1. OPNSense Installation
In this chapter we will discuss how you get OPNsense up and running on a bare metal instance. It is fairly easy and straightforward if you just follow the steps.
- 1. Flash USB drive with Ventoy
- 2. Installation
- 3. Initial Local Configuration
- 4. Initial System Settings
1. Flash USB drive with Ventoy
Now, the first thing we will take a look at before installing any OS on bare metal is the program called Ventoy. Now, why is this program important ? Well for any operating system install you will need a USB stick on which the OS lives that can then be transfered to your laptop/pc/server etcetera. Now, before Ventoy this meant that for each OS you needed a seperate USB drive or you needed to delete the OS that was on the USB stick and then install the new one. Well with Ventoy no more ! Ventoy allows you to install multiple OS's just on one USB stick. In this way you can always carry around all the OS's your USB stick has capacity for. The installation of Ventoy can be done via either Windows, Mac or Linux. Since, we are focused on open source we will demonstrate here how to do it on a linux system, but on the other operating systems it is sort of similar.
- First go to ventoy.net
- Click on Downloads
- Select your operating system
- You are then brought to a SOURCEFORGE Page where you can download the ventoy iso
- We then want to choose the .tar.gz version
- I would then recommend to save the ventoy .tar.gz under an ISO folder where you will also keep all your other ISO's in the future. All of these ISO's can always be found online but if you are in some situation with a slow or no internet connection then it is handy to have already saved them.
- What's next is unzip the file -> then click on anything that ends with x86_64. This will start the GUI to install ventory on your USB stick
- Select the richt USB stick
- Hit Install
- After installing you should remove the USB stick and plug it back in for your computer to recognize it
- After that you can simply drag and drop iso files into the Ventoy USB stick.
- Then once you pop open a new install on a machine you have the option to boot from all the ISO images you have stored on it.
2. Installation
3. Initial Local Configuration
Alright! So you have installed OPNSense on your machine of choice and now you want to configure it for its basic settings. At this moment no WAN is connected yet this will be done in the next chapter. The first thing we want to do is open the OPNSense WebGui in your web browser.
1. Take a laptop and connect an Ethernet cable from your laptop to the port your configured your LAN on.
2. Now, by default OPNSense creates a DCHP server on the LAN network i.e the 192.168.1.1/24 network.
3. Hence, if you plugin your laptop then your laptop should get an IP address on this network e.g 192.168.1.101. This can be confirmed in your network settings. If you don't get an IP address then your LAN port is configured on a different port. Don't worry, just try out all the different ports until you get an IP address. Later in the WebGui we can then adjust the LAN port to your preferred port.
4. So if you have an IP address on your laptop go to http://192.168.1.1 which should open up the OPNSense WebGui
5. Assuming you have not changed the password in your installation process you can login with
username: root
password: opnsense
6. Once logged in you will be prompted with the configuration wizard. You could go through this, but I prefer to abort it and setup everything manually (Especially for static WAN IP addresses, and if ports are not yet correctly configured). In this way you also directly learn where all the options are located. Hence, click on Abort
7. Then the first thing I like to do is to go to Interfaces > Assignments where you can assign the right LAN and WAN port. We will focus first on the LAN port hence you can delete the WAN port for now as we will add it later.
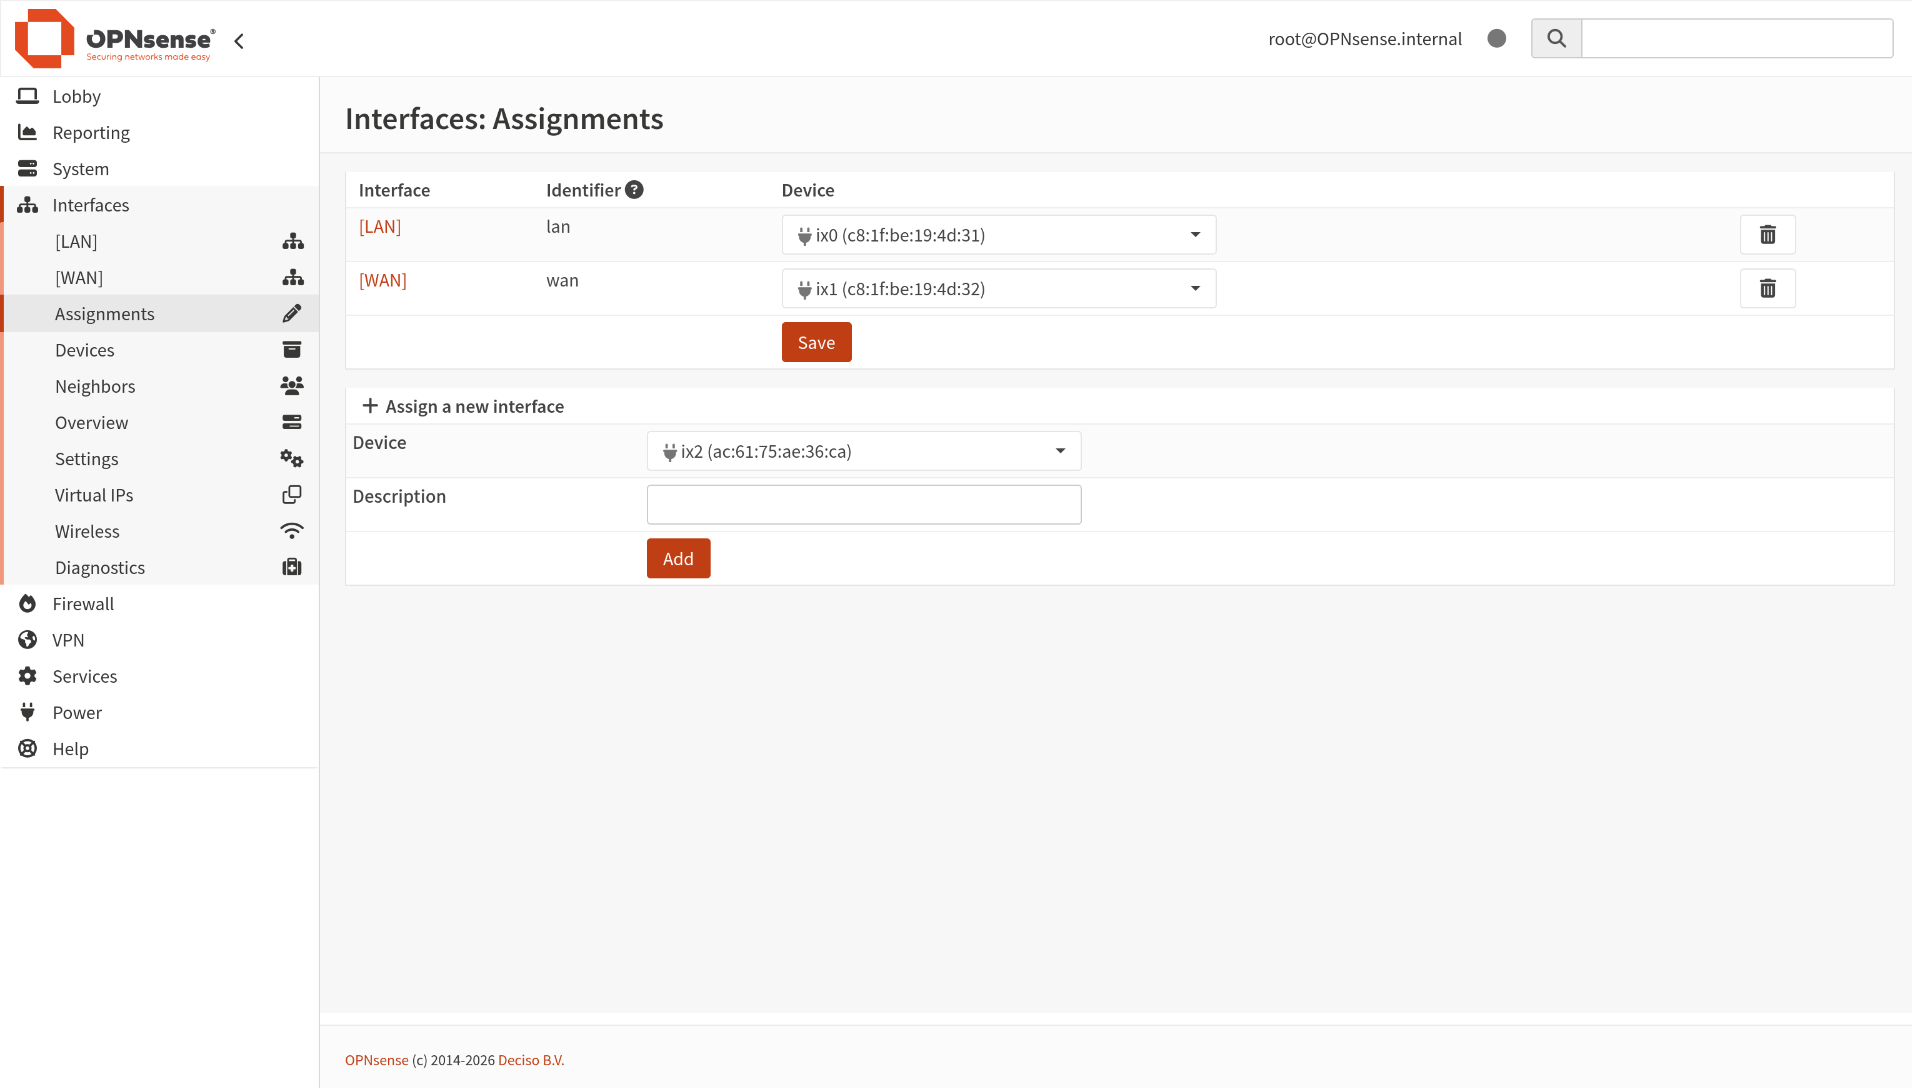
8. Now, if you want to switch your LAN physical port you can do that here by simply clicking on the Device drop down menu behind the LAN connection. Choose the right interface and hit save and apply. If that's done you can then now switch the cable to the right physical port and reconnect to the WebGui.
4. Initial System Settings
Next we will have a look at the system settings of your OPNSense box and configure it to your local needs ;).
1. Go to System > Settings > General
2. In here we will choose a hostname and a domain name. You can call your OPNSense router whatever you want but I like to call it CR1 for core router 1 and the domain name I would choose something related to the location your OPNSense router is running.
3. Set your time zone, language and theme. One of the themes I personally like is the cicada theme, but it is up to you of course.
4. Then if you have a nice picture of your whole setup then you can also add it here, which then later can be added to your home screen.
5. Then the DNS information you can leave blank for now
6. Finally, make sure the following are unchecked
- Allow DNS server list to be overridden by DHCP/PPP on WAN
- Do not use the local DNS service as a nameserver for this system
- Allow default gateway switching
7. That's it for now, but we will come back to this later ;)