1.6 Shapps
A list of installation instructions, tips, gotchas and tricks for all my self hosted applications (Shapps) that I run on my home lab.
Source_1: https://techhut.tv/must-have-home-server-services-2025#hoarder
- Introduction
- 1.6.1 Docker VM Preperation
- 1.6.1.2 Dockhand
- 1.5.2 Docusaurus
- 1.5.3 InvoiceShelf
- 1.5.4 Nextcloud
- 1.5.5 Seafile
- 1.5.6 Penpot
- 1.5.7 Vaultwarden
- 1.5.8 Jellyfin
- 1.5.9 Emby
- 1.5.10 Karakeep
- 1.5.11 Linkwarden
- 1.5.12 Penpot
- 1.5.13 Nexterm
- 1.5.14 Invoice Ninja
- 1.5.15 Frigate NVR
- 1.5.16 OpenLift
- 1.5.17 Arr Stack
- 01. Architectural Overview
- 03. Mount NFS Share inside Arr VM
- 02. Creating a NFS Share
- 04. Folder Structure
- 05. Creating the Docker Compose file
- 06. qBittorent
- 07. NZBGet
- 08. Radarr
- 09. Sonarr
- 10. Prowlarr
- 11. Profillar
- 12. Seerr
- 13. Bazaarr
- Jellyfin Clients
- 14. Jellyfin Themes
- 15. Jellyfin Plugins
- 16. Jellyfin Enhanced
- 1.5.18 Cal.com
- 1.5.19 Kurier
- 1.5.20 ArchiveTune Music
- 1.5.21 OpenCut
- 1.5.22 Sure Finance
- 1.5.23 Open Notebook
- 1.5.24 Dawarich
- 1.5.25 Ente Photos
- 1.5.26 Immich
- 30 Journiv
- 31. Tinycld
- 31. Journal/Diary Applications
- 32. Dashboards
- 5. Dashboards
- 6. Collaboration
- 4. LLM Dashboards
- 1. Cloud Storage
- 20. Documentation
- 8. ToDo Software
- Messenger Applications
Introduction
1.6.1 Docker VM Preperation
1.6.1.1 Docker VM Installation
The first VM we will create is the Docker VM. This VM will serve for all our docker compose files and applications that are not mission critical and are light weight applications. What is and what is not mission critical is of course for up to debate ;) Personally I have three dedicated VM's
- One for Ente Photos
- One for my Servarr Stack
- My Docker VM for all my lightweight applications
In this section we will setup a Docker VM in proxmox i.e most likely your first VM. Luckily this will be extremely ease due to Proxmox Helper scripts. Proxmox Helper scripts walks you extremely easy through the whole installation process of any LXC container and also certain VM's. In this case we will make use of it as well to create our Docker VM. Super easy, no configuration necessary from your end. Just hit the following link in your PVE Shell and you can start
bash -c "$(curl -fsSL https://raw.githubusercontent.com/community-scripts/ProxmoxVE/main/vm/docker-vm.sh)"1. Choose Install Docker Vm
2. Choose Advanced Setup
3. Select the newest form of Debian as of writing that is Debian 13
4. Enable Cloud Init: Yes
5. Provision SSH keys for Cloud-Init VM: -> Choose "manual Paste a single public key "
6. Copy paste in your SSH key from the machine you are planning to access the Docker VM from.
7. Set a Docker VM ID: Choose what fits for you. Most often I start with 1001
8. Choose type: q35
9. Choose the amount of Storage: I would recommend to start with 16G and then you can always add more over time. It is easy to add but hard to remove storage from your VM. Hence, start low and add more if necessary.
10.Disk Cache: None
11. Choose hostname: hostname
12. Choose CPU model: host
13. Allocate CPU cores: Start with 4 and you can always add more if necessary
14. RAM: start with 4096
15. Interface: Choose the interface on which the VLAN sits that you want to use for your docker VM.
16. Set a MAC address: Leave as is
17. Set VLAN: The VLAN you want to host the docker VM on.
18. Finally choose the storage pool: Recommended on your VM mirrored SSD ZFS pool if you have that configured
1.6.1.2 Dockge Introduction
As we will see we can either be in the terminal all the time editing docker compose files for our applications or we can attach a GUI to it.
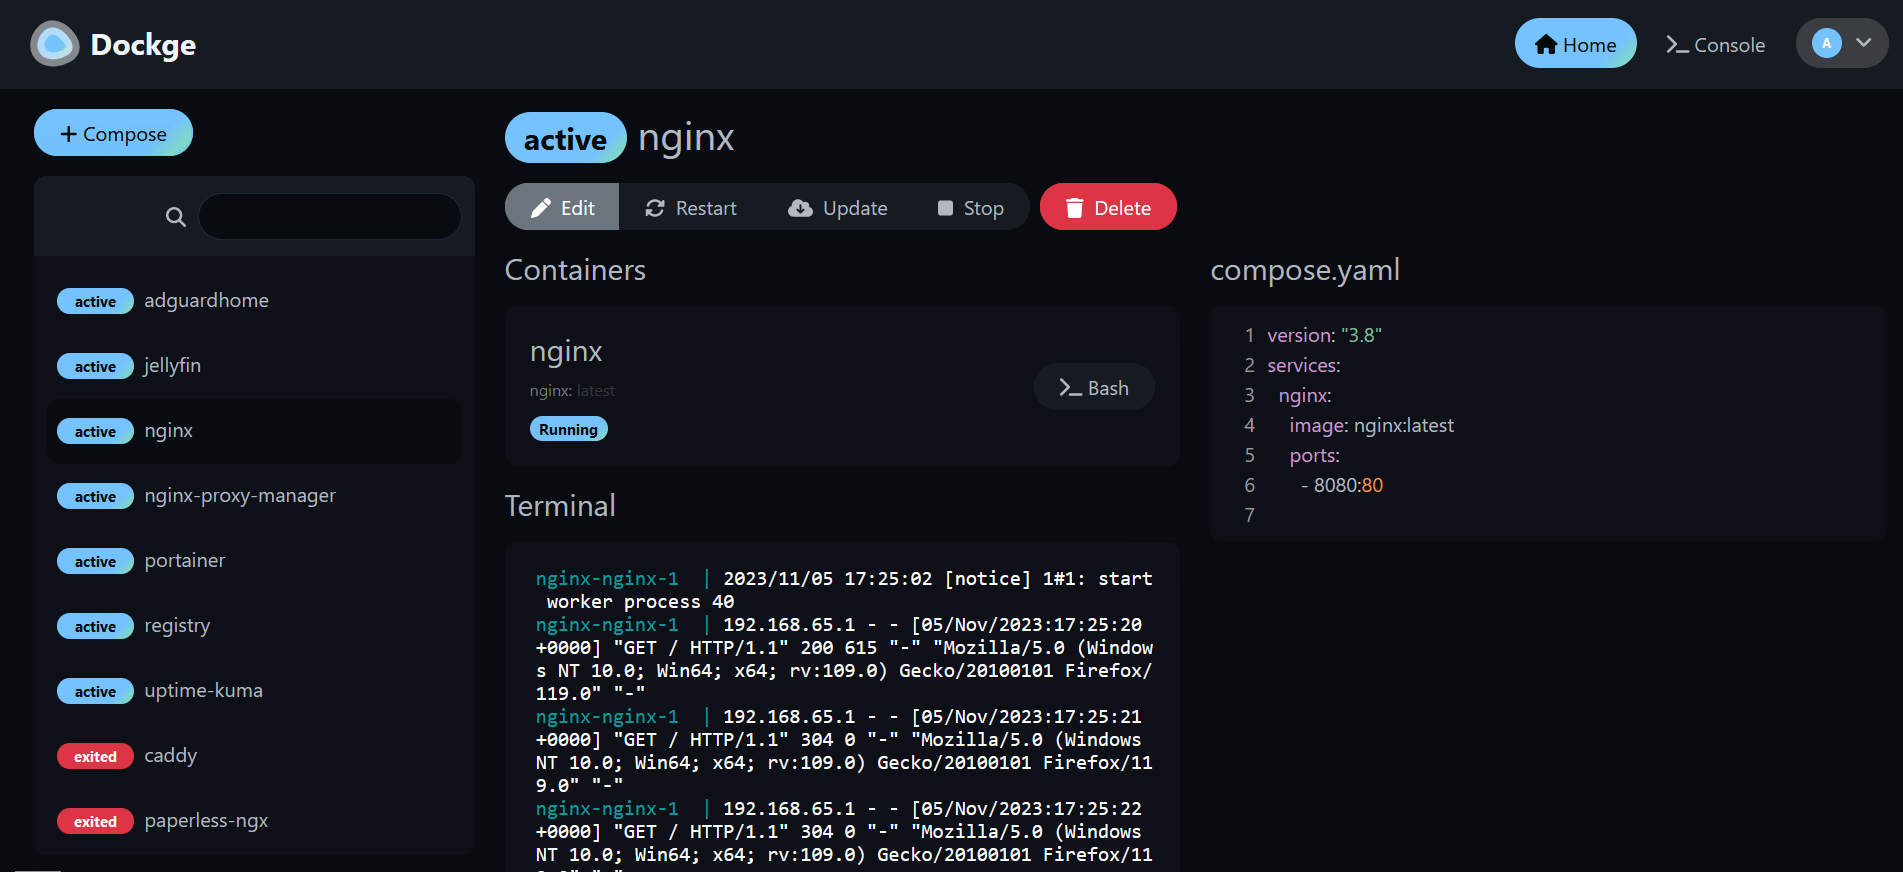
So yeahh that is basically what Dockge is including many other features such as
- 🧑💼 Manage your
compose.yamlfiles- Create/Edit/Start/Stop/Restart/Delete
- Update Docker Images
- ⌨️ Interactive Editor for
compose.yaml - 🦦 Interactive Web Terminal
- 🕷️ (1.4.0 🆕) Multiple agents support - You can manage multiple stacks from different Docker hosts in one single interface
- 🏪 Convert
docker run ...commands intocompose.yaml - 📙 File based structure - Dockge won't kidnap your compose files, they are stored on your drive as usual. You can interact with them using normal
docker composecommands - 🚄 Reactive - Everything is just responsive. Progress (Pull/Up/Down) and terminal output are in real-time
- 🐣 Easy-to-use & fancy UI - If you love Uptime Kuma's UI/UX, you will love this one too
So in this Book we will also make sure to use Dockge for all our installations. It is for sure not necessary but it is so easy and comfortable. In the next page we will do the installation.
1.6.1.3 Dockge Installation
Assuming you already have installed your Docker VM it is time to install Dockge on top of it to handle all your docker compose files ;)
1. Go to the official dockge page and basically copy the docker compose file that looks like this
services:
  dockge:
    image: louislam/dockge:1
    restart: unless-stopped
    ports:
      - 5001:5001
    volumes:
      - /var/run/docker.sock:/var/run/docker.sock
      - ./data:/app/data
      # Stacks Directory
      # ⚠️ READ IT CAREFULLY. If you did it wrong, your data could end up writing into a WRONG PATH.
      # ⚠️ 1. FULL path only. No relative path (MUST)
      # ⚠️ 2. Left Stacks Path === Right Stacks Path (MUST)
      - /opt/stacks:/opt/stacks
    environment:
      # Tell Dockge where to find the stacks
      - DOCKGE_STACKS_DIR=/opt/stacks
      # This is great for entering the Docker VM console from the WebGUI
      - DOCKGE_ENABLE_CONSOLE=true
2. Then open your terminal with your access machine and SSH into it. You added the SSH key of your machine in the Cloud Init section so you should be entering without any interruptions. Simply use
ssh username@IP-Address-Docker-VM
3. Once inside we will create a new dockge folder with
mkdir docgke4. Then we will enter the folder with
cd dockge5. Inside this folder we will create the docker compose file by copying and pasting in the docker compose content from above
nano compose.yml6. Then save it with
CTRL X and hit Y
7. Then we will start the dockge container with
docker compose up -d8. If everything is green and alright we should be able to access the WebGui at
IP-Address-DockerVM:5001
9. Then create an account with a username and password. Now, normally I would say you would save the credentials in your Bitwarden account but we have not yet setup that container. However, choose a non typical username and a password of 20 characters and copy paste it somewhere safe s.t you can find it. After we have created a vaultwarden container you will be able to copy paste it inside of it with all your other future credentials.
1.6.1.2 Dockhand
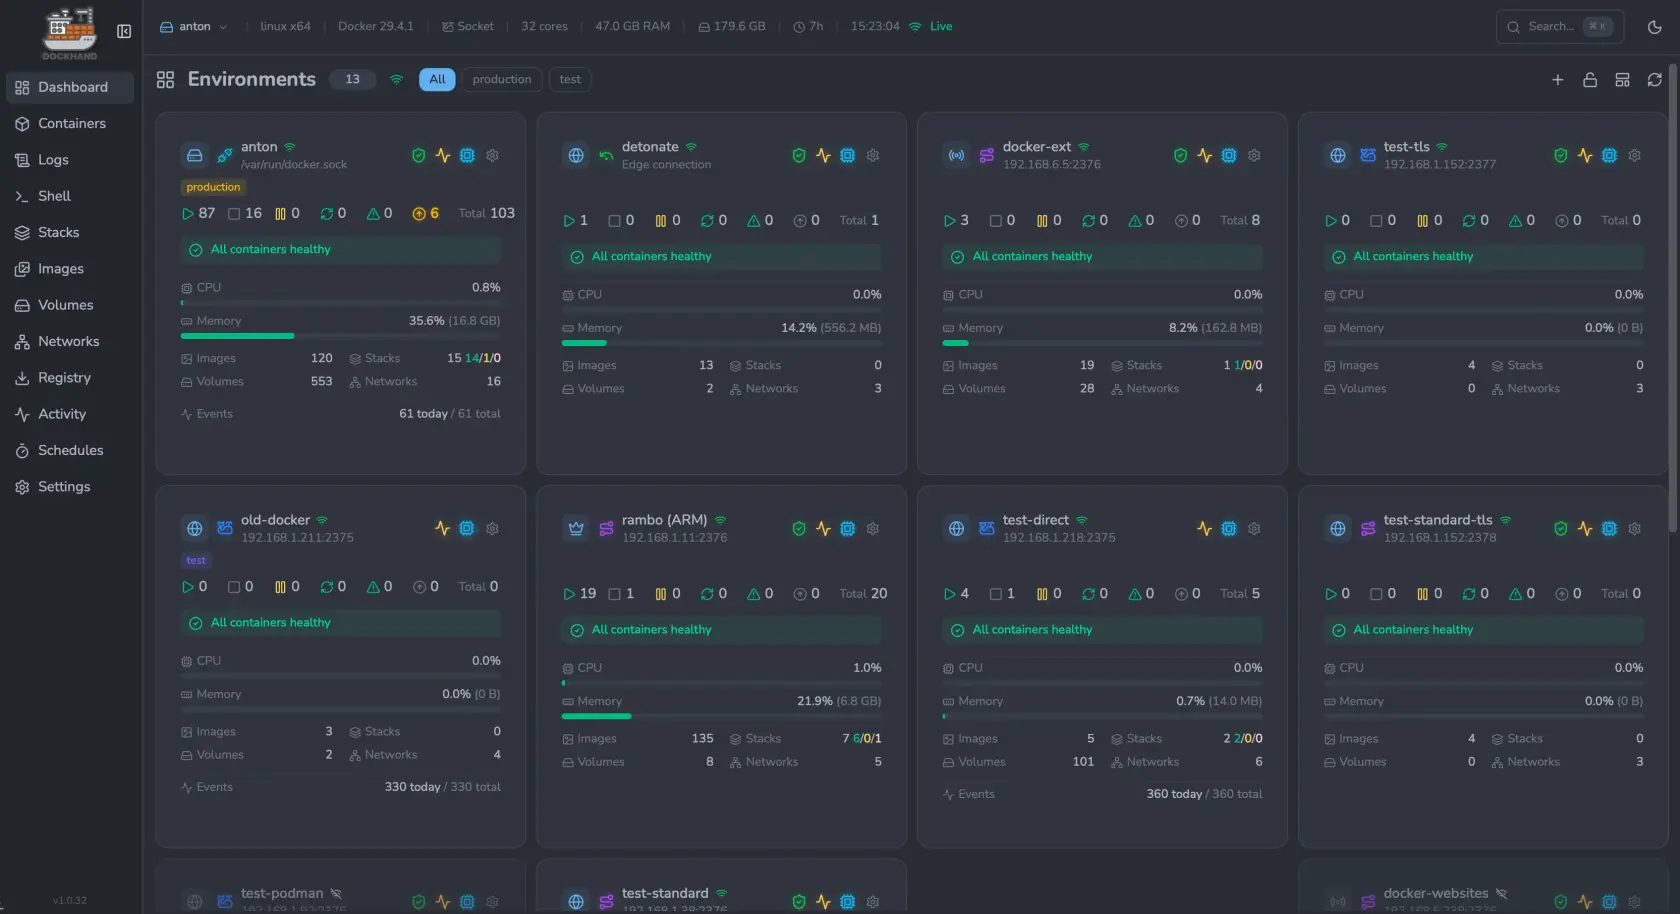
Note! At this moment you can manage remote machines via one central Dockhand instance. However, the compose files live on the Dockhand instance instead of the remote machine. This means if the central Dockhand instance would go down you would also loose the compose files on your remote machine. This ain't great and hence I prefer to have a Dockhand instance on each machine until this problem is solved.
Our Stack will be using docker compose files for all its applications in this docker VM. Now, without any GUI tools this would mean that we need to edit, stop, start, and configure all applications through the terminal. Now, this is great for learning purposes and gets you to the real docker commands. However, after understanding that you can make your life easier by using a GUI that does all the docker commands in the background. Now, there are many solutions for this such as Portainer, Dockge, and others. However, the most recent kid on the block is Dockhand. The amazing thing about this solutions is that it allows you to monitor your docker containers, send you alerts if something is up and send you alerts when new updates for containers are available. That last one is huge!!! It is so important to keep your containers up to date and have someone looking out for your when a new update is available is such a game changer. Instead of manually checking every week for new updates (which I always forget) it is just great that you get an email in your inbox with updates if they are available. Next to this a summary of Dockhead capabilities is.
- Container Management: Start, stop, restart, and monitor containers in real-time
- Compose Stacks: Visual editor for Docker Compose deployments
- Git Integration: Deploy stacks from Git repositories with webhooks and auto-sync
- Multi-Environment: Manage local and remote Docker hosts
- Terminal & Logs: Interactive shell access and real-time log streaming
- File Browser: Browse, upload, and download files from containers
- Authentication: SSO via OIDC, local users, and optional RBAC (Enterprise)
Installation
The installation of Dockhand is fairly straightforward, the only thing you should think about is where you would like to save most of your docker compose files. This could be for instance just in /home/user/dockhand/ and you could also give it access to multiple locations inside of your VM. Personally I save everything underneath /opt/stacks simply because I am used to that due to Dockge that I was mainly using before Dockhand. If that's figured out you can find the docker compose on their website here.
1. Create the Dockhand directory with
mkdir -p /opt/stacks/dockhand2. Then go inside the directory and create the following docker compose file with nano compose.yaml and copy paste the following
compose.yaml
services:
  postgres:
    image: postgres:16-alpine
    restart: unless-stopped
    environment:
      POSTGRES_USER: dockhand
      POSTGRES_PASSWORD: changeme
      POSTGRES_DB: dockhand
    volumes:
      - ./postgres_data:/var/lib/postgresql/data

  dockhand:
    image: fnsys/dockhand:latest
    ports:
      - 3000:3000
    environment:
      DATABASE_URL: postgres://dockhand:changeme@postgres:5432/dockhand
    volumes:
      - /var/run/docker.sock:/var/run/docker.sock
      - ./dockhand_data:/app/data
      - /opt/stacks:/opt/stacks # Directory in which you plan to host docker compose files
    depends_on:
      - postgres
    restart: unless-stopped
3. Sweet then what is left is
docker compose up -d4. You can then reach your Dockhand instance on http://IP-Docker-VM:3000 or the port you specified for your instance.
Dockhand Configuration
1. The first thing to do when everything is up and running is creating an account for obvious security purposes
2. Simply go to Settings > Authentication > Users > + Add User
3. Create a user and make sure that you check that the Authentication toggle is turned ON
Remote Machines
As stated in the warning above, today it is still recommended to
Not all your docker containers will necessarily run on the same virtual machine. However, that would also mean that you need to setup Dockhand on all these VM's. Luckily this is not necessary and you can have one glass connecting to all your docker containers on multiple VM's.
https://github.com/Finsys/hawser
1.5.2 Docusaurus
1.5.3 InvoiceShelf
1.5.2.1 Installation
Links
We will install Invoiceshelf as a docker compose file but it can also be installed as proxmox LXC container. At the time of writing invoiceshelf is still in heavy development and the full functionality is not added yet. However, I try to keep it as up to date as possible ;)
1. Create a folder called invoiceshelf with
mkdir invoiceshelf2. Then the first thing we need to do is get the docker compose files by using the following commands according to the documentation page
git clone https://github.com/InvoiceShelf/docker2. This will download a collection of docker compose files and some other files. Now you can choose 3 different databases and I chose for postgresql for no particular reason
3. In my case I like to deploy my docker compose files with Dockge and hence I will copy the contents of the docker-compose.pgsql.yml file and paste it into my dockge dashboard for a new container. However, you can also grab the file rename it to compose.yml and then save it in your preferred location.
4. Next up is the docker compose file. What is important to change here are 4 things out of which three are already obvious the mysql database, user and password fields. This is clearly added as a note in the compose file
5. Next to that you need to have a public domain name s.t customers can actually access your invoice platform and pay their bills. This domain name needs to be added 3 times at the following places
- APP_URL=https://invoice.example.com
- SESSION_DOMAIN=invoice.example.com
- SANCTUM_STATEFUL_DOMAINS=invoice.example.com
6. Finally we will add mail to it as well with the following environment variables
- MAIL_DRIVER=SMTP
- MAIL_HOST=smtp.example.com
- MAIL_PORT=587
- MAIL_USERNAME=email@email.org
- MAIL_PASSWORD=emailpassword
- MAIL_ENCRYPTION=starttls
7. Finally, you can decide if you keep docker volumes or mounts. I did not get it to work with mounts and hence I stayed with volumes. Since, the data quantity is pretty low it did not really matter anyways since we are not attaching an nfs share or something to it.
8. Then it is ready to sping up the docker compose file
9. The installation wizard is pretty simple however you need to make sure you get one thing right at the SITE URL & DATABASE section. When it asks for the DATABASE HOST. In this case you need to fill in the name you gave the database container. If you have not changed anything this will be invoiceshelf-pgsql.
10. Finally, also make sure you provide the right details for your email address. This will be important since from that email emails will be send to customers.
#-------------------------------------------
# InvoiceShelf PostgresSQL docker-compose variant
# Repo : https://github.com/InvoiceShelf/docker
#-------------------------------------------

services:
  database:
    container_name: invoiceshelf-pgsql
    image: postgres:15
    environment:
      - POSTGRES_PASSWORD=sdfij2309rrjlkkfj0ejfsjdflkjsdfojwefkjHD # ⚠️ Change DB password before proceeding
      - POSTGRES_USER=invoiceshelf # ⚠️ Change DB username before proceeding
      - POSTGRES_DB=invoiceshelf # 🚨 Change DB name before proceeding
    volumes:
      - invoiceshelf_postgres:/var/lib/postgresql/data
    networks:
      - invoiceshelf
    restart: unless-stopped
  webapp:
    image: invoiceshelf/invoiceshelf:nightly
    container_name: invoiceshelf-variant-pgsql
    environment:
      - APP_NAME=InvoiceShelf
      - APP_ENV=production
      - APP_DEBUG=false
      # APP_URL should have:
      # 1. Protocol http or https if you are accessing it via reverse proxy with
      #    SSL, then it will be https, if via local IP, then http.
      # 2. IP address of the server or the domain name
      # 3. (optional) If you are using a custom port such as :8080 or another.
      # REF: https://github.com/InvoiceShelf/InvoiceShelf/issues/213#issuecomment-3026790543

      - APP_URL=https://invoice.rfeyn.org
      # SESSION_DOMAIN should have:
      # 1. IP address of the server or the domain name
      # 2. (optional) If you are using a custom port such as :8080 or another.
      # REF: https://github.com/InvoiceShelf/InvoiceShelf/issues/213#issuecomment-3026790543
      - SESSION_DOMAIN=invoice.rfeyn.org
      # SANCTUM_STATEFUL_DOMAINS should have:
      # 1. IP address of the server or the domain name
      #    1.1 (optional) If you are using a custom port such as :8080 or another.
      # 2. (optional) If you are planning to access the application from different
      #    domains, you must add a comma between each domain
      # REF: https://github.com/InvoiceShelf/InvoiceShelf/issues/213#issuecomment-3026790543
      - SANCTUM_STATEFUL_DOMAINS=invoice.rfeyn.org
      - DB_CONNECTION=pgsql
      - DB_HOST=database
      - DB_PORT=5432
      - DB_DATABASE=invoiceshelf # ⚠️ Change DB name before proceeding
      - DB_USERNAME=invoiceshelf # ⚠️ Change DB username before proceeding
      - DB_PASSWORD=sdfij2309rrjlkkfj0ejfsjdflkjsdfojwefkjHD # ⚠️ Change DB password before proceeding
      - DB_PASSWORD_FILE=
      - CACHE_STORE=file
      - SESSION_DRIVER=file
      - SESSION_LIFETIME=240
      - AUTORUN_ENABLED=true
      - AUTORUN_LARAVEL_MIGRATION=false
      - AUTORUN_LARAVEL_OPTIMIZE=false
      - PHP_OPCACHE_ENABLE=1
      - MAIL_DRIVER=SMTP
      - MAIL_HOST=smtp.porkbun.com
      - MAIL_PORT=587
      - MAIL_USERNAME=dp@p2pnode.org
      - MAIL_PASSWORD=PuV9#@pUca49C70e2V46&keg
      - MAIL_ENCRYPTION=starttls
    volumes:
      - invoiceshelf_storage:/var/www/html/storage/
      - invoiceshelf_modules:/var/www/html/Modules/
    ports:
      - 8090:8080 # 8090 is the public port.
    networks:
      - invoiceshelf
    restart: unless-stopped
    depends_on:
      - database
networks:
  invoiceshelf: null
volumes:
  invoiceshelf_postgres: null
  invoiceshelf_storage: null
  invoiceshelf_modules: null

1.5.2.3 Email Templates
Nederlands
Factuur
Beste {BILLING_ADDRESS_NAME},
-
Er staat een factuur voor u klaar van 🐶 {COMPANY_NAME} voor het uitvoeren van horeca werkzaamheden.
-
Vind de factuur als PDF bestand in onderstaande link
-
Mochten er vragen zijn, twijfel dan niet en bericht me meteen 😉
-
Uiterste betaal datum {INVOICE_DUE_DATE} 💰
-
Ontvang een betalings bevestiging 📬
-
🟥iDeal -> {CUSTOM_INVOICE_BETAALLINK}
Met vriendelijke groet,
DPlancer
Dennis Paassen
KVK: {CUSTOM_INVOICE_KVK}
Betaling
🚀💪Wohoooo!! Bedankt voor je betaling!!
U kunt uw betalings bevestiging vinden door op onderstaande knop te drukken
Met vriendelijke groet,
Dennis Paassen
🐶DPlancer
English
Invoice
Dear {BILLING_ADDRESS_NAME}
-
An invoice from 🐶 {COMPANY_NAME} is ready for you for hospitality services
-
Find the invoice as a PDF file in the link below
-
If you have any questions, please don't hesitate to contact me 😉
-
Invoice due date {INVOICE_DUE_DATE} 💰
-
You will receive a payment confirmation 📬
-
🟥iDeal -> {CUSTOM_INVOICE_BETAALLINK}
Kind regards,
DPlancer
Dennis Paassen
KVK: {CUSTOM_INVOICE_KVK}
Payment
🚀💪Wohoooo!! Thanks for your payment
You can find your payment confirmation by clicking on the lick below
Kind regards,
Dennis Paassen
🐶DPlancer
01. Installation
services:
  app:
    build:
      context: .
    image: invoiceninja/invoiceninja-debian:latest
    restart: unless-stopped
    env_file:
      - ./.env
    volumes:
      - ./app_public:/var/www/html/public
      - ./app_storage:/var/www/html/storage
    depends_on:
      mysql:
        condition: service_healthy
      redis:
        condition: service_healthy
  nginx:
    image: nginx:alpine
    restart: unless-stopped
    ports:
      - 8333:80
      - 6443:443
    volumes:
      - ./nginx:/etc/nginx/conf.d:ro
      - ./app_public:/var/www/html/public:ro
      - ./app_storage:/var/www/html/storage:ro
    depends_on:
      app:
        condition: service_healthy
  mysql:
    image: mysql:8
    restart: unless-stopped
    environment:
      MYSQL_DATABASE: ${DB_DATABASE}
      MYSQL_USER: ${DB_USERNAME}
      MYSQL_PASSWORD: ${DB_PASSWORD}
      MYSQL_ROOT_PASSWORD: ${DB_ROOT_PASSWORD}
    volumes:
      - ./mysql_data:/var/lib/mysql
    healthcheck:
      test:
        - CMD
        - mysqladmin
        - ping
        - -h
        - localhost
        - -u${MYSQL_USER}
        - -p${MYSQL_PASSWORD}
  redis:
    image: redis:alpine
    restart: unless-stopped
    volumes:
      - ./redis_data:/data
    healthcheck:
      test:
        - CMD
        - redis-cli
        - ping
networks: {}
# IN application vars
APP_URL=https://invoice.rfeyn.org
APP_KEY=base64:oUr5FRUWNrM42GeyksHF33ntNtlh29KW5vg2J2brnJ4=
APP_ENV=production
APP_DEBUG=true
REQUIRE_HTTPS=false
PHANTOMJS_PDF_GENERATION=true
PDF_GENERATOR=snappdf
TRUSTED_PROXIES='*'


CACHE_DRIVER=redis
QUEUE_CONNECTION=redis
SESSION_DRIVER=redis

REDIS_HOST=redis
REDIS_PASSWORD=null
REDIS_PORT=6379

FILESYSTEM_DISK=debian_docker

# DB connection
DB_HOST=mysql
DB_PORT=3306
DB_DATABASE=ninjadplancer
DB_USERNAME=ninja
DB_PASSWORD=sf9823fsjlfkjwioefjlskfh0923jfklsdjf
DB_ROOT_PASSWORD=sdpoifj293fj09030rjnsnedfo3498t
DB_CONNECTION=mysql

# Create initial user
# Default to these values if empty
IN_USER_EMAIL=dp@p2pnode.org
IN_PASSWORD=nvQi5W14blOnpv
# IN_USER_EMAIL=
# IN_PASSWORD=

# Mail options
MAIL_MAILER=log
MAIL_HOST=smtp.porkbun.com
MAIL_PORT=587
MAIL_USERNAME=dp@p2pnode.org
MAIL_PASSWORD=PuV9#@pUca49C70e2V46&keg
MAIL_ENCRYPTION=tls
MAIL_FROM_ADDRESS='dp@p2pnode.org'
MAIL_FROM_NAME="DPLancer Invoices"

# MySQL
MYSQL_ROOT_PASSWORD=sdpoifj293fj09030rjnsnedfo3498t
MYSQL_USER=ninja
MYSQL_PASSWORD=sf9823fsjlfkjwioefjlskfh0923jfklsdjf
MYSQL_DATABASE=ninjadplancer

# GoCardless/Nordigen API key for banking integration
NORDIGEN_SECRET_ID=
NORDIGEN_SECRET_KEY=

IS_DOCKER=true
SCOUT_DRIVER=null
#SNAPPDF_CHROMIUM_PATH=/usr/bin/google-chrome-stable
1.5.4 Nextcloud
1. Installation
Now, you can install nextcloud on the same docker VM that you install all other applications on as well. However, I personally have a dedicated VM for nextcloud since it is quite a heavy piece of software and if something goes wrong with nextcloud that affects the VM then it will not affect the other applications. Hence, what I first do is create again another Docker VM with the Docker VM Proxmox Helper Script. If you choose to host it on the same VM with Dockhand then you can also do this of course
ludicrous exemption constant humility trapper hardening deviancy ferocity
passphrase
ludicrous exemption constant humility trapper hardening deviancy ferocity
10.69.1.107:11000
The permissions should be
Permissions for NFS share
Right now I have 1000:1000 for and read and write permissions for everyone. Hence, that 30:00 works. But we need to figure this out for later to set the right permissions in TrueNas.
2026-07-08T22:31:45.606690513Z The www-data user does not appear to have access rights to the data directory.
2026-07-08T22:31:45.606704904Z It is possible that the files are on a filesystem that does not support standard Linux permissions,
2026-07-08T22:31:45.606720217Z or the permissions simply need to be adjusted. Please change the permissions as described below.
2026-07-08T22:31:45.606723395Z Current permissions are:
2026-07-08T22:31:45.609071140Z 1000:1000 770
2026-07-08T22:31:45.609597690Z (userID:groupID permissions)
2026-07-08T22:31:45.609623100Z They should be:
2026-07-08T22:31:45.609626113Z 33:0 750
2026-07-08T22:31:45.609628621Z (userID:groupID permissions)
2026-07-08T22:31:45.609630879Z Also, ensure that all parent directories on the host of your chosen data directory are publicly readable.
4. Restore From Internal Nextcloud Backup
Now, this is not necessary if you have a VM backup of your Nextcloud instance including its storage. However, if this is not the case, or you crashed your VM for whatever reason and have no backup then your can create a new nextcloud instance and import the files from a backup you must have created previously
1.5.5 Seafile
File Server which is dedicated for serving files! It works great for fast file synchronization due to block storage instead of file storage on Nextcloud. It is not bloated with things you don't need as it is on Nextcloud
1. Installation Seafile 13
We will install Seafile again in our docker vm by using Dockhand. For that we need to make sure that we have a place for all the data, which in our case will be an NFS share hosted on our TrueNas VM. Then the next step is of course to look up the docker compose file and deploy it to our needs. The docker compose file can be obtained by downloading it to your machine via Seafile 13. People are working on seafile 14 as we speak. So this documentation might be outdated again on the moment you are reading this. Just make sure you check the general website for the latest edition. So this one right now is focused on Seafile 13. Once 14 will be available we will update the instructions below.
Now! at this moment I don't have a running seafile 13 yet! So I still need to work on this as a project in the future. What I do realize is that you need to have root running for the storage folder. You can also do this without root but also I don't know yet how to do that. For now make sure your TrueNas NFS share has root as the owner.
- Make sure you have compose.yml
- Also you need to run seadoc if you want to have the wiki function. Make sure you copy paste the values from the seafile mysql database
- Create an .env file that serves compose.yml and the seadoc file
compose.yml
services:
  db:
    image: ${SEAFILE_DB_IMAGE:-mariadb:10.11}
    container_name: seafile-mysql
    restart: unless-stopped
    environment:
      - MYSQL_ROOT_PASSWORD=${INIT_SEAFILE_MYSQL_ROOT_PASSWORD:-}
      - MYSQL_LOG_CONSOLE=true
      - MARIADB_AUTO_UPGRADE=1
    volumes:
      - "${SEAFILE_MYSQL_VOLUME:-/opt/seafile-mysql/db}:/var/lib/mysql"
    networks:
      - seafile-net
    healthcheck:
      test:
        [
          "CMD",
          "/usr/local/bin/healthcheck.sh",
          "--connect",
          "--mariadbupgrade",
          "--innodb_initialized",
        ]
      interval: 20s
      start_period: 30s
      timeout: 5s
      retries: 10

  redis:
    image: ${SEAFILE_REDIS_IMAGE:-redis}
    container_name: seafile-redis
    restart: unless-stopped
    command:
      - /bin/sh
      - -c
      - redis-server --requirepass "$$REDIS_PASSWORD"
    environment:
      - REDIS_PASSWORD=${REDIS_PASSWORD:-}
    networks:
      - seafile-net

  seafile:
    image: ${SEAFILE_IMAGE:-seafileltd/seafile-mc:13.0-latest}
    container_name: seafile
    restart: unless-stopped
    # ports:
    #   - "80:80"
    volumes:
      - ${SEAFILE_VOLUME:-/opt/seafile-data}:/shared
    environment:
      - SEAFILE_MYSQL_DB_HOST=${SEAFILE_MYSQL_DB_HOST:-db}
      - SEAFILE_MYSQL_DB_PORT=${SEAFILE_MYSQL_DB_PORT:-3306}
      - SEAFILE_MYSQL_DB_USER=${SEAFILE_MYSQL_DB_USER:-seafile}
      - SEAFILE_MYSQL_DB_PASSWORD=${SEAFILE_MYSQL_DB_PASSWORD:?Variable is not set or empty}
      - INIT_SEAFILE_MYSQL_ROOT_PASSWORD=${INIT_SEAFILE_MYSQL_ROOT_PASSWORD:-}
      - SEAFILE_MYSQL_DB_CCNET_DB_NAME=${SEAFILE_MYSQL_DB_CCNET_DB_NAME:-ccnet_db}
      - SEAFILE_MYSQL_DB_SEAFILE_DB_NAME=${SEAFILE_MYSQL_DB_SEAFILE_DB_NAME:-seafile_db}
      - SEAFILE_MYSQL_DB_SEAHUB_DB_NAME=${SEAFILE_MYSQL_DB_SEAHUB_DB_NAME:-seahub_db}
      - TIME_ZONE=${TIME_ZONE:-Etc/UTC}
      - INIT_SEAFILE_ADMIN_EMAIL=${INIT_SEAFILE_ADMIN_EMAIL:-me@example.com}
      - INIT_SEAFILE_ADMIN_PASSWORD=${INIT_SEAFILE_ADMIN_PASSWORD:-asecret}
      - SEAFILE_SERVER_HOSTNAME=${SEAFILE_SERVER_HOSTNAME:?Variable is not set or empty}
      - SEAFILE_SERVER_PROTOCOL=${SEAFILE_SERVER_PROTOCOL:-http}
      - SITE_ROOT=${SITE_ROOT:-/}
      - NON_ROOT=${NON_ROOT:-false}
      - JWT_PRIVATE_KEY=${JWT_PRIVATE_KEY:?Variable is not set or empty}
      - SEAFILE_LOG_TO_STDOUT=${SEAFILE_LOG_TO_STDOUT:-false}
      - ENABLE_GO_FILESERVER=${ENABLE_GO_FILESERVER:-true}
      - ENABLE_SEADOC=${ENABLE_SEADOC:-true}
      - SEADOC_SERVER_URL=${SEAFILE_SERVER_PROTOCOL:-http}://${SEAFILE_SERVER_HOSTNAME:?Variable is not set or empty}/sdoc-server
      - CACHE_PROVIDER=${CACHE_PROVIDER:-redis}
      - REDIS_HOST=${REDIS_HOST:-redis}
      - REDIS_PORT=${REDIS_PORT:-6379}
      - REDIS_PASSWORD=${REDIS_PASSWORD:-}
      - MEMCACHED_HOST=${MEMCACHED_HOST:-memcached}
      - MEMCACHED_PORT=${MEMCACHED_PORT:-11211}
      - ENABLE_NOTIFICATION_SERVER=${ENABLE_NOTIFICATION_SERVER:-false}
      - INNER_NOTIFICATION_SERVER_URL=${INNER_NOTIFICATION_SERVER_URL:-http://notification-server:8083}
      - NOTIFICATION_SERVER_URL=${NOTIFICATION_SERVER_URL:-${SEAFILE_SERVER_PROTOCOL:-http}://${SEAFILE_SERVER_HOSTNAME:?Variable is not set or empty}/notification}
      - ENABLE_SEAFILE_AI=${ENABLE_SEAFILE_AI:-false}
      - ENABLE_FACE_RECOGNITION=${ENABLE_FACE_RECOGNITION:-false}
      - SEAFILE_AI_SERVER_URL=${SEAFILE_AI_SERVER_URL:-http://seafile-ai:8888}
      - SEAFILE_AI_SECRET_KEY=${JWT_PRIVATE_KEY:?Variable is not set or empty}
      - MD_FILE_COUNT_LIMIT=${MD_FILE_COUNT_LIMIT:-100000}
    labels:
      caddy: ${SEAFILE_SERVER_PROTOCOL:-http}://${SEAFILE_SERVER_HOSTNAME:?Variable is not set or empty}
      caddy.reverse_proxy: "{{upstreams 80}}"
    healthcheck:
      test: ["CMD-SHELL", "curl -f http://localhost:80 || exit 1"]
      interval: 30s
      timeout: 10s
      retries: 3
      start_period: 10s
    depends_on:
      db:
        condition: service_healthy
      redis:
        condition: service_started
    networks:
      - seafile-net

networks:
  seafile-net:
    name: seafile-net
.env
#################################
# Docker compose configurations #
#################################
COMPOSE_FILE='seafile-server.yml,caddy.yml,seadoc.yml'
COMPOSE_PATH_SEPARATOR=','

## Images
SEAFILE_IMAGE=seafileltd/seafile-mc:13.0-latest
SEAFILE_DB_IMAGE=mariadb:10.11
SEAFILE_REDIS_IMAGE=redis
SEAFILE_CADDY_IMAGE=lucaslorentz/caddy-docker-proxy:2.12-alpine
SEADOC_IMAGE=seafileltd/sdoc-server:2.0-latest
NOTIFICATION_SERVER_IMAGE=seafileltd/notification-server:13.0-latest
MD_IMAGE=seafileltd/seafile-md-server:13.0-latest

## Persistent Storage
BASIC_STORAGE_PATH=/opt
SEAFILE_VOLUME=$BASIC_STORAGE_PATH/seafile-data
SEAFILE_MYSQL_VOLUME=$BASIC_STORAGE_PATH/seafile-mysql/db
SEAFILE_CADDY_VOLUME=$BASIC_STORAGE_PATH/seafile-caddy
SEADOC_VOLUME=$BASIC_STORAGE_PATH/seadoc-data

#################################
#      Startup parameters       #
#################################
SEAFILE_SERVER_HOSTNAME=seafile.example.com
SEAFILE_SERVER_PROTOCOL=http
TIME_ZONE=Etc/UTC
JWT_PRIVATE_KEY=

#####################################
# Third-party service configuration #
#####################################

## Database
SEAFILE_MYSQL_DB_HOST=db
SEAFILE_MYSQL_DB_USER=seafile
SEAFILE_MYSQL_DB_PASSWORD=PASSWORD
SEAFILE_MYSQL_DB_CCNET_DB_NAME=ccnet_db
SEAFILE_MYSQL_DB_SEAFILE_DB_NAME=seafile_db
SEAFILE_MYSQL_DB_SEAHUB_DB_NAME=seahub_db

## Cache
CACHE_PROVIDER=redis # or memcached


### Redis
REDIS_HOST=redis
REDIS_PORT=6379
REDIS_PASSWORD=

### Memcached
MEMCACHED_HOST=memcached
MEMCACHED_PORT=11211

######################################
#        Initial variables           #
# (Only valid in first-time startup) #
######################################

## Database root password, Used to create Seafile users
INIT_SEAFILE_MYSQL_ROOT_PASSWORD=ROOT_PASSWORD

## Seafile admin user
INIT_SEAFILE_ADMIN_EMAIL=me@example.com
INIT_SEAFILE_ADMIN_PASSWORD=asecret

############################################
# Additional configurations for extensions #
############################## Seafile AI
ENABLE_SEAFILE_AI=false
ENABLE_FACE_RECOGNITION=false
SEAFILE_AI_LLM_TYPE=openai
SEAFILE_AI_LLM_URL=
SEAFILE_AI_LLM_KEY= # your llm key
SEAFILE_AI_LLM_MODEL=gpt-4o-mini

## Metadata server
MD_FILE_COUNT_LIMIT=100000
################

## SeaDoc service
ENABLE_SEADOC=true

## Notification
ENABLE_NOTIFICATION_SERVER=false
NOTIFICATION_SERVER_URL=
compose.yml
services:
  db:
    image: mariadb:10.11
    container_name: seafile-db
    environment:
      - MYSQL_ROOT_PASSWORD=${SEAFILE_PASSWORD}
      - MYSQL_LOG_CONSOLE=true
      - MARIADB_AUTO_UPGRADE=1
    volumes:
      - ./mysql:/var/lib/mysql
    restart: unless-stopped
    healthcheck:
      test: ["CMD", "healthcheck.sh", "--connect", "--innodb_initialized"]
      interval: 20s
      start_period: 30s
      timeout: 5s
      retries: 10

  redis:
    image: redis:7
    container_name: seafile-redis
    restart: unless-stopped
    healthcheck:
      test: ["CMD", "redis-cli", "ping"]
      interval: 20s
      timeout: 5s
      retries: 5

  seafile:
    image: seafileltd/seafile-mc:13.0-latest
    container_name: seafile
    ports:
      - "1026:80"
    volumes:
      - /mnt/seafile:/shared
    environment:
      # Core
      - SEAFILE_SERVER_HOSTNAME=${SEAFILE_SERVER_HOSTNAME}
      - SEAFILE_SERVER_PROTOCOL=${SEAFILE_SERVER_PROTOCOL}
      - TIME_ZONE=${TIME_ZONE}
      - JWT_PRIVATE_KEY=${JWT_PRIVATE_KEY}

      # Database
      - DB_HOST=db
      - DB_ROOT_PASSWD=${SEAFILE_PASSWORD}
      - SEAFILE_MYSQL_DB_HOST=db
      - SEAFILE_MYSQL_DB_USER=seafile
      - SEAFILE_MYSQL_DB_PASSWORD=${SEAFILE_PASSWORD}
      - SEAFILE_MYSQL_DB_CCNET_DB_NAME=ccnet_db
      - SEAFILE_MYSQL_DB_SEAFILE_DB_NAME=seafile_db
      - SEAFILE_MYSQL_DB_SEAHUB_DB_NAME=seahub_db

      # Cache
      - CACHE_PROVIDER=redis
      - REDIS_HOST=redis
      - REDIS_PORT=6379

      # First-run admin bootstrap (ignored on subsequent starts)
      - INIT_SEAFILE_ADMIN_EMAIL=${SEAFILE_ADMIN_EMAIL}
      - INIT_SEAFILE_ADMIN_PASSWORD=${SEAFILE_PASSWORD}
      - INIT_SEAFILE_MYSQL_ROOT_PASSWORD=${SEAFILE_PASSWORD}
    depends_on:
      db:
        condition: service_healthy
      redis:
        condition: service_healthy
    restart: unless-stopped
.env
# ==== Hostname ====
# Bake-in on first run - the domain or IP:port you will actually use to reach Seafile.
# Do NOT change after first boot without also editing conf/seahub_settings.py.
SEAFILE_SERVER_HOSTNAME=10.69.1.106
SEAFILE_SERVER_PROTOCOL=http
TIME_ZONE=Europe/Amsterdam

# ==== Secrets ====
# Paste the output of: openssl rand -base64 40
JWT_PRIVATE_KEY=m41h+mivVsScLtvik+ebyiPvyjlhiZ1HgeIAjkp5J92aQqnda7uLkQ==

# ONE password used for everything: MariaDB root, Seafile's DB user, and the Seafile web admin.
# Pick a strong unique value.
SEAFILE_PASSWORD=NKetpcGDPqCXGlBYATTTZ26E438Ns1FOPoqlUX0QeOGmgsEYSBToAg==

# Admin email for the first-boot web UI login (only used on first startup).
SEAFILE_ADMIN_EMAIL=dp@p2pnode.org
1.5.6 Penpot
1.5.7 Vaultwarden
1.5.8 Jellyfin
1. Installation
For Jellyfin we wil install it in the following way
1.5.9 Emby
1.5.10 Karakeep
1.5.11 Linkwarden
1.5.12 Penpot
Penpot is the open-source design platform for teams that need scalable collaboration.
01. Installation
The installation of Penpot is quite straightforward.
According to its own official documentation the first step we need to do is obtaining all the resources necessary to run Penpot as a docker container with the following command
wget https://raw.githubusercontent.com/penpot/penpot/main/docker/images/docker-compose.yamlIf you follow along with the Dockge installations it is recommended to run this inside the /opt/stacks directory such that it sits directly in the directory that Dockge can access it.
1.5.13 Nexterm
1. Installation
Source: https://nexterm.dev/install
1.5.14 Invoice Ninja
Invoice Ninja is a free, open-source invoicing, expenses, and time-tracking application for freelancers and small businesses, offering features like custom-branded invoices, recurring billing, online payments via 40+ gateways, project and task management, and expense tracking
Invoice Ninja is by far the most comfortable invoice system that I have used so far for my small freelance business in the hospitality industry. It has more features that I will ever need but it makes invoicing employers just so streamlined and easy. Instead of manually making all your invoices, sending emails, keeping track of payments, due dates, manual payments and more. Invoice Ninja makes this all a smooth experience for both you and the person that needs to pay you.
01. Docker Installation
Alright, so if you have a small business or you are simply a freelancer in any field then Invoice Ninja might be for you. It is quite an easy install but you need to know a couple of gotcha's to get things rolling. I show you here my method that works for me, and you can just copy paste that. However, there are of course other workflows possible as well.
According to its official documentation
Docker Compose File
services:
  app:
    build:
      context: .
    image: invoiceninja/invoiceninja-debian:${TAG:-latest}
    restart: unless-stopped
    env_file:
      - ./.env
    volumes:
      # - ./php/php.ini:/usr/local/etc/php/conf.d/invoiceninja.ini:ro
      # - ./php/php-fpm.conf:/usr/local/etc/php-fpm.d/invoiceninja.conf:ro
      # - ./supervisor/supervisord.conf:/etc/supervisor/conf.d/supervisord.conf:ro
      - app_public:/var/www/html/public
      - app_storage:/var/www/html/storage
    depends_on:
      mysql:
        condition: service_healthy
      redis:
        condition: service_healthy
  nginx:
    image: nginx:alpine
    restart: unless-stopped
    ports:
      - 8333:80
    volumes:
      - ./nginx:/etc/nginx/conf.d:ro
      - app_public:/var/www/html/public:ro
      - app_storage:/var/www/html/storage:ro
    depends_on:
      app:
        condition: service_healthy
  mysql:
    image: mysql:8
    restart: unless-stopped
    environment:
      MYSQL_DATABASE: ${DB_DATABASE}
      MYSQL_USER: ${DB_USERNAME}
      MYSQL_PASSWORD: ${DB_PASSWORD}
      MYSQL_ROOT_PASSWORD: ${DB_ROOT_PASSWORD}
    volumes:
      - mysql_data:/var/lib/mysql
    healthcheck:
      test:
        - CMD
        - mysqladmin
        - ping
        - -h
        - localhost
        - -u${MYSQL_USER}
        - -p${MYSQL_PASSWORD}
  redis:
    image: redis:alpine
    restart: unless-stopped
    volumes:
      - redis_data:/data
    healthcheck:
      test:
        - CMD
        - redis-cli
        - ping
volumes:
  app_public:
    driver: local
  app_storage:
    driver: local
  mysql_data:
    driver: local
  redis_data:
    driver: local
networks: {}
.env
# IN application vars
TAG=latest
APP_URL=https://invoice.rfeyn.org
APP_KEY=base64:gDCwop+h+/KcHsrCzc7tt4lbqcqH8hzMnm3x3+8oGnM=
API_SECRET=Kikkers49$91
APP_ENV=production
APP_DEBUG=true
REQUIRE_HTTPS=false
PHANTOMJS_PDF_GENERATION=false #Turn this function off to generate pdf with snappdf
PDF_GENERATOR=snappdf
TRUSTED_PROXIES='*'


CACHE_DRIVER=redis
QUEUE_CONNECTION=redis
SESSION_DRIVER=redis

REDIS_HOST=redis
REDIS_PASSWORD=null
REDIS_PORT=6379

FILESYSTEM_DISK=debian_docker

# DB connection
DB_HOST=mysql
DB_PORT=3306
DB_DATABASE=ninjadplancer
DB_USERNAME=ninja
DB_PASSWORD=sf9823fsjlfkjwioefjlskfh0923jfklsdjf
DB_ROOT_PASSWORD=sdpoifj293fj09030rjnsnedfo3498t
DB_CONNECTION=mysql

# Create initial user
# Default to these values if empty
IN_USER_EMAIL=dp@p2pnode.org
IN_PASSWORD=nvQi5W14blOnpv
# IN_USER_EMAIL=
# IN_PASSWORD=

# Mail options
MAIL_MAILER=log
MAIL_HOST=smtp.porkbun.com
MAIL_PORT=587
MAIL_USERNAME=dp@p2pnode.org
MAIL_PASSWORD=PuV9#@pUca49C70e2V46&keg
MAIL_ENCRYPTION=tls
MAIL_FROM_ADDRESS='dp@p2pnode.org'
MAIL_FROM_NAME="DPLancer Invoices"

# MySQL
MYSQL_ROOT_PASSWORD=sdpoifj293fj09030rjnsnedfo3498t
MYSQL_USER=ninja
MYSQL_PASSWORD=sf9823fsjlfkjwioefjlskfh0923jfklsdjf
MYSQL_DATABASE=ninjadplancer

# GoCardless/Nordigen API key for banking integration
NORDIGEN_SECRET_ID=
NORDIGEN_SECRET_KEY=

IS_DOCKER=true
SCOUT_DRIVER=null
#SNAPPDF_CHROMIUM_PATH=/usr/bin/google-chrome-stable
2.
02. Payment Integrations (Mollie)
After you have successfully installed Invoice Ninja and created an account it is time to connect a payment integration with it. You don't need to have a payment integration to use Invoice Ninja, however if you went through the hassle of installing it you better do it ;) Yes the integrations are not fully open source but it's the best we have so far
1. Go to Settings --> Payment Settings --> Add Payment Gateway
2. Then choose a payment gateway that suits your needs. This could be for instance Stripe for USA and Mollie for European customers. I am from the Netherlands where most people use iDeal/Wero for their payments. Hence, I went with Mollie for my personal invoice ninja instance for my hospitality business. Hence, the following is a Mollie integration but it would work the same for any other payment gateway.
3. In the case of Mollie create an account and make sure you provide them with a business website or a proper description of your business. This is necessary for them to accept iDeal payments for instance.
4. If the iDeal payments are not accepted automatically after one day then I would recommend to contact support. This is what I did and they accepted it straight away.
5. If that is all set you need to obtain an API key and a Profile ID.
6. Inside of Mollie click on "Developers" that sits in the left bottom corner of your dashboard.
7. Then choose API Access Tokens -> + Create new Token
8.
03. Localization
This is a short page, but it is of importance! If you operate in country X you would like that the emails and client portals your clients interact with is in language X. This is where localization comes in.
- Go to Settings -> Localization
- Then select the right language, timezone and date format for the country you are operating in.
1.5.15 Frigate NVR
01. Frigate Installation
Configuration File
mqtt:
  enabled: true
  host: 10.131.2.131
  user: peaske
  password: 7&QpP1qBKikkers49$91

semantic_search:
  enabled: true
  reindex: false

record:
  enabled: true
  continuous:
    days: 14

snapshots:
  enabled: true
  retain:
    default: 14
  required_zones: [cam_1_person, cam_2_person, cam_3_person, cam_4_person,
        cam_5_person, cam_6_person, cam_7_person, cam_8_person, cam_9_person]
  # Optional: Camera override for retention settings (default: global values)

objects:
  track:
    - person

cameras:     # No cameras defined, UI wizard should be used
  cam_1:
    enabled: true
    ffmpeg:
      inputs:
        - path:
            rtsp://admin:Stel13DeternetArea1()@10.131.2.101:554/cam/realmonitor?channel=1&subtype=0&unicast=true&proto=Onvif
          roles:
            - record
            - audio
        - path:
            rtsp://admin:Stel13DeternetArea1()@10.131.2.101:554/cam/realmonitor?channel=1&subtype=1&unicast=true&proto=Onvif
          roles:
            - detect
    objects:
      track:
        - person
        - car
    detect:
      enabled: true
      width: 1280
      height: 720
      fps: 5
    review:
      alerts:
        labels:
          - person
          - car
        required_zones:
          - cam_1_person
    #      - cam_1_car
      detections:
        labels:
          - person
        required_zones:
          - cam_1_person
    #      - cam_1_car
    live:
      streams:
        Stream 1: cam_1_1
        Stream 2: cam_1_2
    notifications:
      enabled: true
    zones:
      cam_1_person:
        coordinates: 0.679,0.187,0.407,0.989,0.668,0.997,0.72,0.593,0.737,0.195
        inertia: 3
        loitering_time: 0
        objects: person
      #cam_1_car:
      #  coordinates: 0.539,0.127,0.285,0.374,0.073,0.772,0.186,1,0.651,0.149
      #  loitering_time: 0
      #  inertia: 3
      #  objects: car
  cam_2:
    enabled: true
    ffmpeg:
      inputs:
        - path:
            rtsp://admin:Stel13DeternetArea1()@10.131.2.102:554/cam/realmonitor?channel=1&subtype=0&unicast=true&proto=Onvif
          roles:
            - record
            - audio
        - path:
            rtsp://admin:Stel13DeternetArea1()@10.131.2.102:554/cam/realmonitor?channel=1&subtype=1&unicast=true&proto=Onvif
          roles:
            - detect
    detect:
      enabled: true
      width: 1280
      height: 720
      fps: 5
    review:
      alerts:
        labels:
          - person
        required_zones:
          - cam_2_person
      detections:
        labels:
          - person
        required_zones:
          - cam_2_person
    live:
      streams:
        Stream 1: cam_2_1
        Stream 2: cam_2_2
    notifications:
      enabled: true
    zones:
      cam_2_person:
        coordinates: 0.483,0.265,0.35,0.998,0.754,0.992,0.582,0.009
        loitering_time: 0
        objects: person
    objects:
      filters:
        person:
          mask: 0.004,0.011,0.003,0.991,0.335,0.992,0.478,0.241,0.57,0.008
  cam_3:
    enabled: true
    ffmpeg:
      inputs:
        - path:
            rtsp://admin:Stel13DeternetArea1()@10.131.2.103:554/cam/realmonitor?channel=1&subtype=0&unicast=true&proto=Onvif
          roles:
            - record
            - audio
        - path:
            rtsp://admin:Stel13DeternetArea1()@10.131.2.103:554/cam/realmonitor?channel=1&subtype=1&unicast=true&proto=Onvif
          roles:
            - detect
    detect:
      enabled: true
      width: 1280
      height: 720
      fps: 5
    review:
      alerts:
        labels:
          - person
        required_zones:
          - cam_3_person
      detections:
        labels:
          - person
        required_zones:
          - cam_3_person
    live:
      streams:
        Stream 1: cam_3_1
        Stream 2: cam_3_2
    zones:
      cam_3_person:
        coordinates: 0.497,0.106,0.59,0.991,0.462,0.992,0.45,0.13
        loitering_time: 0
        objects: person
    objects:
      filters:
        person:
          mask:
            0.506,0.113,0.601,0.982,0.995,0.989,0.992,0.018,0.545,0,0.61,0.087
  cam_4:
    enabled: true
    ffmpeg:
      inputs:
        - path:
            rtsp://admin:Stel13DeternetArea1()@10.131.2.104:554/cam/realmonitor?channel=1&subtype=0&unicast=true&proto=Onvif
          roles:
            - record
            - audio
        - path:
            rtsp://admin:Stel13DeternetArea1()@10.131.2.104:554/cam/realmonitor?channel=1&subtype=1&unicast=true&proto=Onvif
          roles:
            - detect
    detect:
      enabled: true
      width: 1280
      height: 720
      fps: 5
    review:
      alerts:
        labels:
          - person
        required_zones:
          - cam_4_person
      detections:
        labels:
          - person
        required_zones:
          - cam_4_person
    live:
      streams:
        Stream 1: cam_4_1
        Stream 2: cam_4_2
    notifications:
      enabled: true
    zones:
      cam_4_person:
        coordinates: 0.593,0.465,0.712,0.994,0.366,0.997,0.374,0.466
        loitering_time: 0
        objects: person
    objects:
      mask:
        0.311,0.005,0.359,0.431,0.664,0.437,0.817,0.995,0.995,0.998,0.994,0.009
  cam_5:
    enabled: true
    ffmpeg:
      inputs:
        - path:
            rtsp://admin:Stel13DeternetArea1()@10.131.2.105:554/cam/realmonitor?channel=1&subtype=0&unicast=true&proto=Onvif
          roles:
            - record
            - audio
        - path:
            rtsp://admin:Stel13DeternetArea1()@10.131.2.105:554/cam/realmonitor?channel=1&subtype=1&unicast=true&proto=Onvif
          roles:
            - detect
    detect:
      enabled: true
      width: 1280
      height: 720
      fps: 5
    review:
      alerts:
        labels:
          - person
        required_zones:
          - cam_5_person
      detections:
        labels:
          - person
        required_zones:
          - cam_5_person
    live:
      streams:
        Stream 1: cam_5_1
        Stream 2: cam_5_2
    notifications:
      enabled: true
    zones:
      cam_5_person:
        coordinates: 0.534,0.116,0.517,0.991,0.332,0.998,0.491,0.113
        loitering_time: 0
        objects: person
    objects:
      mask: 0.004,0.005,0.006,0.997,0.315,0.994,0.491,0.023
  cam_6:
    enabled: true
    ffmpeg:
      inputs:
        - path:
            rtsp://admin:Stel13DeternetArea1()@10.131.2.106:554/cam/realmonitor?channel=1&subtype=0&unicast=true&proto=Onvif
          roles:
            - record
            - audio
        - path:
            rtsp://admin:Stel13DeternetArea1()@10.131.2.106:554/cam/realmonitor?channel=1&subtype=1&unicast=true&proto=Onvif
          roles:
            - detect
    detect:
      enabled: true
      width: 1280
      height: 720
      fps: 5
    review:
      alerts:
        labels:
          - person
        required_zones:
          - cam_6_person
      detections:
        labels:
          - person
        required_zones:
          - cam_6_person
    live:
      streams:
        Stream 1: cam_6_1
        Stream 2: cam_6_2
    notifications:
      enabled: true
    zones:
      cam_6_person:
        coordinates: 0.225,0.198,0.279,0.593,0.346,0.998,0.489,1,0.253,0.166
        loitering_time: 0
        objects: person
    objects:
      mask:
        - 0.267,0.008,0.264,0.157,0.505,0.997,0.99,0.986,0.991,0.011
        - 0.003,0.008,0.007,0.994,0.31,0.991,0.194,0.017
  cam_7:
    enabled: true
    ffmpeg:
      inputs:
        - path: rtsp://127.0.0.1:8554/cam_7_1
          input_args: preset-rtsp-restream
          roles:
            - record
            - audio
        - path:
            rtsp://admin:Stel13DeternetArea1()@10.131.2.107:554/cam/realmonitor?channel=1&subtype=1&unicast=true&proto=Onvif
          roles:
            - detect
    detect:
      enabled: true
      width: 1280
      height: 720
      fps: 5
    review:
      alerts:
        labels:
          - person
        required_zones:
          - cam_7_person
      detections:
        labels:
          - person
        required_zones:
          - cam_7_person
    live:
      streams:
        Stream 1: cam_7_1
        Stream 2: cam_7_2
    notifications:
      enabled: true
    zones:
      cam_7_person:
        coordinates: 0.519,0.071,0.603,0.991,0.806,0.991,0.595,0.027
        loitering_time: 0
        objects: person
    objects:
      mask:
        - 0.005,0.015,0.009,0.986,0.436,0.991,0.457,0.015
        - 0.614,0.014,0.835,0.992,0.996,0.988,0.997,0.009
  cam_8:
    enabled: true
    ffmpeg:
      inputs:
        - path:
            rtsp://admin:Stel13DeternetArea1()@10.131.2.108:554/cam/realmonitor?channel=1&subtype=0&unicast=true&proto=Onvif
          roles:
            - record
            - audio
        - path:
            rtsp://admin:Stel13DeternetArea1()@10.131.2.108:554/cam/realmonitor?channel=1&subtype=1&unicast=true&proto=Onvif
          roles:
            - detect
    detect:
      enabled: true
      width: 1280
      height: 720
      fps: 5
    review:
      alerts:
        labels:
          - person
        required_zones:
          - cam_8_person
      detections:
        labels:
          - person
        required_zones:
          - cam_8_person
    live:
      streams:
        Stream 1: cam_8_1
        Stream 2: cam_8_2
    notifications:
      enabled: true
    zones:
      cam_8_person:
        coordinates:
          0.287,0.585,0.092,0.753,0.126,0.887,0.19,1,0.356,0.931,0.477,0.694
        loitering_time: 0
        objects: person
  cam_9:
    enabled: true
    ffmpeg:
      inputs:
        - path: rtsp://127.0.0.1:8554/cam_9_1
          input_args: preset-rtsp-restream
          roles:
            - record
            - audio
        - path:
            rtsp://admin:Stel13DeternetArea1()@10.131.2.109:554/cam/realmonitor?channel=1&subtype=1
          roles:
            - detect
    detect:
      enabled: true
      width: 1280
      height: 720
      fps: 5
    review:
      alerts:
        labels:
          - person
        required_zones:
          - cam_9_person
      detections:
        labels:
          - person
        required_zones:
          - cam_9_person
    live:
      streams:
        Stream 1: cam_9_1
        Stream 2: cam_9_2
    notifications:
      enabled: true
    zones:
      cam_9_person:
        coordinates: 0.362,0.184,0.703,0.52,0.554,0.971,0.365,0.973,0.128,0.588
        loitering_time: 0
        objects: person
version: 0.17-0
go2rtc:
  streams:
    cam_1_1:
      - rtsp://admin:Stel13DeternetArea1()@10.131.2.101:554/cam/realmonitor?channel=1&subtype=0&unicast=true&proto=Onvif
    cam_1_2:
      - rtsp://admin:Stel13DeternetArea1()@10.131.2.101:554/cam/realmonitor?channel=1&subtype=1&unicast=true&proto=Onvif
    cam_2_1:
      - rtsp://admin:Stel13DeternetArea1()@10.131.2.102:554/cam/realmonitor?channel=1&subtype=0&unicast=true&proto=Onvif
    cam_2_2:
      - rtsp://admin:Stel13DeternetArea1()@10.131.2.102:554/cam/realmonitor?channel=1&subtype=1&unicast=true&proto=Onvif
    cam_3_1:
      - rtsp://admin:Stel13DeternetArea1()@10.131.2.103:554/cam/realmonitor?channel=1&subtype=0&unicast=true&proto=Onvif
    cam_3_2:
      - rtsp://admin:Stel13DeternetArea1()@10.131.2.103:554/cam/realmonitor?channel=1&subtype=1&unicast=true&proto=Onvif
    cam_4_1:
      - rtsp://admin:Stel13DeternetArea1()@10.131.2.104:554/cam/realmonitor?channel=1&subtype=0&unicast=true&proto=Onvif
    cam_4_2:
      - rtsp://admin:Stel13DeternetArea1()@10.131.2.104:554/cam/realmonitor?channel=1&subtype=1&unicast=true&proto=Onvif
    cam_5_1:
      - rtsp://admin:Stel13DeternetArea1()@10.131.2.105:554/cam/realmonitor?channel=1&subtype=0&unicast=true&proto=Onvif
    cam_5_2:
      - rtsp://admin:Stel13DeternetArea1()@10.131.2.105:554/cam/realmonitor?channel=1&subtype=1&unicast=true&proto=Onvif
    cam_6_1:
      - rtsp://admin:Stel13DeternetArea1()@10.131.2.106:554/cam/realmonitor?channel=1&subtype=0&unicast=true&proto=Onvif
    cam_6_2:
      - rtsp://admin:Stel13DeternetArea1()@10.131.2.106:554/cam/realmonitor?channel=1&subtype=1&unicast=true&proto=Onvif
    cam_7_1:
      - rtsp://admin:Stel13DeternetArea1()@10.131.2.107:554/cam/realmonitor?channel=1&subtype=0&unicast=true&proto=Onvif
    cam_7_2:
      - rtsp://admin:Stel13DeternetArea1()@10.131.2.107:554/cam/realmonitor?channel=1&subtype=1&unicast=true&proto=Onvif
    cam_8_1:
      - rtsp://admin:Stel13DeternetArea1()@10.131.2.108:554/cam/realmonitor?channel=1&subtype=0&unicast=true&proto=Onvif
    cam_8_2:
      - rtsp://admin:Stel13DeternetArea1()@10.131.2.108:554/cam/realmonitor?channel=1&subtype=1&unicast=true&proto=Onvif
    cam_9_1:
      - rtsp://admin:Stel13DeternetArea1()@10.131.2.109:554/cam/realmonitor?channel=1&subtype=0&unicast=true&proto=Onvif
    cam_9_2:
      - rtsp://admin:Stel13DeternetArea1()@10.131.2.109:554/cam/realmonitor?channel=1&subtype=1&unicast=true&proto=Onvif

notifications:
  enabled: true
  email: dp@p2pnode.org
Snapshot
Alerts
Detections
Recording
objects:
  track:
    #- person
    #- car
  filters:
    person:
      min_score: .60
      threshold: .65
    car:
      min_score: .60
      threshold: .65
Compose file
services:
  frigate:
    mem_limit: 5g
    container_name: frigate
    privileged: true # this may not be necessary for all setups
    restart: unless-stopped
    stop_grace_period: 30s # allow enough time to shut down the various services
    image: ghcr.io/blakeblackshear/frigate:stable
    shm_size: "1000mb" # update for your cameras based on calculation above
    devices:
   #   - /dev/bus/usb:/dev/bus/usb # Passes the USB Coral, needs to be modified for other versions
   #   - /dev/apex_0:/dev/apex_0 # Passes a PCIe Coral, follow driver instructions here https://coral.ai/docs/m2/get-started/#2a-on-linux
   #   - /dev/video11:/dev/video11 # For Raspberry Pi 4B
   #   - /dev/dri/card0:/dev/dri/card0 # For intel hwaccel, needs to be updated for your hardware
      - /dev/dri/renderD128:/dev/dri/renderD128 # For intel hwaccel, needs to be updated for your hardware
    volumes:
      - ./etc/localtime:/etc/localtime:ro
      - ./config:/config
      - ./media:/media/frigate
      - type: tmpfs # Optional: 1GB of memory, reduces SSD/SD Card wear
        target: /tmp/cache
        tmpfs:
          size: 1000000000
    ports:
      - 8971:8971
      - 8080:8080
      - 5000:5000 # Internal unauthenticated access. Expose carefully.
      - 8554:8554 # RTSP feeds
      - 8555:8555/tcp # WebRTC over tcp
      - 8555:8555/udp # WebRTC over udp
    environment:
      FRIGATE_RTSP_PASSWORD: "Stel137&QpP1qB"
  mqtt:
    mem_limit: 1g
    image: eclipse-mosquitto:latest
    container_name: mqtt
    restart: unless-stopped
    volumes:
      - ./mosquitto/config:/mosquitto/config
      - ./mosquitto/data:/mosquitto/data
      - ./mosquitto/log:/mosquitto/log
    ports:
      - 1883:1883
# With 1280x720 detect resolution

mqtt:
  host: mqtt # The hostname of mqtt in the docker compose file
  topic_prefix: frigate
  enabled: true

# _______________________________________Detection______________________________________

#ffmpeg: #If you use an AMD CPU for detection then leave this whole section uncommented
#  hwaccel_args: preset-vaapi
#  output_args:
#    record: preset-record-generic-audi-aac

#detectors:
#  ov_0:
#    type: openvino
#    device: CPU
#  ov_1:
#    type: openvino
#    device: CPU
#  ov_2:
#    type: openvino
#    device: CPU


#logger:
#  default: info
#  logs:
#    frigate.video: debug  # Enable FFmpeg debug logs
#ffmpeg:
#  input_args:
#    - hwaccel
#    - vaapi
#    - rtsp_transport
#    - tcp
#
# ----------------------------------------Timezone ------------------------------------
# This makes sure that Frigate always uses the local time and does not switch to another
# Timezone when it is viewed remotely.

ui:
  timezone: Europe/Berlin

# ----------------------------------------Tracked Objects ------------------------------------

objects:
  track:
    - person
    - car
  filters:
    person:
      min_score: .60
      threshold: .65
    car:
      min_score: .60
      threshold: .65

detect:
  enabled: true
go2rtc:
  streams:
    cam1:
      - rtsp://admin:Stel13DeternetArea1()@10.131.2.101/cam/realmonitor?channel=1&subtype=0
    cam1_sub:
      - rtsp://admin:Stel13DeternetArea1()@10.131.2.101/cam/realmonitor?channel=1&subtype=1
    cam2:
      - rtsp://admin:Stel13DeternetArea1()@10.131.2.102/cam/realmonitor?channel=1&subtype=0
    cam2_sub:
      - rtsp://admin:Stel13DeternetArea1()@10.131.2.102/cam/realmonitor?channel=1&subtype=1
    cam3:
      - rtsp://admin:Stel13DeternetArea1()@10.131.2.103/cam/realmonitor?channel=1&subtype=0
    cam3_sub:
      - rtsp://admin:Stel13DeternetArea1()@10.131.2.103/cam/realmonitor?channel=1&subtype=1
    cam4:
      - rtsp://admin:Stel13DeternetArea1()@10.131.2.104/cam/realmonitor?channel=1&subtype=0
    cam4_sub:
      - rtsp://admin:Stel13DeternetArea1()@10.131.2.104/cam/realmonitor?channel=1&subtype=1
    cam5:
      - rtsp://admin:Stel13DeternetArea1()@10.131.2.105/cam/realmonitor?channel=1&subtype=0
    cam5_sub:
      - rtsp://admin:Stel13DeternetArea1()@10.131.2.105/cam/realmonitor?channel=1&subtype=1
    cam6:
      - rtsp://admin:Stel13DeternetArea1()@10.131.2.106/cam/realmonitor?channel=1&subtype=0
    cam6_sub:
      - rtsp://admin:Stel13DeternetArea1()@10.131.2.106/cam/realmonitor?channel=1&subtype=1
    cam7:
      - rtsp://admin:Stel13DeternetArea1()@10.131.2.107/cam/realmonitor?channel=1&subtype=0
    cam7_sub:
      - rtsp://admin:Stel13DeternetArea1()@10.131.2.107/cam/realmonitor?channel=1&subtype=1
    cam8:
      - rtsp://admin:Stel13DeternetArea1()@10.131.2.108/cam/realmonitor?channel=1&subtype=0
    cam8_sub:
      - rtsp://admin:Stel13DeternetArea1()@10.131.2.108/cam/realmonitor?channel=1&subtype=1
    cam9:
      - rtsp://admin:Stel13DeternetArea1()@10.131.2.109/cam/realmonitor?channel=1&subtype=0
    cam9_sub:
      - rtsp://admin:Stel13DeternetArea1()@10.131.2.109/cam/realmonitor?channel=1&subtype=1


cameras:
# ----------------------------------------CAM 1 ------------------------------------
  cam1:
    review:
      alerts:
        required_zones: cam1_parking_lot
      detections:
        required_zones: cam1_parking_lot
    lpr:
      enabled: false
    ffmpeg:
      inputs:
        - path: rtsp://127.0.0.1:8554/cam1_sub
          input_args: preset-rtsp-restream
          roles:
            - detect
        - path: rtsp://127.0.0.1:8554/cam1
          input_args: preset-rtsp-restream
          roles:
            - record
      output_args:
        record: preset-record-generic-audio-aac
    detect:
      width: 1280
      height: 720
      fps: 5
    objects:
      track:
        - person
        - car
      filters:
        person:
          mask: 0,1,0.117,1,0.236,0.86,0.649,0.13,0.719,0,0.625,0,0,0
    snapshots:
      required_zones:
        - cam1_parking_lot
      enabled: true
      timestamp: true
      bounding_box: true
      crop: true
      height: 500
      retain:
        default: 14
    record:
      enabled: true
      alerts:
        retain:
          days: 14
        pre_capture: 15
        post_capture: 15
      detections:
        retain:
          days: 14
        pre_capture: 15
        post_capture: 15
      continuous:
        retain:
          days: 14
      motion:
        days: 0
    notifications:
      enabled: true

    zones:
      cam1_parking_lot:
        coordinates:
          0.235,0.881,0.129,1,0.487,1,0.678,0.997,0.741,0.47,0.747,0.207,0.752,0,0.733,0,0.715,0.026,0.495,0.423,0.485,0.437
        inertia: 3
        loitering_time: 0
    motion:
      mask:
        0.742,0,0.745,0.204,0.741,0.46,0.718,0.719,0.678,0.998,0.996,0.998,0.994,0.003

# ----------------------------------------CAM 2 ------------------------------------

  cam2:
    review:
      alerts:
        required_zones: cam2_person
      detections:
        required_zones: cam2_person
    lpr:
      enabled: false
    ffmpeg:
      inputs:
        - path: rtsp://127.0.0.1:8554/cam2_sub
          input_args: preset-rtsp-restream
          roles:
            - detect
        - path: rtsp://127.0.0.1:8554/cam2
          input_args: preset-rtsp-restream
          roles:
            - record
      output_args:
        record: preset-record-generic-audio-aac
    detect:
      width: 1280
      height: 720
      fps: 5
    objects:
      track:
        - person
      filters:
        person:
          min_area: 2000
          max_area: 90000
      mask: 0,0,0,1,0.373,1,0.56,0
    snapshots:
      required_zones:
        - cam2_person
      enabled: true
      timestamp: true
      bounding_box: true
      crop: true
      height: 500
      retain:
        default: 14
    record:
      enabled: true
      alerts:
        retain:
          days: 14
        pre_capture: 15
        post_capture: 15
      detections:
        retain:
          days: 14
        pre_capture: 15
        post_capture: 15
      continuous:
        days: 14
      motion:
        days: 0
    notifications:
      enabled: true

    zones:
      cam2_person:
        coordinates: 0.808,1,0.374,1,0.56,0,0.58,0
        inertia: 3
        loitering_time: 0
        objects: person
    motion:
      mask: 0.584,0,0.812,0.998,0.995,0.995,1,0

# ----------------------------------------CAM 3 ------------------------------------

  cam3:
    review:
      alerts:
        required_zones: cam3_person
      detections:
        required_zones: cam3_person
    lpr:
      enabled: false
    ffmpeg:
      inputs:
        - path: rtsp://127.0.0.1:8554/cam3_sub
          input_args: preset-rtsp-restream
          roles:
            - detect
        - path: rtsp://127.0.0.1:8554/cam3
          input_args: preset-rtsp-restream
          roles:
            - record
      output_args:
        record: preset-record-generic-audio-aac
    detect:
      width: 1280
      height: 720
      fps: 5
    objects:
      track:
        - person
      mask: 0.539,0.003,0.732,1,0.996,0.995,0.996,0.008
    snapshots:
      required_zones:
        - cam3_person
      enabled: true
      timestamp: true
      bounding_box: true
      crop: true
      height: 500
      retain:
        default: 14
    record:
      enabled: true
      alerts:
        retain:
          days: 14
        pre_capture: 15
        post_capture: 15
      detections:
        retain:
          days: 14
        pre_capture: 15
        post_capture: 15
      continuous:
        days: 14
      motion:
        days: 0
    notifications:
      enabled: true

    zones:
      cam3_person:
        coordinates: 0.442,0,0.243,0.992,0.723,1,0.535,0.003
        inertia: 3
        loitering_time: 0
        objects: person
    motion:
      mask:
        - 0.627,0.032,0.631,0.079,0.971,0.077,0.972,0.034
        - 0.002,0.003,0.007,0.994,0.238,0.99,0.44,0.003

# ----------------------------------------CAM 4 ------------------------------------

  cam4:
    review:
      alerts:
        required_zones: cam4_person
      detections:
        required_zones: cam4_person
    lpr:
      enabled: false
    ffmpeg:
      inputs:
        - path: rtsp://127.0.0.1:8554/cam4_sub
          input_args: preset-rtsp-restream
          roles:
            - detect
        - path: rtsp://127.0.0.1:8554/cam4
          input_args: preset-rtsp-restream
          roles:
            - record
      output_args:
        record: preset-record-generic-audio-aac
    detect:
      width: 1280
      height: 720
      fps: 5
    objects:
      track:
        - person
      mask:
        - 0.67,1,0.996,0.992,0.997,0.006,0.302,0.001,0.366,0.538,0.52,0.496,0.575,0.468
        - 0.003,0.002,0,0.978,0.039,0.537,0.295,0.014
    snapshots:
      required_zones:
        - cam4_person
      enabled: true
      timestamp: true
      bounding_box: true
      crop: true
      height: 500
      retain:
        default: 14
    record:
      enabled: true
      alerts:
        retain:
          days: 14
        pre_capture: 15
        post_capture: 15
      detections:
        retain:
          days: 14
        pre_capture: 15
        post_capture: 15
      continuous:
        days: 14
      motion:
        days: 0
    notifications:
      enabled: true

    zones:
      cam4_person:
        coordinates:
          0.045,0.541,0,0.998,0.664,1,0.572,0.493,0.501,0.513,0.364,0.545,0.299,0.016
        inertia: 3
        loitering_time: 0
        objects: person
    motion: {}

# ----------------------------------------CAM 5 ------------------------------------

  cam5:
    review:
      alerts:
        required_zones: cam5_person
      detections:
        required_zones: cam5_person
    lpr:
      enabled: false
    ffmpeg:
      inputs:
        - path: rtsp://127.0.0.1:8554/cam5_sub
          input_args: preset-rtsp-restream
          roles:
            - detect
        - path: rtsp://127.0.0.1:8554/cam5
          input_args: preset-rtsp-restream
          roles:
            - record
      output_args:
        record: preset-record-generic-audio-aac
    detect:
      width: 1280
      height: 720
      fps: 5
    objects:
      track:
        - person
      mask: 0,0,0,1,0.179,1,0.511,0
    snapshots:
      required_zones:
        - cam5_person
      enabled: true
      timestamp: true
      bounding_box: true
      crop: true
      height: 500
      retain:
        default: 14
    record:
      enabled: true
      alerts:
        retain:
          days: 14
        pre_capture: 15
        post_capture: 15
      detections:
        retain:
          days: 14
        pre_capture: 15
        post_capture: 15
      continuous:
        days: 14
      motion:
        days: 0
    notifications:
      enabled: true

    zones:
      cam5_person:
        coordinates:
          0.521,0,0.456,0.185,0.383,0.42,0.308,0.639,0.193,1,0.811,0.997,0.568,0.005
        inertia: 3
        loitering_time: 0
        objects: person
    motion:
      mask: 0.566,0,0.816,0.998,0.999,0.995,0.998,0.005

# ----------------------------------------CAM 6 ------------------------------------

  cam6:
    review:
      alerts:
        required_zones: cam6_person
      detections:
        required_zones: cam6_person
    lpr:
      enabled: false
    ffmpeg:
      inputs:
        - path: rtsp://127.0.0.1:8554/cam6_sub
          input_args: preset-rtsp-restream
          roles:
            - detect
        - path: rtsp://127.0.0.1:8554/cam6
          input_args: preset-rtsp-restream
          roles:
            - record
      output_args:
        record: preset-record-generic-audio-aac
    detect:
      width: 1280
      height: 720
      fps: 5
    objects:
      track:
        - person
      filters:
        person:
          min_area: 3000
          max_area: 90000
      mask:
        1,1,1,0,0.216,0,0.235,0.231,0.271,0.22,0.298,0.21,0.312,0.249,0.554,1
    snapshots:
      required_zones:
        - cam6_person
      enabled: true
      timestamp: true
      bounding_box: true
      crop: true
      height: 500
      retain:
        default: 14
    record:
      enabled: true
      alerts:
        retain:
          days: 14
        pre_capture: 15
        post_capture: 15
      detections:
        retain:
          days: 14
        pre_capture: 15
        post_capture: 15
      continuous:
        days: 14
      motion:
        days: 0
    notifications:
      enabled: true

    zones:
      cam6_person:
        coordinates:
          0.215,0.016,0.131,0.333,0.075,1,0.543,0.988,0.296,0.222,0.232,0.245
        inertia: 3
        loitering_time: 0
        objects: person
    motion:
      mask: 0.002,0.003,0.005,0.997,0.069,0.997,0.128,0.321,0.212,0.002

# ----------------------------------------CAM 7 ------------------------------------

  cam7:
    review:
      alerts:
        required_zones: cam7_person
      detections:
        required_zones: cam7_person
    lpr:
      enabled: false
    ffmpeg:
      inputs:
        - path: rtsp://127.0.0.1:8554/cam7_sub
          input_args: preset-rtsp-restream
          roles:
            - detect
        - path: rtsp://127.0.0.1:8554/cam7
          input_args: preset-rtsp-restream
          roles:
            - record
      output_args:
        record: preset-record-generic-audio-aac
    detect:
      width: 1280
      height: 720
      fps: 5
    objects:
      track:
        - person
      mask: 0.616,0.003,0.756,0.445,0.866,0.99,0.994,0.997,0.996,0.006
    snapshots:
      required_zones:
        - cam7_person
      enabled: true
      timestamp: true
      bounding_box: true
      crop: true
      height: 500
      retain:
        default: 14
    record:
      enabled: true
      alerts:
        retain:
          days: 14
        pre_capture: 15
        post_capture: 15
      detections:
        retain:
          days: 14
        pre_capture: 15
        post_capture: 15
      continuous:
        days: 14
      motion:
        days: 0
    notifications:
      enabled: true

    zones:
      cam7_person:
        coordinates:
          0.404,0,0.308,1,0.861,0.994,0.815,0.742,0.739,0.408,0.611,0.002
        inertia: 3
        loitering_time: 0
        objects: person
    motion:
      mask:
        - 0.001,0.003,0.004,0.992,0.303,0.997,0.398,0.005
        - 0.629,0.03,0.633,0.074,0.97,0.079,0.971,0.032

# ----------------------------------------CAM 8 ------------------------------------

  cam8:
    review:
      alerts:
        required_zones: cam8_person
      detections:
        required_zones: cam8_person
    lpr:
      enabled: false
    ffmpeg:
      inputs:
        - path: rtsp://127.0.0.1:8554/cam8_sub
          input_args: preset-rtsp-restream
          roles:
            - detect
        - path: rtsp://127.0.0.1:8554/cam8
          input_args: preset-rtsp-restream
          roles:
            - record
      output_args:
        record: preset-record-generic-audio-aac
    detect:
      width: 1280
      height: 720
      fps: 5
    objects:
      track:
        - person
      filters:
        person:
          min_area: 5000
          max_area: 90000
      mask:
        0.279,0.01,0.342,0.604,0.67,0.801,0.634,0.944,0.62,0.997,0.996,0.995,0.995,0.003
    snapshots:
      required_zones:
        - cam8_person
      enabled: true
      timestamp: true
      bounding_box: true
      crop: true
      height: 500
      retain:
        default: 14
    record:
      enabled: true
      alerts:
        retain:
          days: 14
        pre_capture: 15
        post_capture: 15
      detections:
        retain:
          days: 14
        pre_capture: 15
        post_capture: 15
      continuous:
        days: 14
      motion:
        days: 0
    notifications:
      enabled: true

    zones:
      cam8_person:
        coordinates: 0.042,0.612,0.174,0.99,0.62,0.997,0.671,0.798,0.155,0.499
        inertia: 3
        loitering_time: 0
        objects: person
    motion:
      mask: 0.629,0.027,0.634,0.08,0.972,0.08,0.972,0.03

# ----------------------------------------CAM 9 ------------------------------------

  cam9:
    lpr:
      enabled: false
    ffmpeg:
      inputs:
        - path: rtsp://127.0.0.1:8554/cam9_sub
          input_args: preset-rtsp-restream
          roles:
            - detect
        - path: rtsp://127.0.0.1:8554/cam9
          input_args: preset-rtsp-restream
          roles:
            - record
      output_args:
        record: preset-record-generic-audio-aac
    detect:
      width: 1280
      height: 720
      fps: 5
    objects:
      track:
        - person
      filters:
        person:
          min_area: 5000
          max_area: 90000
    snapshots:
      required_zones:
        - cam9_person
      enabled: true
      timestamp: true
      bounding_box: true
      crop: true
      height: 500
      retain:
        default: 14
    record:
      enabled: true
      alerts:
        retain:
          days: 14
        pre_capture: 15
        post_capture: 15
      detections:
        retain:
          days: 14
        pre_capture: 15
        post_capture: 15
      continuous:
        days: 14
      motion:
        days: 0
    notifications:
      enabled: true

    motion:
      mask: 0.627,0.032,0.628,0.079,0.971,0.082,0.974,0.032
    zones:
      cam9_person:
        coordinates:
          0.123,0.587,0.374,1,0.562,1,0.824,0.018,0.488,0.01,0.324,0.253
        loitering_time: 0
        objects: person
version: 0.17-0


semantic_search:
  enabled: true
  model_size: small
face_recognition:
  enabled: false
  model_size: small
lpr:
  enabled: false
classification:
  bird:
    enabled: false
notifications:
  enabled: true
  email: dp@p2pnode.org
New Config
mqtt:
  enabled: true

semantic_search:
  enabled: true
  reindex: false

objects:
  track:
    - person
    - car
  filters:
    person:
      min_score: .60
      threshold: .65
    car:
      min_score: .60
      threshold: .65


cameras:     # No cameras defined, UI wizard should be used
  cam_1:
    enabled: true
    ffmpeg:
      inputs:
        - path:
            rtsp://admin:Stel13DeternetArea1()@10.131.2.101:554/cam/realmonitor?channel=1&subtype=0&unicast=true&proto=Onvif
          roles:
            - record
            - audio
        - path:
            rtsp://admin:Stel13DeternetArea1()@10.131.2.101:554/cam/realmonitor?channel=1&subtype=1&unicast=true&proto=Onvif
          roles:
            - detect
    detect:
      width: 1280
      height: 720
    record:
      enabled: true
      continuous:
        days: 14
    live:
      streams:
        Stream 1: cam_1_1
        Stream 2: cam_1_2
    notifications:
      enabled: true
    zones:
      cam_1_person:
        coordinates:
          0.596,0.09,0.523,0.089,0,0.549,0,1,0.111,1,0.607,0.985,0.652,0.097
        inertia: 3
        loitering_time: 0
        objects: person
  cam_2:
    enabled: true
    ffmpeg:
      inputs:
        - path:
            rtsp://admin:Stel13DeternetArea1()@10.131.2.102:554/cam/realmonitor?channel=1&subtype=0&unicast=true&proto=Onvif
          roles:
            - record
            - audio
        - path:
            rtsp://admin:Stel13DeternetArea1()@10.131.2.102:554/cam/realmonitor?channel=1&subtype=1&unicast=true&proto=Onvif
          roles:
            - detect
    detect:
      width: 1280
      height: 720
    record:
      enabled: true
      continuous:
        days: 14
    live:
      streams:
        Stream 1: cam_2_1
        Stream 2: cam_2_2
    notifications:
      enabled: true
    zones:
      cam_2_person:
        coordinates: 0.483,0.265,0.35,0.998,0.754,0.992,0.582,0.009
        loitering_time: 0
        objects: person
  cam_3:
    enabled: true
    ffmpeg:
      inputs:
        - path:
            rtsp://admin:Stel13DeternetArea1()@10.131.2.103:554/cam/realmonitor?channel=1&subtype=0&unicast=true&proto=Onvif
          roles:
            - record
            - audio
        - path:
            rtsp://admin:Stel13DeternetArea1()@10.131.2.103:554/cam/realmonitor?channel=1&subtype=1&unicast=true&proto=Onvif
          roles:
            - detect
    detect:
      width: 1280
      height: 720
    live:
      streams:
        Stream 1: cam_3_1
        Stream 2: cam_3_2
    zones:
      cam_3_person:
        coordinates: 0.497,0.106,0.59,0.991,0.462,0.992,0.45,0.13
        loitering_time: 0
        objects: person
  cam_4:
    enabled: true
    ffmpeg:
      inputs:
        - path:
            rtsp://admin:Stel13DeternetArea1()@10.131.2.104:554/cam/realmonitor?channel=1&subtype=0&unicast=true&proto=Onvif
          roles:
            - record
            - audio
        - path:
            rtsp://admin:Stel13DeternetArea1()@10.131.2.104:554/cam/realmonitor?channel=1&subtype=1&unicast=true&proto=Onvif
          roles:
            - detect
    detect:
      width: 1280
      height: 720
    record:
      enabled: true
      continuous:
        days: 14
    live:
      streams:
        Stream 1: cam_4_1
        Stream 2: cam_4_2
    notifications:
      enabled: true
    zones:
      cam_4_person:
        coordinates: 0.593,0.465,0.712,0.994,0.366,0.997,0.374,0.466
        loitering_time: 0
        objects: person
  cam_5:
    enabled: true
    ffmpeg:
      inputs:
        - path:
            rtsp://admin:Stel13DeternetArea1()@10.131.2.105:554/cam/realmonitor?channel=1&subtype=0&unicast=true&proto=Onvif
          roles:
            - record
            - audio
        - path:
            rtsp://admin:Stel13DeternetArea1()@10.131.2.105:554/cam/realmonitor?channel=1&subtype=1&unicast=true&proto=Onvif
          roles:
            - detect
    detect:
      width: 1280
      height: 720
    record:
      enabled: true
      continuous:
        days: 14
    live:
      streams:
        Stream 1: cam_5_1
        Stream 2: cam_5_2
    notifications:
      enabled: true
    zones:
      cam_5_person:
        coordinates: 0.534,0.116,0.517,0.991,0.332,0.998,0.491,0.113
        loitering_time: 0
        objects: person
  cam_6:
    enabled: true
    ffmpeg:
      inputs:
        - path:
            rtsp://admin:Stel13DeternetArea1()@10.131.2.106:554/cam/realmonitor?channel=1&subtype=0&unicast=true&proto=Onvif
          roles:
            - record
            - audio
        - path:
            rtsp://admin:Stel13DeternetArea1()@10.131.2.106:554/cam/realmonitor?channel=1&subtype=1&unicast=true&proto=Onvif
          roles:
            - detect
    detect:
      width: 1280
      height: 720
    record:
      enabled: true
      continuous:
        days: 14
    live:
      streams:
        Stream 1: cam_6_1
        Stream 2: cam_6_2
    notifications:
      enabled: true
    zones:
      cam_6_person:
        coordinates: 0.225,0.198,0.279,0.593,0.346,0.998,0.489,1,0.253,0.166
        loitering_time: 0
        objects: person
  cam_7:
    enabled: true
    ffmpeg:
      inputs:
        - path: rtsp://127.0.0.1:8554/cam_7_1
          input_args: preset-rtsp-restream
          roles:
            - record
            - audio
        - path:
            rtsp://admin:Stel13DeternetArea1()@10.131.2.107:554/cam/realmonitor?channel=1&subtype=1&unicast=true&proto=Onvif
          roles:
            - detect
    detect:
      width: 1280
      height: 720
    record:
      enabled: true
      continuous:
        days: 14
    live:
      streams:
        Stream 1: cam_7_1
        Stream 2: cam_7_2
    notifications:
      enabled: true
    zones:
      cam_7_person:
        coordinates: 0.519,0.071,0.603,0.991,0.806,0.991,0.595,0.027
        loitering_time: 0
        objects: person
  cam_8:
    enabled: true
    ffmpeg:
      inputs:
        - path:
            rtsp://admin:Stel13DeternetArea1()@10.131.2.108:554/cam/realmonitor?channel=1&subtype=0&unicast=true&proto=Onvif
          roles:
            - record
            - audio
        - path:
            rtsp://admin:Stel13DeternetArea1()@10.131.2.108:554/cam/realmonitor?channel=1&subtype=1&unicast=true&proto=Onvif
          roles:
            - detect
    detect:
      width: 1280
      height: 720
    record:
      enabled: true
      continuous:
        days: 14
    live:
      streams:
        Stream 1: cam_8_1
        Stream 2: cam_8_2
    notifications:
      enabled: true
    zones:
      cam_8_person:
        coordinates:
          0.287,0.585,0.092,0.753,0.126,0.887,0.19,1,0.356,0.931,0.477,0.694
        loitering_time: 0
        objects: person
  cam_9:
    enabled: true
    ffmpeg:
      inputs:
        - path: rtsp://127.0.0.1:8554/cam_9_1
          input_args: preset-rtsp-restream
          roles:
            - record
            - audio
        - path:
            rtsp://admin:Stel13DeternetArea1()@10.131.2.109:554/cam/realmonitor?channel=1&subtype=1
          roles:
            - detect
    detect:
      width: 1280
      height: 720
    record:
      enabled: true
      continuous:
        days: 14
    live:
      streams:
        Stream 1: cam_9_1
        Stream 2: cam_9_2
    notifications:
      enabled: true
    zones:
      cam_9_person:
        coordinates: 0.362,0.184,0.703,0.52,0.554,0.971,0.365,0.973,0.128,0.588
        loitering_time: 0
        objects: person
version: 0.17-0
go2rtc:
  streams:
    cam_1_1:
      - rtsp://admin:Stel13DeternetArea1()@10.131.2.101:554/cam/realmonitor?channel=1&subtype=0&unicast=true&proto=Onvif
    cam_1_2:
      - rtsp://admin:Stel13DeternetArea1()@10.131.2.101:554/cam/realmonitor?channel=1&subtype=1&unicast=true&proto=Onvif
    cam_2_1:
      - rtsp://admin:Stel13DeternetArea1()@10.131.2.102:554/cam/realmonitor?channel=1&subtype=0&unicast=true&proto=Onvif
    cam_2_2:
      - rtsp://admin:Stel13DeternetArea1()@10.131.2.102:554/cam/realmonitor?channel=1&subtype=1&unicast=true&proto=Onvif
    cam_3_1:
      - rtsp://admin:Stel13DeternetArea1()@10.131.2.103:554/cam/realmonitor?channel=1&subtype=0&unicast=true&proto=Onvif
    cam_3_2:
      - rtsp://admin:Stel13DeternetArea1()@10.131.2.103:554/cam/realmonitor?channel=1&subtype=1&unicast=true&proto=Onvif
    cam_4_1:
      - rtsp://admin:Stel13DeternetArea1()@10.131.2.104:554/cam/realmonitor?channel=1&subtype=0&unicast=true&proto=Onvif
    cam_4_2:
      - rtsp://admin:Stel13DeternetArea1()@10.131.2.104:554/cam/realmonitor?channel=1&subtype=1&unicast=true&proto=Onvif
    cam_5_1:
      - rtsp://admin:Stel13DeternetArea1()@10.131.2.105:554/cam/realmonitor?channel=1&subtype=0&unicast=true&proto=Onvif
    cam_5_2:
      - rtsp://admin:Stel13DeternetArea1()@10.131.2.105:554/cam/realmonitor?channel=1&subtype=1&unicast=true&proto=Onvif
    cam_6_1:
      - rtsp://admin:Stel13DeternetArea1()@10.131.2.106:554/cam/realmonitor?channel=1&subtype=0&unicast=true&proto=Onvif
    cam_6_2:
      - rtsp://admin:Stel13DeternetArea1()@10.131.2.106:554/cam/realmonitor?channel=1&subtype=1&unicast=true&proto=Onvif
    cam_7_1:
      - rtsp://admin:Stel13DeternetArea1()@10.131.2.107:554/cam/realmonitor?channel=1&subtype=0&unicast=true&proto=Onvif
    cam_7_2:
      - rtsp://admin:Stel13DeternetArea1()@10.131.2.107:554/cam/realmonitor?channel=1&subtype=1&unicast=true&proto=Onvif
    cam_8_1:
      - rtsp://admin:Stel13DeternetArea1()@10.131.2.108:554/cam/realmonitor?channel=1&subtype=0&unicast=true&proto=Onvif
    cam_8_2:
      - rtsp://admin:Stel13DeternetArea1()@10.131.2.108:554/cam/realmonitor?channel=1&subtype=1&unicast=true&proto=Onvif
    cam_9_1:
      - rtsp://admin:Stel13DeternetArea1()@10.131.2.109:554/cam/realmonitor?channel=1&subtype=0&unicast=true&proto=Onvif
    cam_9_2:
      - rtsp://admin:Stel13DeternetArea1()@10.131.2.109:554/cam/realmonitor?channel=1&subtype=1&unicast=true&proto=Onvif
notifications:
  enabled: true
  email: dp@p2pnode.org
02. Configure Cameras
Camera Network
The first thing to be made sure of is to create a dedicated network for your camera system. This can either be dedicated or VLAN based. In this way you can separate Camera traffic from other traffic and if your camera netwok gets breached than all other services will not be affected. Depending on your network setup you can either define this VLAN directly on an L3 swich or if you use the router on a stick model on your router. Hence, make sure all cameras are on the same CAM network.
Initial Camera Setup
Now, by default your cameras are not yet living on the camera network VLAN that we just created. Now, for each brand and camera it is different but it basically boils down to this.
- Make sure you have a laptop with an ethernet port
- Look up on the internet how you can reset your particular camera to its default settings.
- This will most likely also tell you what the default IP address is that particular camera e.g Amcrest cameras live on 192.168.1.108.
- If you know that then you also know on which network it lives.
- Next, we need to set our laptop to the same default network as the camera.
- Then we can simply access the camera by typing in the address of the camera in our favourite webbrowser.
- Then again depending on your camera, go to the networking page to give your camera a static IP address on the Camera Network.
- Note! Once you change the ip address of the camera then you can only keep accessing it if you bring your laptop on that network as well.
- After you have done that you can stick the IP camera in an untagged CAM Network port on your PoE switch.
- If you can then connect to it with your laptop by connected it as well to the same switch then you know it works!
- Repeat this process until you brought all the cameras on the camera network.
Streams
Next up are the camera stream possibilities of your camera. Most cameras come at least with two camera streams. These streams are basically recording the same thing but on different resolution scales. For instance, for your recordings you would love to have the highest resolution possible, howerver for your object and sound detection you don't need that. This can greatly reduce the stress on your resources and hence provide a much smoother experience, especially on systems that are not so well resourced.
Other that we also need to know or set the resolution of all of the cameras. The reason being is that these resolutions should be the same as in our Frigate configuration file later on. It is all up to you and the resources but some common resolutions would be
- 640x480 (VGA) for substream (The higher the sream the more stress will be put on your resources)
- Highest resolution for main stream (e.g 1920x1080 or 2960x1668)
Make sure you write these numbers down and have set them all the same for all your cameras.
NTP Time Server
An NTP server (Network Time Protocol server) is a server that provides accurate time information to clients over the Internet, allowing them to synchronize their clocks to Coordinated Universal Time (UTC) with high precision. NTP servers can maintain time accuracy within a few milliseconds over local networks and tens of milliseconds over the public Internet.
Now why would you want this ? Well you want that each camera in your system displays the same time i.e that all clocks are synchronized. They even synchronize with summer and winter times ;) This is a must have instead of cameras showing different times.
Now, which NTP servers to use then ? Well I would recommend to use the NTP servers from the NTP Pool Project. The pool.ntp.org project is a big virtual cluster of timeservers providing reliable, easy to use NTP service for millions of clients. You could click on your continent region and then use any of the time servers they provide. For instance clicking on Europe you get the following addresses
server 0.europe.pool.ntp.org
server 1.europe.pool.ntp.org
server 2.europe.pool.ntp.org
server 3.europe.pool.ntp.org
You can use any of these 4 and implement them as the NTP server for each camera. Make sure to use the same s.t they all use the same time servers and are synchronized.
Viewing Preferences
Now, depnding on the camera you have obtained they all have different possibilities. It is now then time to go to the cameras and tweak it to your liking. For instance, if you prefer night vision with colour on your camera's then you can set that setting for your camera. I would highly recommend to do this ;)
01. Hardware Pass Through
To make frigate operate smoothly and effectively a GPU or XXX should be used for hardware acceleration. Otherwise all the image recognition and playback needs to be handled by the CPU which is really heavy. If you don't do this and you have a bunch of cameras then it can easily consume 8 cpu cores if not more. Hence, get a GPU or Google XXX device.
- Inside of the BIOS of your system go to
Tutorial on Hardware Acceleration for Frigate: https://www.youtube.com/watch?v=SeHgsIwyOuY
1. Then Resizable BAR needs to be turned on in the BIOS of your system if it's available.
2. Then go int
3. Mount NFS Share
04. Mount NFS Share to Linux VM
- Create dataset
- Data space management -> set it to x TiB
- Shares -> Unix -> Add
!!!! Mount should happen at root !!!!!
Now, that we have created an NFS share it is time to share it with another machine virtual or bare metal. In this case we will install inside a linux VM
To test if a TrueNas NFS share can be mounted use the following command:
sudo mount -t nfs 10.131.1.10:/mnt/alexandria/frigate /home/dpasnfrigate/media
sudo mount -t nfs 10.131.1.10:/mnt/alexandria/frigate /home/dpasnfrigate/mediaKeep NFS share Mounted on Reboots
Generally, you will want to mount the remote NFS directory automatically when the system boots.
The /etc/fstab file contains a list of entries that define where how and what filesystem will be mounted on system startup.
To automatically mount an NFS share when your Linux system starts up add a line to the /etc/fstab file. The line must include the hostname or the IP address of the NFS server, the exported directory, and the mount point on the local machine.
Use the following procedure to automatically mount an NFS share on Linux systems:
- Set up a mount point for the remote NFS share:
sudo mkdir /frigate/media
sudo mkdir /frigate/media- Open the /etc/fstab file with your text editor :
sudo nano /etc/fstab
sudo nano /etc/fstab- Add the following line
10.131.2.10:/mnt/alexandria/frigate frigate/media nfs defaults 0 0
10.131.2.10:/mnt/alexandria/frigate frigate/media nfs defaults 0 0- it
- Finally you need to update the new file with
systemctl daemon-reload
systemctl daemon-reload- Run the mount command in one of the following forms to mount the NFS share:
mount frigate/media
mount frigate/media- The mount command, will read the content of the /etc/fstab and mount the share.
- Next time you reboot the system the NFS share will be mounted automatically.
admin
60ab1406fba90830c0126bbdcae06743d54a4f62d76f1e75
sudo apt install gnome-software-plugin-flatpak
1.5.16 OpenLift
1.5.17 Arr Stack
In this chapter we follow roughly the guidelines from Techhut Instruction Video and the Trash Guides guide. However, there are other methods as well of course.
01. Architectural Overview
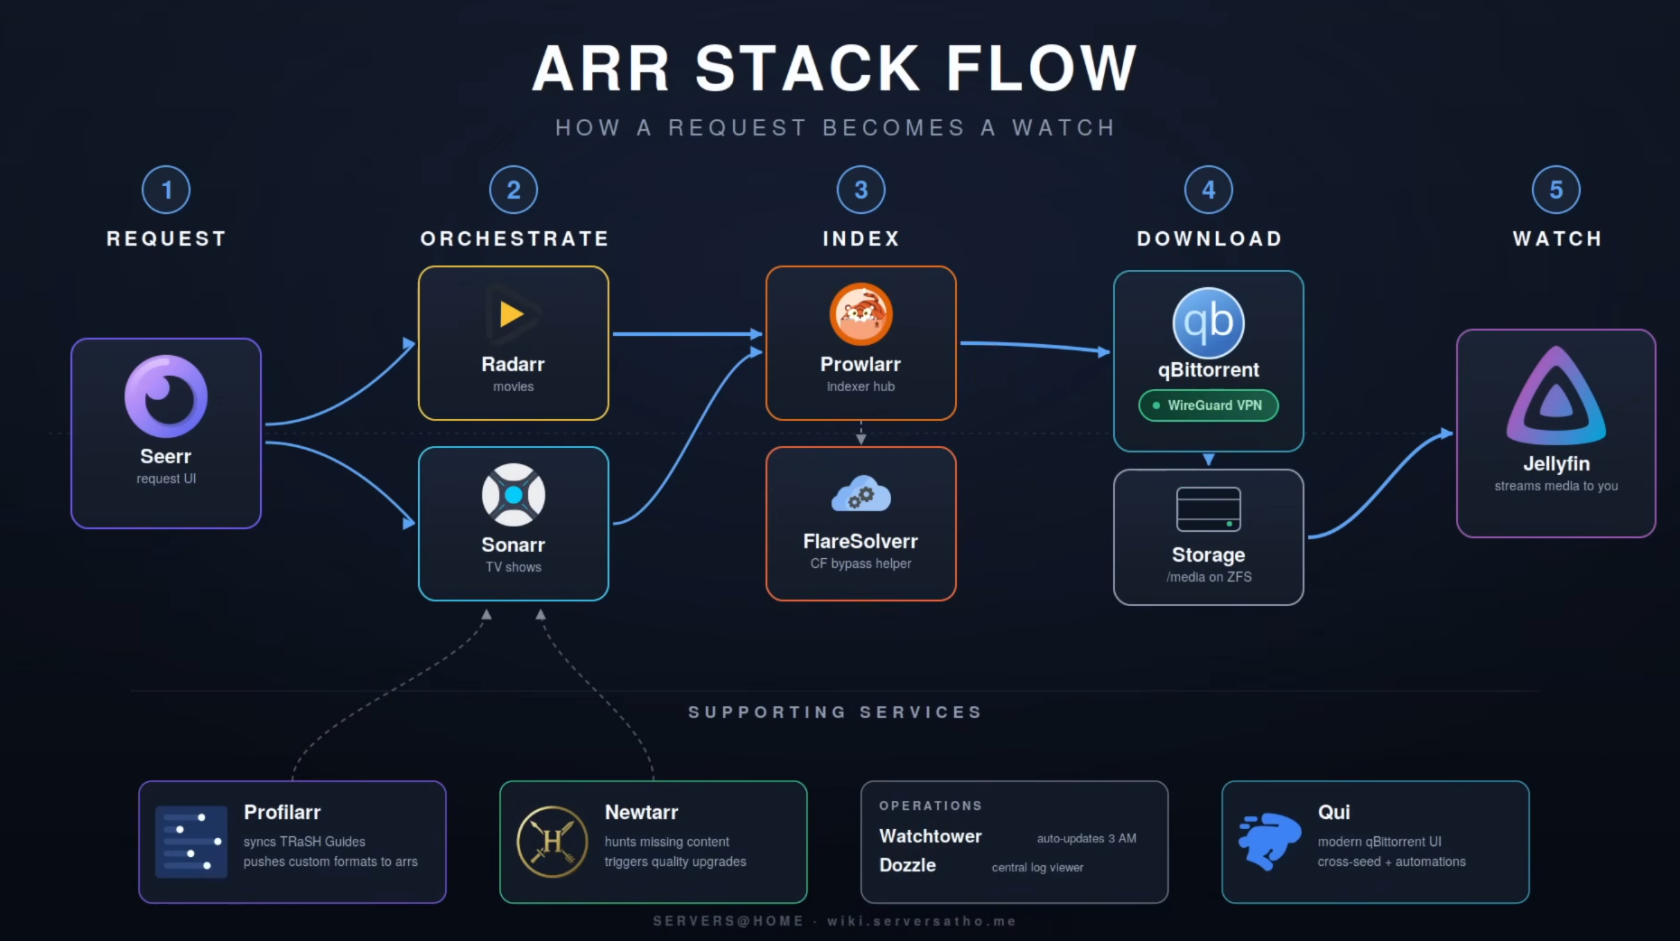
Movie/Show Request
- A user makes a request via Seerr, which is basically a catalogue of all the existing movies and tv shows and upcoming ones. This is where the end user will interact with for requests. Everything else from 2-4 is not publicly accessible. Only 1 and 5 are in the whole process.
- Then the request will end up in Radarr for movies and Sonarr for TV shows.
- Radarr and Sonarr are open-source applications designed for automating the downloading of movies and TV shows, respectively. They help users track their favorite media, automatically search for new episodes or films, and manage downloads through a user-friendly web interface.
Overview of the Request Process
Radarr/Sonarr and Prowlarr work in tandem to automate the downloading of movies. Here’s how the process unfolds:
- Search Request: Radarr/Sonarr initiates a search request for a specific movie/show.
- Querying Indexers: Prowlarr receives this request and queries all its configured indexers.
- Returning Results: The results from the indexers are sent back to Prowlarr.
- Final Decision: Prowlarr then forwards these results back to Radarr/Sonarr, which makes the final decision on which movie/show/episode to download.
Download clients
- After the correct movie/show has been confirmed depending on if its a usenet or torrent file is then send to one of the download clients they are connected to.
- Examples of these download clients are nzbget for usenet and qbittorrent for torrents.
- They go out and download the movies/shows to your hard drives
Front end Jellyfin Clients
List of all Jellyfin clients
Then finally you have multiple front ends that users can interact with to actually watch their movies and shows. Basically Jellyfin sits in the backend and any application that can speak to the Jellyfin API can represent this media how they seem fit. Famous ones I like are
- Fladder for Android Mobile and Laptops (It allows Seerr to be integrated into one application)
- Jellyfin for TV
- Kodi with a sweet theme for the TV
- For iOS devices I would recommend
03. Mount NFS Share inside Arr VM
Now, that we have created an NFS share we should mount it inside the VM. But before we can mount it we need to install the NFS tools such that it can talk the NFS langauge. This is fairly straightforward with the following commands
1. Within the VM install cifs-utils
sudo apt install cifs-utils
2. Now, edit the fstab file and add the following lines editing them to match your information:
sudo nano /etc/fstabIP Address arr VM:/mnt/pool/dataset_name /mnt/data nfs defaults 0 04. Once that is saved we restart the daemon and mount the file share
sudo systemctl daemon-reload
sudo mount -a
5.
02. Creating a NFS Share
Since this stack will save lots of big files i.e movies and tv shows we will create an NFS share for this on our TrueNas VM. You don't need to use TrueNas obviously to create an NFS share but this guide uses TrueNas and hence we do that ;)
1. First we will create a new dataset in TrueNas
2. Go to Datasets -> Click on Add Dataset
3. Give it a name you like
4. Leave the Dataset Preset to Generi
5. Create the dataset ;)
6. Once that is done we click on the dataset and we need to change its permissions
7. Edit the permissions and make sure that the User 1000 has the read write and Execute permissions on both the User and Group section. Leave all the other boxes for Other unchecked.
8. Sweet! Then finally we will make an NFS share that our Arr Stack will utilize to download and store content on.
10. Then give it a name and choose the dataset for your Arr Stack.
11. For now you can leave the networks and hosts as it is. We can later restrict it by only allowing the Arr stack access to it but that's for later.
12. Cheers!! you made the Arr Stack NFS share !
Awesome, Let's now look at the folder structure ;)
04. Folder Structure
It's good practice to give all containers the same access to the same root directory or share. This is why all containers in the compose file have the bind volume mount /data:/data. It makes everything easier, plus passing in two volumes such as the commonly suggested /tv, /movies, and /downloads makes them look like two different file systems, even if they are a single file system outside the container. See my current setup below.
data
├── books
├── downloads
│   ├── qbittorrent
│   │   ├── completed
│   │   ├── incomplete
│   │   └── torrents
│   └── nzbget
│       ├── completed
│       ├── intermediate
│       ├── nzb
│       ├── queue
│       └── tmp
├── movies
├── music
├── shows
└── youtube
1. Now, to implement this we will move into our NFS share inside our VM and create the above folder structure with the command
mkdir -p downloads/qbittorrent/{completed,incomplete,torrents} && mkdir -p downloads/nzbget/{completed,intermediate,nzb,queue,tmp}2. Perfect! You can check with "ls" if the folder structure was actually created correctly.
3. Now, to get the permissions right we need to move back into TrueNas to have the ownership of the folders recursively owned by user 1000 and group 1000.
4. Go to TrueNas -> Datasets -> DATASET_NAME -> Click on Permissions
5. In here make sure that the 6 top blocks are all set and that you check the boxes
- Apply User
- Apply Group
- Apply permissions recursively.
6. Then accept the Warning and save the permission. Sweet! now you are ready to start setting up the docker compose file and can be sure that all the containers have the proper permissions to all the folders.
05. Creating the Docker Compose file
Now, that the NFS share and folder structure is created and added to the Virtual machine with /etc/fstab we can start creating the docker compose file and its environment ".env" file. It must be said that this docker compose file is basically a copy paste from the compose file created by home lab teacher Techhut. You can find his compose file here. In this docker page I will first explain all the different components and what they do. However, you can also directly copy and paste docker compose and environment file if you want of course.
Docker Compose File
networks:
  servarrnetwork:
    name: servarrnetwork
    ipam:
      config:
        - subnet: 172.39.0.0/24
services:
  gluetun:
    image: qmcgaw/gluetun
    container_name: gluetun
    cap_add:
      - NET_ADMIN
    devices:
      - /dev/net/tun:/dev/net/tun # If running on an LXC see readme for more info.
    networks:
      servarrnetwork:
        ipv4_address: ${SET_IP_GLUETUN}
    ports:
      - 8080:8080 # qbittorrent web interface
      - 6881:6881 # qbittorrent torrent port
      - 6789:6789 # nzbget
      - 9696:9696 # prowlarr
      - 8191:8191 # flaresolverr
    volumes:
      - ./gluetun:/gluetun
    # Make a '.env' file in the same directory.
    env_file:
      - .env
    healthcheck:
      test: ping -c 1 www.google.com || exit 1
      interval: 20s
      timeout: 10s
      retries: 5
    restart: unless-stopped
  qbittorrent:
    image: lscr.io/linuxserver/qbittorrent:latest
    container_name: qbittorrent
    restart: unless-stopped
    labels:
      - deunhealth.restart.on.unhealthy=true
    environment:
      - PUID=${PUID}
      - PGID=${PGID}
      - TZ=${TZ}
      - WEBUI_PORT=8080 # must match "qbittorrent web interface" port number in gluetun's service above
      - TORRENTING_PORT=${FIREWALL_VPN_INPUT_PORTS} # airvpn forwarded port, pulled from .env
    volumes:
      - ./qbittorrent:/config
      - ${ROOT_DIR}:/data
    depends_on:
      gluetun:
        condition: service_healthy
        restart: true
    network_mode: service:gluetun
    healthcheck:
      test: ping -c 1 www.google.com || exit 1
      interval: 60s
      retries: 3
      start_period: 20s
      timeout: 10s
  # See the 'qBittorrent Stalls with VPN Timeout' section for more information.
  deunhealth:
    image: qmcgaw/deunhealth
    container_name: deunhealth
    network_mode: none
    environment:
      - LOG_LEVEL=info
      - HEALTH_SERVER_ADDRESS=127.0.0.1:9999
      - TZ=${TZ}
    restart: always
    volumes:
      - /var/run/docker.sock:/var/run/docker.sock
  nzbget:
    image: lscr.io/linuxserver/nzbget:latest
    container_name: nzbget
    environment:
      - PUID=${PUID}
      - PGID=${PGID}
      - TZ=${TZ}
    volumes:
      - /etc/localtime:/etc/localtime:ro
      - ./nzbget:/config
      - ${ROOT_DIR}:/data
    depends_on:
      gluetun:
        condition: service_healthy
        restart: true
    restart: unless-stopped
    network_mode: service:gluetun
  prowlarr:
    image: lscr.io/linuxserver/prowlarr:latest
    container_name: prowlarr
    environment:
      - PUID=${PUID}
      - PGID=${PGID}
      - TZ=${TZ}
    volumes:
      - /etc/localtime:/etc/localtime:ro
      - ./prowlarr:/config
    restart: unless-stopped
    depends_on:
      gluetun:
        condition: service_healthy
        restart: true
    network_mode: service:gluetun
  flaresolverr:
    image: ghcr.io/flaresolverr/flaresolverr:latest
    container_name: flaresolverr
    environment:
      - LOG_LEVEL=${LOG_LEVEL:-info}
      - LOG_HTML=${LOG_HTML:-false}
      - CAPTCHA_SOLVER=${CAPTCHA_SOLVER:-none}
      - TZ=${TZ}
    depends_on:
      gluetun:
        condition: service_healthy
        restart: true
    network_mode: service:gluetun
    restart: unless-stopped
  sonarr:
    image: lscr.io/linuxserver/sonarr:latest
    container_name: sonarr
    restart: unless-stopped
    environment:
      - PUID=${PUID}
      - PGID=${PGID}
      - TZ=${TZ}
    volumes:
      - /etc/localtime:/etc/localtime:ro
      - ./sonarr:/config
      - ${ROOT_DIR}:/data
    ports:
      - 8989:8989
    networks:
      servarrnetwork:
        ipv4_address: ${SET_IP_SONARR}
  radarr:
    image: lscr.io/linuxserver/radarr:latest
    container_name: radarr
    restart: unless-stopped
    environment:
      - PUID=${PUID}
      - PGID=${PGID}
      - TZ=${TZ}
    volumes:
      - /etc/localtime:/etc/localtime:ro
      - ./radarr:/config
      - ${ROOT_DIR}:/data
    ports:
      - 7878:7878
    networks:
      servarrnetwork:
        ipv4_address: ${SET_IP_RADARR}
  lidarr:
    container_name: lidarr
    image: lscr.io/linuxserver/lidarr:latest
    restart: unless-stopped
    volumes:
      - /etc/localtime:/etc/localtime:ro
      - ./lidarr:/config
      - ${ROOT_DIR}:/data
    environment:
      - PUID=${PUID}
      - PGID=${PGID}
      - TZ=${TZ}
    ports:
      - 8686:8686
    networks:
      servarrnetwork:
        ipv4_address: ${SET_IP_LIDARR}
  bazarr:
    image: lscr.io/linuxserver/bazarr:latest
    container_name: bazarr
    restart: unless-stopped
    environment:
      - PUID=${PUID}
      - PGID=${PGID}
      - TZ=${TZ}
    volumes:
      - /etc/localtime:/etc/localtime:ro
      - ./bazarr:/config
      - ${ROOT_DIR}:/data
    ports:
      - 6767:6767
    networks:
      servarrnetwork:
        ipv4_address: ${SET_IP_BAZARR}
  seerr:
    container_name: seerr
    image: ghcr.io/seerr-team/seerr:latest
    environment:
      - LOG_LEVEL=debug
      - PUID=${PUID}
      - PGID=${PGID}
      - TZ=${TZ}
    healthcheck:
      test: wget --no-verbose --tries=1 --spider http://localhost:5055/api/v1/status
        || exit 1
      start_period: 20s
      timeout: 3s
      interval: 15s
      retries: 3
    restart: unless-stopped
    volumes:
      - ./seerr:/app/config
    ports:
      - 5055:5055
    networks:
      servarrnetwork:
        ipv4_address: ${SET_IP_SEERR}
  # jellystat-db:
  #   image: postgres:18.1
  #   container_name: jellystat-db
  #   restart: unless-stopped
  #   shm_size: '1gb'
  #   environment:
  #     - POSTGRES_USER=${JELLYSTAT_POSTGRES_USER}
  #     - POSTGRES_PASSWORD=${JELLYSTAT_POSTGRES_PASSWORD}
  #   volumes:
  #     - ./jellystat/postgres-data:/var/lib/postgresql/data
  #   healthcheck:
  #     test: ["CMD-SHELL", "pg_isready --dbname=postgres --username=${JELLYSTAT_POSTGRES_USER}"]
  #     interval: 10s
  #     timeout: 5s
  #     retries: 5
  #   networks:
  #     servarrnetwork:
  #       ipv4_address: ${SET_IP_JELLYSTAT_DB}
  #
  # jellystat:
  #   image: cyfershepard/jellystat:latest
  #   container_name: jellystat
  #   restart: unless-stopped
  #   environment:
  #     - POSTGRES_USER=${JELLYSTAT_POSTGRES_USER}
  #     - POSTGRES_PASSWORD=${JELLYSTAT_POSTGRES_PASSWORD}
  #     - POSTGRES_IP=jellystat-db
  #     - POSTGRES_PORT=5432
  #     - JWT_SECRET=${JELLYSTAT_JWT_SECRET}
  #     - TZ=${TZ}
  #   volumes:
  #     - ./jellystat/backup-data:/app/backend/backup-data
  #   ports:
  #     - 3000:3000
  #   depends_on:
  #     jellystat-db:
  #       condition: service_healthy
  #   healthcheck:
  #     test: wget --no-verbose --tries=1 --spider http://localhost:3000/auth/isConfigured || exit 1
  #     interval: 60s
  #     timeout: 30s
  #     retries: 5
  #     start_period: 30s
  #   networks:
  #     servarrnetwork:
  #       ipv4_address: ${SET_IP_JELLYSTAT}
Environment Variables
# General UID/GID and Timezone
TZ=America/Los_Angeles
PUID=1000
PGID=1000

# Input your VPN provider and type here
VPN_SERVICE_PROVIDER=airvpn
VPN_TYPE=wireguard

# Mandatory, airvpn forwarded port
FIREWALL_VPN_INPUT_PORTS=port

# Copy all these variables from your generated configuration file
WIREGUARD_PUBLIC_KEY=key
WIREGUARD_PRIVATE_KEY=key
WIREGUARD_PRESHARED_KEY=key
WIREGUARD_ADDRESSES=ip

# Optional location variables, comma separated list, no spaces after commas, make sure it matches the config you created
# NOTE: These can cause connection failures with some providers. Remove or comment out if Gluetun won't connect.
#SERVER_COUNTRIES=country
#SERVER_CITIES=city

# Health check duration
HEALTH_VPN_DURATION_INITIAL=120s

# Static IPs for services on servarrnetwork
SET_IP_GLUETUN=172.39.0.2
SET_IP_SONARR=172.39.0.3
SET_IP_RADARR=172.39.0.4
SET_IP_LIDARR=172.39.0.5
SET_IP_BAZARR=172.39.0.6
SET_IP_SEERR=172.39.0.7
SET_IP_JELLYSTAT_DB=172.39.0.8
SET_IP_JELLYSTAT=172.39.0.9

# Jellystat (uncomment service block in compose.yaml to enable)
JELLYSTAT_POSTGRES_USER=postgres
JELLYSTAT_POSTGRES_PASSWORD=changeme
JELLYSTAT_JWT_SECRET=changeme
Network
- First of all an internal docker network is created called "servarrnetwork"
- Then we give this network as well a subnet in a /24. This can be any private subnet you please since it is only internal
Gluetun
So what does this docker compose file represent ? What is the workflow here ?
06. qBittorent
In this section we will setup our qBittorrent downloading client.
1. First get your temporary password that is provided to login which you can find in the logs. Use the command
sudo docker logs qbittorrentExample output
[migrations] started
[migrations] no migrations found
───────────────────────────────────────
██╗ ███████╗██╗ ██████╗
██║ ██╔════╝██║██╔═══██╗
██║ ███████╗██║██║ ██║
██║ ╚════██║██║██║ ██║
███████╗███████║██║╚██████╔╝
╚══════╝╚══════╝╚═╝ ╚═════╝
Brought to you by linuxserver.io
───────────────────────────────────────
To support LSIO projects visit:
https://www.linuxserver.io/donate/
───────────────────────────────────────
GID/UID
───────────────────────────────────────
User UID: 1000
User GID: 1000
───────────────────────────────────────
Linuxserver.io version: 5.2.1_v2.0.13-ls460
Build-date: 2026-06-08T23:02:32+00:00
───────────────────────────────────────
[custom-init] No custom files found, skipping...
WebUI will be started shortly after internal preparations. Please wait...
******** Information ********
To control qBittorrent, access the WebUI at: http://localhost:8080
The WebUI administrator username is: admin
The WebUI administrator password was not set. A temporary password is provided for this session: yfUHUIHFX
You should set your own password in program preferences.
Connection to localhost (::1) 8080 port [tcp/http-alt] succeeded!
2. Then go to IP address:8080 and login with "admin" and your temporary password
3. Once logged in you can change your password and username by going to Settings > WebUI
4.
5. What's next is setting up the directory scheme for the torrent files
6. Go to Settings > Downloads
7. Then Look for
Default save path: /data/torrents/completed
Keep incomplete torrents in: /data/torrents/incomplete
Copy torrent files to: /data/torrents/torrents
8. Congratz now your qBittorent client is all set
07. NZBGet
For a Usenet downloading client we choose NZBget. Yes this is not the only one out there but it is leightweight and efficient. If your container is up and running you can find your NZB instance at
IP address VM:6789
- Now, the first time that you will login you will need the standard login credentials which are
Default credentials:
Username: nzbget
Password: tegbzn6789
- As with any platform we first change the user credentials. Go to Settings > Security > Change username and Password
Download Folders
- Next we will setup up the download folders nzbget will use for its downloads. We already configured them in our folder structure so that will be a piece of cake
- For this go to Settings > Paths
In here we will specify
Main Dir: /data/usenet/
DestDir: /data/usenet/completed
InterDir: /data/usenet/incompleted
- This is again according to the Trash Guide folder structure we created in the beginning. If you then hit Save and Apply it should give you no errors. If nzbget cannot reach the folders for writing permissions or they don't exist then it will tell you with a red banner.
News-Server
- Now, we will setup our new server. It is up to you which news server you choose however regardless you will need 3 items. Your username, password and the host URL. If you have obtained these credentials by login in to you news reader then you can go to Settings > News-Server
- Fill in a name for the News-server
- Fill in the username
- Fill in the password
- Fill in the host URL
- By hitting save and apply everything should be good if you did not receive any errors.
- Aweseom then your downloading clients are set and we can move on
Categories
Now, we have created the folders movies, tv, books and music inside the completed usenet folder. We now need to tell nzbget about these locations through the means of categories.
- Go to Settings > Categories
- Add the Categories movies, tv, books and music. Make sure it is all in lower case ;)
NZBGET Health
Health
A decreasing health for a movie in NZBGet typically indicates that the files are becoming less available or are missing parts, making it difficult to download them successfully. This can happen due to content takedowns or the age of the files, leading to failed downloads
Extraction
Files need to be extracted from .rar archives in NZBGet because they are compressed to save space and facilitate faster downloads. Extracting them allows you to access the original files contained within the archive
08. Radarr
1. Create Account
Now, that we have setup our Download clients i.e qBittorent and NZBGet we will configure Radarr, Sonarr, Lidarr, Bazaarr. However, we will only demonstrate one of the 4 since the configuration is exactly the same
- Go to your Radarr's IP address :7878
- Once, there you will start making an account. For this you can again use Bitwarden to create random login credentials for your instance
2. Media Management
- in this step we will assign the folders in which the radarr files will reside
- Go to Settings > Media Management > Add root folder
- Here you will choose the movie folder you have created in your docker compose file. If you follow this guide this would be at /data/media/Movies
- Congratulations, now you have told Radarr where to store all the movies.
3. Downloading Clients
Now we will connect the downloading clients qBittorent and nzbget to Radarr for it to use.
- Go to Settings > Downloading Clients > + add
- Select qBittorent and fill in the credentials of your qBittorent downloading client
- Once done, add another client but this time choose for nzbget.
- Also fill in here the credentials of your nzbget client with the category movies
- Awesome you are all set !
4. Indexers
The final thing we need to setup for our Radarr instance are indexers. However, we will use Prowlarr for this as a centralised indexer for all ARR apps. The only thing we need for Prowlarr to
connect to Radarr is it's API key.
- Go to Settings > General
- Copy paste the API key
09. Sonarr
1. Create Account
For Sonarr it will be quite similar as for Radarr
- Go to your Radarr's IP address:8989
- Once, there you will start making an account. For this you can again use Bitwarden to create random login credentials for your instance
2. Media Management
- in this step we will assign the folders in which the radarr files will reside
- Go to Settings > Media Management > Add root folder
- Here you will choose the movie folder you have created in your docker compose file. If you follow this guide this would be at /data/media/tvshows
- Congratulations, now you have told Radarr where to store all the movies.
3. Downloading Clients
Now we will connect the downloading clients qBittorent and nzbget to Radarr for it to use.
- Go to Settings > Downloading Clients > + add
- Select qBittorent and fill in the credentials of your qBittorent downloading client
- Once done, add another client but this time choose for nzbget.
- Also fill in here the credentials of your nzbget client with the category "tv"
- Awesome you are all set !
4. Indexers
The final thing we need to setup for our Radarr instance are indexers. However, we will use Prowlarr for this as a centralised indexer for all ARR apps. The only thing we need for Prowlarr to
connect to Radarr is it's API key.
- Go to Settings > General
- Copy paste the API key
10. Prowlarr
So Prowlarr is an indexer manager and proxy that integrates with various PVR (Personal Video Recorder) applications, allowing users to manage both Torrent Trackers and Usenet Indexers seamlessly. It works with applications like Radarr, Sonarr, and Lidarr to automate the process of finding and downloading media content. In other words it basically tells all the other ARR applications about the indexers that are available to use to find media content.
Prowlarr Apps
- Go to Radarr and obtain its API key at Settings > General > API key
- Then open up Prowlarr at VMIP:9696
- Go to Settings > Apps > + Icon
- Then make sure you fill in the subnet IP you created for the servarrnetwork. For instance if your servarrnetwork is 172.44.0.1/24 then your subnet IP will be 172.44.0.1
Prowlar Indexers
Setting up the nzbgeek indexer in Prowlarr
11. Profillar
The next ARR app we will install is profillar. This one, is just really important since it allow you to filter what type and size of content you want all don automatically. If you don't have that much storage space you would not want to download 4K content all the time for instance. On top of that it is hard to see the difference between 4K and 1080p anwyays, even 720p does well on smaller screens. Personally I download everything in 1080p or 720p if I don't care about it to much. The 4K is really not visible on my TV anyways. It gives you just great control over your quality and storage space you have access to.
- Go to VMIP:6868
- Create an account
- The first thing we will do just as with Prowlarr is connect it to Radarr and Sonarr.
- Grab your API keys from both apps again
- Go to Settings > External Apps > Add Radar and then add Sonarr. The IP address for both Sonarr and Radarr is your VMIP
Quality Profiles
- After this we need to add a quality profile repository to our profillar app. There are many different repositories but the one that seems used most often is the following
https://github.com/Dictionarry-Hub/database - Then go to
Media Management
- Go back to Radarr and Sonarr
- Go to General > Media Management > Click on Advanced in the left top corner
- Then scroll down to Propers and Repacks and select "DO NOT PREFER"
12. Seerr
13. Bazaarr
Jellyfin Clients
🌎 Browser-Based
| Name | OSS | Free | Paid | Downloads |
|---|---|---|---|---|
ampcast ⚒️ 🎵 |
✅ | ✅ | ❎ |  |
Aperture ⚒️ |
✅ | ✅ | ❎ |  |
Feishin ⚒️ 🎵 |
✅ | ✅ | ❎ |  |
| Finetic | ✅ | ✅ | ❎ |  |
| Fladder | ✅ | ✅ | ❎ |    |
Jelly Music App 🎵 |
✅ | ✅ | ❎ |  |
Jellyfin Vue 🔹 ⚒️ |
✅ | ✅ | ❎ |   |
Jellyfin Web 🔹 |
✅ | ✅ | ❎ |  |
| Jellyflix | ✅ | ✅ | ❎ |   |
| Moonfin | ✅ | ✅ | ❎ |    |
| Pelagica | ✅ | ✅ | ❎ |  |
Preserve ⚒️ 🎵 |
✅ | ✅ | ❎ |  |
Shadfin ⚒️ |
✅ | ✅ | ❎ |  |
sonixd ⚒️ 🎵 |
✅ | ✅ | ❎ |  |
💻 Desktop
Windows
| Name | OSS | Free | Paid | Downloads |
|---|---|---|---|---|
ampcast ⚒️ 🎵 |
✅ | ✅ | ❎ | |
Blink ⚒️ |
✅ | ✅ | ❎ |  |
Bloodin ⚒️ |
✅ | ✅ | ❎ | |
Feishin ⚒️ 🎵 |
✅ | ✅ | ❎ | |
| Fladder | ✅ | ✅ | ❎ | |
FluentFin ⚒️ |
✅ | ✅ | ❎ |  |
Foxy 🎵 |
✅ | ✅ | ❎ |  |
| Hills | ❌ | ✅ | ☑️ |  |
| iPlay | ✅ | ✅ | ❎ |   |
Jelly Music App 🎵 |
✅ | ✅ | ❎ | |
Jellyamp 🎵 |
✅ | ✅ | ❎ |  |
Jellyfin Media Player 🔹 |
✅ | ✅ | ❎ |   |
Jellyfin MPV Shim 🔹 |
✅ | ✅ | ❎ |   |
| Jellyflix | ✅ | ✅ | ❎ | |
| Moonfin | ✅ | ✅ | ❎ | |
| Playtorrio | ✅ | ✅ | ❎ |  |
Preserve ⚒️ 🎵 |
✅ | ✅ | ❎ | |
| Rodel Player | ❌ | ✅ | ❎ | |
Sonixd ⚒️ 🎵 |
✅ | ✅ | ❎ | |
Supersonic ⚒️ 🎵 |
✅ | ✅ | ❎ |   |
Switchfin ⚒️ |
✅ | ✅ | ❎ |  |
Tauon Music Box 🎵 |
✅ | ✅ | ❎ |   |
tsukimi ⚒️ |
✅ | ✅ | ❎ |  |
macOS
| Name | OSS | Free | Paid | Downloads |
|---|---|---|---|---|
ampcast ⚒️ 🎵 |
✅ | ✅ | ❎ | |
Blink ⚒️ |
✅ | ✅ | ❎ | |
Bloodin ⚒️ |
✅ | ✅ | ❎ | |
Coppelia ⚒️ 🎵 |
✅ | ✅ | ❎ |  |
Dee Jellie 🎵 |
❌ | ❌ | ☑️ | |
Discrete 🎵 |
❌ | ✅ | ☑️ | |
Feishin ⚒️ 🎵 |
✅ | ✅ | ❎ | |
Finer 🎵 |
❌ | ✅ | ❎ | |
| Fladder | ✅ | ✅ | ❎ | |
Foxy 🎵 |
✅ | ✅ | ❎ | |
| HamHub | ❌ | ✅ | ❎ | |
| Infuse | ❌ | ✅ | ☑️ | |
| iPlay | ✅ | ✅ | ❎ | |
Jelly Music App 🎵 |
✅ | ✅ | ❎ | |
Jellyfin Media Player 🔹 |
✅ | ✅ | ❎ | |
Jellyfin MPV Shim 🔹 |
✅ | ✅ | ❎ | |
| Jellyflix | ✅ | ✅ | ❎ | |
| Moonfin | ✅ | ✅ | ❎ | |
| Phyn | ❌ | ✅ | ☑️ | |
| Playtorrio | ✅ | ✅ | ❎ | |
| SenPlayer | ❌ | ✅ | ☑️ | |
Sonixd ⚒️ 🎵 |
✅ | ✅ | ❎ | |
Supersonic ⚒️ 🎵 |
✅ | ✅ | ❎ | |
Switchfin ⚒️ |
✅ | ✅ | ❎ | |
| VidHub | ❌ | ✅ | ☑️ | |
Linux
| Name | OSS | Free | Paid | Downloads |
|---|---|---|---|---|
ampcast ⚒️ 🎵 |
✅ | ✅ | ❎ | |
Blink ⚒️ |
✅ | ✅ | ❎ | |
Bloodin ⚒️ |
✅ | ✅ | ❎ | |
Coppelia ⚒️ 🎵 |
✅ | ✅ | ❎ | |
Delfin ⚒️ |
✅ | ✅ | ❎ |  |
Feishin ⚒️ 🎵 |
✅ | ✅ | ❎ | |
| Fladder | ✅ | ✅ | ❎ | |
Foxy 🎵 |
✅ | ✅ | ❎ | |
Gelly ⚒️ 🎵 |
✅ | ✅ | ❎ |   |
Jelly Music App 🎵 |
✅ | ✅ | ❎ | |
Jellyamp 🎵 |
✅ | ✅ | ❎ | |
Jellyfin Media Player 🔹 |
✅ | ✅ | ❎ | |
Jellyfin MPV Shim 🔹 |
✅ | ✅ | ❎ | |
| Jellyflix | ✅ | ✅ | ❎ | |
| Moonfin | ✅ | ✅ | ❎ | |
| Playtorrio | ✅ | ✅ | ❎ | |
Preserve ⚒️ 🎵 |
✅ | ✅ | ❎ | |
Sonixd ⚒️ 🎵 |
✅ | ✅ | ❎ | |
Supersonic ⚒️ 🎵 |
✅ | ✅ | ❎ | |
Switchfin ⚒️ |
✅ | ✅ | ❎ | |
Tauon Music Box 🎵 |
✅ | ✅ | ❎ | |
tsukimi ⚒️ |
✅ | ✅ | ❎ | |
📱 Mobile
iOS
| Name | OSS | Free | Paid | Downloads |
|---|---|---|---|---|
Coppelia ⚒️ 🎵 |
✅ | ✅ | ❎ | |
Dee Jellie 🎵 |
❌ | ❌ | ☑️ | |
Discrete 🎵 |
❌ | ✅ | ☑️ | |
| Filebar | ❌ | ✅ | ☑️ | |
Finamp 🎵 |
✅ | ✅ | ❎ | |
Finer 🎵 |
❌ | ✅ | ❎ | |
Fintunes 🎵 |
✅ | ✅ | ❎ |   |
| Fladder | ✅ | ✅ | ❎ | |
| HamHub | ❌ | ✅ | ❎ | |
| Infuse | ❌ | ✅ | ☑️ | |
| iPlay | ✅ | ✅ | ❎ | |
Jellify 🎵 |
✅ | ✅ | ❎ |   |
JellyBook 📖 |
✅ | ✅ | ❎ |   |
Jellyfin Mobile for iOS 🔹 |
✅ | ✅ | ❎ | |
| Jellyflix | ✅ | ✅ | ❎ | |
| JellyTV | ❌ | ❌ | ☑️ | |
Manet 🎵 |
❌ | ✅ | ❎ | |
| Moonfin | ✅ | ✅ | ❎ | |
| Phyn | ❌ | ✅ | ☑️ | |
Plappa 🎵 |
✅ | ✅ | ❎ | |
| SenPlayer | ❌ | ✅ | ☑️ | |
| Streamyfin | ✅ | ✅ | ❎ |  |
| Sunkfin | ✅ | ✅ | ❎ | |
Swiftfin 🔹 ⚒️ |
✅ | ✅ | ❎ | |
| VidHub | ❌ | ✅ | ☑️ | |
| yybx | ❌ | ❌ | ☑️ | |
Android
| Name | OSS | Free | Paid | Downloads |
|---|---|---|---|---|
AFinity ⚒️ |
✅ | ✅ | ❎ |  |
| AfuseKt | ❌ | ✅ | ☑️ |  |
Coppelia ⚒️ 🎵 |
✅ | ✅ | ❎ | |
Finamp 🎵 |
✅ | ✅ | ❎ | |
Findroid ⚒️ |
✅ | ✅ | ❎ | |
Fintunes 🎵 |
✅ | ✅ | ❎ | |
| Fladder | ✅ | ✅ | ❎ | |
Gelli 🎵 |
✅ | ✅ | ❎ |  |
| Ghosten-Player | ✅ | ✅ | ❎ |  |
| Hills | ❌ | ✅ | ☑️ | |
Jellify 🎵 |
✅ | ✅ | ❎ | |
JellyBook 📖 |
✅ | ✅ | ❎ | |
| JellyCine | ✅ | ✅ | ❎ |  |
Jellyfin for Android 🔹 |
✅ | ✅ | ❎ | |
| Jellyflix | ✅ | ✅ | ❎ | |
| Moonfin | ✅ | ✅ | ❎ | |
| Phyn | ❌ | ✅ | ☑️ | |
| Playtorrio | ✅ | ✅ | ❎ | |
| Reefin | ❌ | ❌ | ❎ |  |
| Streamyfin | ✅ | ✅ | ❎ | |
Symfonium ⚒️ 🎵 |
❌ | ❌ | ☑️ | |
| VidHub | ❌ | ✅ | ☑️ | |
Void ⚒️ |
✅ | ✅ | ❎ |   |
| Yamby | ❌ | ✅ | ☑️ | |
Sailfish OS
| Name | OSS | Free | Paid | Downloads |
|---|---|---|---|---|
| Sailfin | ✅ | ✅ | ❎ |  |
HarmonyOS
| Name | OSS | Free | Paid | Downloads |
|---|---|---|---|---|
FinMusic 🎵 |
✅ | ✅ | ❎ |   |
| FinVideo | ✅ | ✅ | ❎ |  |
Nintendo Switch
| Name | OSS | Free | Paid | Downloads |
|---|---|---|---|---|
Switchfin ⚒️ |
✅ | ✅ | ❎ | |
📺 TV
Apple TV
| Name | OSS | Free | Paid | Downloads |
|---|---|---|---|---|
Dee Jellie 🎵 |
❌ | ❌ | ☑️ | |
| Filebar | ❌ | ✅ | ☑️ | |
| HamHub | ❌ | ✅ | ❎ | |
| Infuse | ❌ | ✅ | ☑️ | |
| JellySee | ❌ | ❌ | ☑️ | |
| Mediora | ✅ | ✅ | ❎ | |
| Moonfin | ✅ | ✅ | ❎ | |
| MrMC | ✅ | ✅ | ☑️ | |
| SenPlayer | ❌ | ✅ | ☑️ | |
Swiftfin 🔹 ⚒️ |
✅ | ✅ | ❎ | |
| VidHub | ❌ | ✅ | ☑️ | |
| yybx | ❌ | ❌ | ☑️ | |
Android TV
| Name | OSS | Free | Paid | Downloads |
|---|---|---|---|---|
| AfuseKt TV | ❌ | ❌ | ☑️ |  |
DUNE ⚒️ |
✅ | ✅ | ❎ |  |
| Elefin | ✅ | ✅ | ❎ |  |
| Fladder | ✅ | ✅ | ❎ | |
| Ghosten-Player | ✅ | ✅ | ❎ | |
Jellyfin for Android TV 🔹 |
✅ | ✅ | ❎ | |
| Moonfin | ✅ | ✅ | ❎ | |
| Reefin | ❌ | ❌ | ❎ | |
| VidHub | ❌ | ✅ | ☑️ | |
Void ⚒️ |
✅ | ✅ | ❎ | |
| Wholphin | ✅ | ✅ | ❎ |  |
| Yamby | ❌ | ✅ | ☑️ | |
Kodi
| Name | OSS | Free | Paid | Downloads |
|---|---|---|---|---|
JellyCon 🔹 |
✅ | ✅ | ❎ |  |
Jellyfin for Kodi 🔹 |
✅ | ✅ | ❎ |  |
Roku
| Name | OSS | Free | Paid | Downloads |
|---|---|---|---|---|
Jellyfin for Roku 🔹 |
✅ | ✅ | ❎ |  |
| JellyRock | ✅ | ✅ | ❎ |  |
| Moonfin | ✅ | ✅ | ❎ | |
Tizen
| Name | OSS | Free | Paid | Downloads |
|---|---|---|---|---|
Jellyfin for Tizen 🔹 |
✅ | ✅ | ❎ | Build It Yourself |
| Litefin | ✅ | ✅ | ❎ |  |
| Moonfin | ✅ | ✅ | ❎ | |
webOS
| Name | OSS | Free | Paid | Downloads |
|---|---|---|---|---|
Breezyfin ⚒️ |
✅ | ✅ | ❎ |  |
Jellyfin for WebOS 🔹 |
✅ | ✅ | ❎ |  |
| Litefin | ✅ | ✅ | ❎ | |
| Moonfin | ✅ | ✅ | ❎ | |
By Type
🎵 Music Client
| Name | OSS | Free | Paid | Downloads |
|---|---|---|---|---|
ampcast ⚒️ 🎵 |
✅ | ✅ | ❎ | |
Coppelia ⚒️ 🎵 |
✅ | ✅ | ❎ | |
Dee Jellie 🎵 |
❌ | ❌ | ☑️ | |
Discrete 🎵 |
❌ | ✅ | ☑️ | |
Feishin ⚒️ 🎵 |
✅ | ✅ | ❎ | |
Finamp 🎵 |
✅ | ✅ | ❎ | |
Finer 🎵 |
❌ | ✅ | ❎ | |
FinMusic 🎵 |
✅ | ✅ | ❎ | |
Fintunes 🎵 |
✅ | ✅ | ❎ | |
Foxy 🎵 |
✅ | ✅ | ❎ | |
Gelli 🎵 |
✅ | ✅ | ❎ | |
Gelly ⚒️ 🎵 |
✅ | ✅ | ❎ | |
Jellify 🎵 |
✅ | ✅ | ❎ | |
Jelly Music App 🎵 |
✅ | ✅ | ❎ | |
Jellyamp 🎵 |
✅ | ✅ | ❎ | |
Manet 🎵 |
❌ | ✅ | ❎ | |
Plappa 🎵 |
✅ | ✅ | ❎ | |
Preserve ⚒️ 🎵 |
✅ | ✅ | ❎ | |
Sonixd ⚒️ 🎵 |
✅ | ✅ | ❎ | |
sonixd ⚒️ 🎵 |
✅ | ✅ | ❎ | |
Supersonic ⚒️ 🎵 |
✅ | ✅ | ❎ | |
Symfonium ⚒️ 🎵 |
❌ | ❌ | ☑️ | |
Tauon Music Box 🎵 |
✅ | ✅ | ❎ | |
📖 Reader
| Name | OSS | Free | Paid | Downloads |
|---|---|---|---|---|
JellyBook 📖 |
✅ | ✅ | ❎ | |
- Official
🔹 - Beta
⚒️ - Music Client
🎵 - Reader
📖
[!NOTE] Please note that this Markdown file is automatically generated from the
clients.yamlfile. Contributions should only be made by updating theclients.yamlfile. Any updates to the.yamlfile will result in this Markdown file being re-generated to reflect those changes.
14. Jellyfin Themes
List of Jellyfin Themes'
ElegantFin: https://lscambo13.github.io/ElegantFin/
CSS:
@import url("https://cdn.jsdelivr.net/gh/lscambo13/ElegantFin@main/Theme/ElegantFin-jellyfin-theme-build-latest-minified.css");15. Jellyfin Plugins

A List of Awesome Jellyfin Themes and Plugins
[ Plugins • Companion Apps & Tools • Guides • Snippets • Related • Contribute ]
🖌️ ThemesBrowse the collection of community themes |
📺 ClientsBrowse available clients for all platforms |
|---|
🧩 Plugins
🎨 UI & Customization
- HoverTrailer - Displays movie trailers on hover.
- InPlayerEpisodePreview - Adds an episode list to the video player.
- jellyfin-editors-choice-plugin - Adds a Netflix-style, full-width content slider to the home page to feature selected content.
- Jellyfin-Enhanced - Adds keyboard shortcuts, subtitle styling, TMDB reviews, Jellyseerr search and request integration, and other improvements to Jellyfin.
- jellyfin-icon-metadata - Adds metadata provider icons to Jellyfin.
- Jellyfin-JavaScript-Injector - Injects custom JavaScript into the Jellyfin UI without modifying index.html.
- Jellyfin-MonWUI-Plugin - UI enhancement toolkit for Jellyfin providing customizable sliders, hover trailers, a music player, notifications, and other interface modules.
- Jellyfin.Plugin.ActorPlus - Adds additional details and hoverable filmography to actor portraits and displays actor lists when hovering over movie or series posters.
- jellyfin-plugin-collection-sections - Adds additional sections to
jellyfin-plugin-home-sectionsfor collections and playlists. - jellyfin-plugin-custom-tabs - Adds personalized tabs in jellyfin-web for quick access to custom content.
- jellyfin-plugin-GetAvatar - Allows users to choose an avatar from a collection of images.
- jellyfin-plugin-home-sections - Allows users to customize the jellyfin-web home screen with dynamic sections like "Because You Watched" and "Latest Movies".
- jellyfin-plugin-media-bar - A Featured Content Bar to showcase your media collection.
- jellyfin-plugin-pages - Enables other plugins to create custom Jellyfin pages that match the native UI.
- jellyfin-plugin-ratings - Adds user ratings, card overlays, media requests, deletion workflows, chat, and new media notifications to Jellyfin.
- jellyfin-plugin-skin-manager - Helps you to download and install skins.
- Jellyfin-Seasonals - Collections of seasonal themes and animations for Jellyfin.
- jellyscrub - Smooth mouse-over video scrubbing previews.
🔸 Stale- NOTE: Jellyfin 10.9 now natively supports trickplay.
- Static Assets - Upload and serve static assets such as CSS, JavaScript, and images directly from Jellyfin.
🔸 Stale
📂 Collections & Playlists
- jellyfin-favorited-songs-playlist - Automatically creates and updates a "Favorited Songs" playlist containing all your favorited music tracks.
- jellyfin-plugin-auto-collections - Automatically creates and maintains dynamic collections based on flexible criteria.
- jellyfin-plugin-collection-import - Creates and sorts collections by importing from external sources like mdblist.
- jellyfin-plugin-provider-stuff - Automates tagging library items with streaming provider tags, creates collections per provider.
🔸 Stale - Jellyfin-Roulette - Adds a roulette feature that plays a random entry from a playlist.
- jellyfin-smartlists-plugin - Creates dynamic collections and playlists in Jellyfin that automatically update based on customizable rules as the library changes.
- playlist-generator - Creates personal playlists based on your listening history.
- TheDwarfsHammer - Enhanced collection management and content discovery for Jellyfin.
▶️ Playback
- intro-skipper - Fingerprint audio to automatically detect intro and outro segments in Jellyfin.
- jellyfin-plugin-cinemamode - Enables Jellyfin's Cinema Mode with local trailers and pre-rolls.
- jellyfin-plugin-discontinue-watching - Lets you remove items from the Continue Watching list without resetting watch progress, with optional auto-hide after inactivity.
- jellyfin-plugin-jellysleep - Adds sleep timer functionality to Jellyfin.
- Jellyfin.Plugin.StreamLimit - Allows limiting the number of simultaneous streams per user.
- jellyfin-transcode-nag - Nags users when they're transcoding due to unsupported formats or codecs, while allowing bitrate-based transcoding.
🔗 Integration & Sync
- Gelato - Replaces Jellyfin's default search with Stremio-powered results and can automatically import entire catalogs into your library through scheduled tasks.
- jellyfin-ani-sync - Automatically tracks and synchronizes anime watching progress between Jellyfin and Anilist and other services.
- jellyfin-plugin-animethemes - Fetches anime opening and ending themes from AnimeThemes.moe, supporting both audio and video.
- Jellyfin.Plugin.JF_To_Stash_Sync - Synchronizes viewing activity with Stash.
- jellyfin-plugin-letterboxd-sync - Automatically syncs your watched movie history with Letterboxd.
- jellyfin-plugin-listenbrainz - Automatically syncs your music activity with ListenBrainz.
- jellyfin-plugin-streamyfin - Companion plugin for Streamyfin which allows for a centralized configuration of the Streamyfin application.
- jellyfin-rpc by kennethsible - Displays your current Jellyfin activity directly on Discord.
- jellyfin-rpc by Radiicall - Displays your current Jellyfin activity directly on Discord.
- jellynext - Creates per-user virtual libraries for personalized Trakt recommendations and new seasons.
- Moonbase - Companion plugin for Moonfin clients, providing server-side settings sync, integrations, and a hosted Moonfin Web interface.
- MyAnimeSync - Automatically synchronizes anime watching progress between Jellyfin and MyAnimeList.
- Plexyfin - Automatically synchronizes artwork and collections from Plex to Jellyfin.
- Shokofin - Integrates Shoko Server with Jellyfin for anime library management.
🔔 Notifications
🔐 Authentication
- jellyfin-plugin-ldapauth - Allows the use of LDAP as an auth provider.
- jellyfin-plugin-sso - Allows users to sign in through an SSO provider.
🔹 Beta - Jellyfin Security - Natively adds TOTP and email 2FA, passkeys, OIDC/SSO sign-in, brute-force protection, IP allowlists, device pairing, trusted browsers, and audit logging to Jellyfin.
- TeleJelly - Allows users to sign in through the Telegram Login Widget.
📚 Library Management
- AniLiberty STRM Plugin - Generates AniLiberty STRM libraries for Jellyfin with metadata, intro markers, and watch-progress sync.
- Jellyfin Ignore - Ignores filename patterns on library scans.
🔹 Beta🔸 Stale - jellyfin-local-posters - Automatically matches and imports local posters using TPDb and MediUX filename formats. Also supports syncing posters from Google Drive.
- jellyfin-musictags-plugin - Automatically extracts audio file metadata and converts it into standard Jellyfin tags.
- jellyfin-plugin-air-times - Provides localized series air times based on server location.
🔸 Stale - jellyfin-plugin-enigma2 - Supports Vu+ & Enigma2 live TV streamers.
🔸 Stale - jellyfin-plugin-languageTags - Adds language tags to media based on audio tracks using FFmpeg.
- jellyfin-plugin-localrecs - Generates personalized movie and TV recommendations based on local watch history without external services required.
- jellyfin-plugin-media-cleaner - Automatically removes played media after a specified time period.
- jellyfin-plugin-MediathekViewDL - Integrates MediathekViewDL into Jellyfin and allows users to search, download, and manage content.
- jellyfin-plugin-meilisearch - Enhances Jellyfin search speed and accuracy by offloading queries to a Meilisearch instance.
- jellyfin-powertoys - A collection of plugins to enhance Jellyfin with additional features and tools.
- JellyfinTweaks - Overrides Jellyfin settings such as Enable Backdrops and Enable Theme Music across all devices.
- Jellyfin-Xtream-Library - Syncs Xtream VOD and Series content to native Jellyfin libraries via STRM files, with automatic metadata lookup and Live TV support.
- JellySTRMprobe - Probes STRM files to extract media information (codec, resolution, duration, audio) that Jellyfin skips during library scans.
- media-upload-plugin - Media-manager that provides uploads, bulk downloads from URLs, and directory browsing within Jellyfin.
🔸 Stale - quality-gate - Restrict users to specific media versions based on configurable path-based policies, useful for bandwidth management or tiered access.
- smart-covers - Cover extraction for books, audiobooks, comics, magazines, and music libraries with online fallback via Open Library & Google Books.
- whisper-subs - Automatically generates subtitles using local AI models powered by Whisper, with all processing on your server.
🏷️ Metadata Providers
- jellyfin-imdb-rating-updater - Downloads the IMDb ratings dataset daily and updates the CommunityRating field for library items with an IMDb ID without modifying other metadata.
- jellyfin-plugin-AnimeMultiSource - Aggregates anime metadata, tags, artwork, and people from multiple sources (AniList, AniDB, MAL/Jikan, TVDB, Fanart.tv) with rate limiting and persistent caching for large libraries.
- jellyfin-plugin-applemusic - Fetches album and artist metadata from Apple Music.
- Jellyfin.Plugin.ArtworkMultiSource - Combines posters and logos from TMDb and TVDB with language-aware priority and configurable sorting.
- jellyfin-plugin-hikka - Metadata and images for anime and manga from the Hikka website.
- jellyfin-plugin-kinopoisk - Metadata provider for Kinopoisk.
- Jellyfin.Plugin.MDBList_Ratings - Retrieves ratings from MDBList using TMDb IDs and integrates them into Jellyfin's rating fields, with optional UI enhancements to display ratings from multiple sources.
- jellyfin-plugin-myanimelist - Provides MyAnimeList metadata for anime.
- jellyfin-plugin-onepace - Provides metadata and cover art for the One Pace project.
- Jellyfin Plugin PhoenixAdult - Metadata provider for adult content from multiple sites.
🔸 Stale - jellyfin-plugin-shikimori - Metadata provider for shikimori.one.
- Jellyfin Plugin Stash - Metadata provider for Stash.
- Jellyfin Plugin ThePornDB - Metadata provider for ThePornDB.
- jellyfin-youtube-metadata-plugin - Provides metadata for YouTube content.
👾 Companion Apps & Tools
🖼️ Artwork & Posters
- aphrodite - Enhances media library posters with quality indicators like resolution, audio codec, and review ratings.
🔸 Stale - CoverMaker - Allows designing and generating custom cover images for your media collections.
- Jellyfin-Cover-Maker - Website for creating consistent covers and posters for Jellyfin libraries.
- Jellyfin-Image-Exporter - Exports images (posters, banners, thumbnails) from Jellyfin metadata.
- jellyfin-poster-hrd-logo - Automatically downloads covers for HDR movies from TMDb and applies an HDR logo in the top-right corner.
🔸 Stale - jellyfin_ratings - Replaces Jellyfin ratings with ratings from various sources (IMDb, Trakt, Letterboxd, and others).
- jellyfin-tools - Generates images with Jellyfin-like styling such as shadow overlays and library title text.
🔸 Stale - Jellyfin Update Poster - Batch imports cover images from ThePosterDB and MediUX, with set downloading support for MediUX.
- jellytools - CLI tool for synchronizing artwork and collections from Plex to Jellyfin and generating animated library card videos.
🔸 Stale - pixelfin - Inspects Jellyfin libraries for missing, present, or low-resolution images with export support.
- Posterizarr - Automates poster, background, and title card creation for Plex, Jellyfin, and Emby with customizable overlays.
- TitleCardMaker - Automated title card maker for Plex, Jellyfin, and Emby.
🔍 Media Requests & Discovery
- Anchorr - Discord bot for Jellyfin media requests and new content notifications.
- AudioBookRequest - Request management tool for audiobooks on Plex, Jellyfin, and Audiobookshelf.
- content-recommender - Suggests movies or TV shows from your library based on watch history.
- jellyfin-updoot - Adds thumbs-up recommendations, per-item comments, and a "recommended by users" page.
- jellyseerr - Request management and media discovery tool for Jellyfin, Plex, and Emby.
- List-Sync - Automatically import movies and TV shows from IMDB or Trakt lists into Jellyseerr.
🔹 Beta - reiverr - Combined interface for Jellyfin, TMDB, Radarr, and Sonarr.
🔹 Beta - scenepeek-android - An Android app that provides detailed movie and TV show information with TMDB and Jellyseerr integration.
- SuggestArr - Automatically request suggested movies and TV shows to Jellyseerr based on recently watched.
- swiparr - Swipe through your library, match with friends in a session, and find something everyone wants to watch.
- whatseerr - WhatsApp bot for Seerr that allows users to search and request media via WhatsApp messages.
📊 Statistics & Watch History
- jellyfin-rewind - A Spotify Wrapped-like experience for Jellyfin music listeners.
- jellyfin-watch-updater - Updates
lastPlayedDatefor watched items when clients fail to set it, enabling tools such as media cleanup plugins to correctly detect watched media. - JellyPlex-Watched - Syncs watch history between Jellyfin, Plex, and Emby Servers.
- Jellystat - Statistics and analytics dashboard for Jellyfin.
- jelly-watch-wise - Monitors and enforces Jellyfin watch time limits per user, with API integration and a simple GUI.
🔸 Stale - streamystats - Statistics service for Jellyfin, providing analytics and data visualization.
- watchstate - Syncs play state between different media servers.
👥 User Management
- Jellycord - Discord companion bot for managing JFA-GO instances.
🔸 Stale - jellyfin-telegram-channel-sync - Syncs Jellyfin user access with Telegram channel membership, automatically disabling accounts when members leave.
- jfa-go - User- / Invite-Management system for Jellyfin.
- jf-avatars - Allows users to select avatars from an image gallery.
- wizarr - Advanced user invitation and management system.
📁 Media Organization
- CineSync - Python-based library management tool for organizing debrid and local libraries without Sonarr or Radarr.
- Fixarr - Cross-platform media renaming and backup tool.
🔹 Beta - JellyCC - Command-line tool that audits, repairs and optimizes media to ensure Direct Play on Jellyfin.
- Jellyfin-Auto-Collections - A tool to automatically make and update collections based on internet lists such as IMDb and Letterboxd.
- JellyfinEasyMetadataManager - Desktop tool for managing and editing metadata in Jellyfin libraries.
- jellyfinmanager - Command-line tool for managing Jellyfin watched status with backup/restore capabilities and missing episode detection using TVDB.
- jellysweep - Automatically removes old, unwatched movies and TV shows by analyzing viewing history and user requests.
- mnamer - Customizable tool to automatically rename and organize media files.
- Multi-User Media Cleaner - Query and delete unwanted media content from your Jellyfin server.
- Squishy - Transcode and download your Jellyfin media with fully customizable presets and hardware acceleration.
💬 Subtitles
- bazarr-jellyfin - Search and download subtitles directly from Jellyfin's native subtitle UI using your Bazarr instance.
- OpenSubtitlesDownload - Automatically or manually downloads subtitles using CLI/Gnome/KDE.
- subgen - Autogenerate subtitles using OpenAI Whisper Model via Jellyfin.
🎵 Music
- AudioMuse-AI - Uses sonic analysis and AI-powered clustering to create tempo and mood-based playlists via the Jellyfin API.
- jellyfin-theme-music-manager - Web application for managing theme songs and backdrop videos for Jellyfin libraries.
- jellyplist - Utility for syncing Spotify playlists to Jellyfin.
🔹 Beta - JellyTunes - Sync your Jellyfin music library to any USB drive or SD card — with optional FLAC to MP3 conversion.
- MusicBrainz-UserScripts - One-click importing of album from Jellyfin into MusicBrainz.
- Playlifin - Converts YouTube Music playlists to Jellyfin playlists.
📥 Content Import
- calibre2jellyfin - Python script to construct a Jellyfin ebook library from a Calibre library.
- trailarr - Manages trailer downloads for your Radarr and Sonarr libraries.
- trailerfin - Automatically retrieves and creates STRM links to IMDb trailers and places them in the backdrops folder to view trailers on the details page.
- ytdlp2STRM - Streams YouTube, Twitch and more via yt-dlp to Jellyfin.
- ytdl-sub - Automates downloading and metadata generation with yt-dlp.
🔧 Server Administration
- ADRG - Dynamic Docker resource governor using cgroups v2 to throttle background tasks during media activity.
- autopulse - Lightweight automation service that updates Plex, Jellyfin, and Emby libraries based on notifications from media organizers like Sonarr and Radarr.
- autoscan - Replaces the default Plex and Emby behaviour for picking up changes on the file system.
🔸 Stale - Cloud Seeder - One-click installer and maintainer for Jellyfin on Windows, macOS, and Linux.
- declarative-jellyfin - Declarative configuration of your Jellyfin server on NixOS.
🔹 Beta - jellyfin-encoder - Docker-based automatic 720p HEVC/AV1 transcoding service for Jellyfin libraries with NVIDIA and Intel hardware acceleration.
- jellyhub - Indexes media from multiple Jellyfin servers into a single searchable hub.
- Jellyman - CLI tool for installing, managing, and updating Jellyfin on Linux.
- JellyRoller - A CLI Jellyfin Controller.
🔹 Beta - JellySearch - A fast full-text search proxy for Jellyfin using Meilisearch.
- Jellyswarrm - Reverse proxy that lets you combine multiple Jellyfin servers into one virtual instance.
- Samsung-Jellyfin-Installer - Cross-platform tool that helps you install Jellyfin on Samsung Smart TVs running Tizen OS.
- Universal Plugin Repo - Consolidates many plugin repositories to create a universal catalogue.
- xsrv.jellyfin - Ansible role to deploy and configure Jellyfin.
🧰 Miscellaneous
- embyToLocalPlayer - Lets you watch videos from Jellyfin using a local video player (like VLC and MPV) and syncs watch progress back.
- jelly-clipper - Web application for creating, sharing, and managing video clips from Jellyfin libraries.
🔹 Beta - Jellyfin Episodes Ratings Grid - Show IMDb episode ratings in a heatmap-style grid on Jellyfin series pages.
- jellyfin-mods - Collection of modifications and customizations for personalizing Jellyfin.
- Jellyfin Notification System - Sends Telegram notifications with media images whenever a new movie, series, season, or episode is added to Jellyfin.
🔸 Stale - Jellyfin Segment Editor - Manage Jellyfin Media Segment positions.
- KefinTweaks - Collection of UI enhancements and customization tweaks for Jellyfin.
- MPC-JF - Launch external media players (MPC-HC, MPC-BE, PotPlayer) from Jellyfin Web or Jellyfin Media Player.
- Scyphomote - A dedicated remote control for Jellyfin with support for playback transparency, trickplay previews, and more.
- tunarr - Create custom live TV channels from your Plex or Jellyfin library with a web UI and IPTV support.
📜 Snippets
- snippets/language-overlay - A script to add flags to movie posters.
📖 Guides
- jellyfin-on-macos - Guide for hosting Jellyfin on macOS with dynamic DNS, geo-filtering, and monitoring dashboards.
🌌 Related
This section includes software, guides and tools that are not specifically designed to work with Jellyfin, but can be useful for tasks related to media management or to enhance Jellyfin's functionality.
- Dispatcharr - Self-hosted M3U proxy with IPTV, EPG, and VOD management support.
- ErsatzTV - Stream custom live channels using your own media.
🔹 Beta - Explo - Automated music discovery tool that recommends tracks based on your listening history.
- locatarr - A list of tools used to automate the downloading and organization of media files.
- MediaTracker - Media tracker and user rating platform with Jellyfin integration.
- Movary - Media tracker and user rating platform.
🔹 Beta - Multi Scrobbler - Scrobbles music from many sources to many clients.
🔹 Beta - Quasarr - Emulates a usenet indexer and download client to allow direct downloads with sonarr/radarr.
- rffmpeg - A remote FFmpeg wrapper, commonly used for transcoding media on more capable machines.
- speedrr - Change your torrent client's upload speed dynamically, on certain events such as when a Plex/Jellyfin stream starts.
- Threadfin - M3U proxy for Jellyfin (Based on xTeVe).
- TRaSH Guides - Easy-to-understand guides for Sonarr, Radarr, and Bazarr, along with related tools.
Communities
This section contains links to communities which focus on Jellyfin or related topics.
- Jellyfin Discord - The official Jellyfin Discord server.
🔰 Official - Jellyfin Forum - The official Jellyfin forum.
🔰 Official - Jellyfin Matrix - The official Jellyfin Matrix server.
🔰 Official - r/Jellyfin - The official Jellyfin subreddit.
🔰 Official - r/JellyfinCommunity - An independent, community-run subreddit.
- JellyfinCommunity Discord - An independent, community-run Discord server.
Contribute
Contributions welcome! But please read the contribution guidelines first. You can also create a new issue.
16. Jellyfin Enhanced
Reboot: It is important that after installing Jellyfin Enhanced that you reboot the whole Jellyfin stack. Just a simple reboot from the dashboard screen won't work. Hence, go to Dockhand and reboot the whole stack, from the cli or any other docker configuration software that you are using. After the reboot you will notice that at least a random item button will appear in the right top corner
1.5.18 Cal.com
1.5.19 Kurier
1.5.20 ArchiveTune Music
Source: https://github.com/ArchiveTuneApp/ArchiveTune
This is not a self hosted app, but it is perfect to replace spotify and itunes with.
1.5.21 OpenCut
Source: https://opencut.app/roadmap
1.5.22 Sure Finance
Sure is an all-in-one personal finance platform. Track, optimize, grow, and manage your money through every stage of life.
01. What is Sure Finance ?
Track your bank accounts  , check how your stocks
  and crypto
  are doing, and monitor your everything else
  in any currency
  all in one place.
Alright! Well yeah we still live in a capitalistic world and hence our finances have a big impact on our lives and the time we can spend on open source projects ;) Hence, a great open source project called Sure can help you organizing your financial life. It basically handles all your assets in one central place. That includes values of all your assets, cash and bank accounts. This can be interestingly handy if you want to have one glass that displays everything instead of having multiple apps, accounts and dashboards you need to go through to keep track of all your finances. It can both be used for families and personal accounts but as well for small businesses.
02. Installation
Sure provides a great installation page on their website as can be found over here. However, I would like to drop the docker compose file straight away. Also note that I like to keep all the volumes inside the same folder instead of all in docker volumes. Hence, this has been changed compared to the original docker compose file. We will deploy this again nicely in Dockhand with compose and .env file that can be found below
compose.yml
x-db-env: &db_env
  POSTGRES_USER: ${POSTGRES_USER:-sure_user}
  POSTGRES_PASSWORD: ${POSTGRES_PASSWORD:-sure_password}
  POSTGRES_DB: ${POSTGRES_DB:-sure_production}

x-rails-env: &rails_env
  <<: *db_env
  SECRET_KEY_BASE: ${SECRET_KEY_BASE:-a7523c3d0ae56415046ad8abae168d71074a79534a7062258f8d1d51ac2f76d3c3bc86d86b6b0b307df30d9a6a90a2066a3fa9e67c5e6f374dbd7dd4e0778e13}
  SELF_HOSTED: "true"
  RAILS_FORCE_SSL: "false"
  RAILS_ASSUME_SSL: "false"
  DB_HOST: db
  DB_PORT: 5432
  REDIS_URL: redis://redis:6379/1
  # NOTE: enabling OpenAI will incur costs when you use AI-related features in the app (chat, rules).  Make sure you have set appropriate spend limits on your account before adding this.
#  OPENAI_ACCESS_TOKEN: ${OPENAI_ACCESS_TOKEN}

services:
  web:
    image: ghcr.io/we-promise/sure:stable
    volumes:
      - ./app-storage:/rails/storage
    ports:
      - ${PORT:-3000}:3000
      # To also publish on IPv6 (dual-stack), uncomment the line below AND
      # set BINDING=:: in the environment block. See docs/hosting/docker.md
      # "Binding to IPv6" for details.
      # - "[::]:${PORT:-3000}:3000"
    restart: unless-stopped
    environment:
      <<: *rails_env
      # BINDING: "::"  # Uncomment for IPv6 dual-stack inside the container
    depends_on:
      db:
        condition: service_healthy
      redis:
        condition: service_healthy
    dns:
      - 8.8.8.8
      - 1.1.1.1
    networks:
      - sure_net

  worker:
    image: ghcr.io/we-promise/sure:stable
    command: bundle exec sidekiq
    volumes:
      - ./app-storage:/rails/storage
    restart: unless-stopped
    depends_on:
      db:
        condition: service_healthy
      redis:
        condition: service_healthy
    dns:
      - 8.8.8.8
      - 1.1.1.1
    environment:
      <<: *rails_env
    networks:
      - sure_net

  db:
    image: postgres:16
    restart: unless-stopped
    volumes:
      - ./postgres-data:/var/lib/postgresql/data
    environment:
      <<: *db_env
    healthcheck:
      test: [ "CMD-SHELL", "pg_isready -U $$POSTGRES_USER -d $$POSTGRES_DB" ]
      interval: 5s
      timeout: 5s
      retries: 5
    networks:
      - sure_net

  backup:
    profiles:
      - backup
    image: prodrigestivill/postgres-backup-local
    restart: unless-stopped
    volumes:
      - ./backups:/backups # Change this path to your desired backup location on the host machine
    environment:
      - POSTGRES_HOST=db
      - POSTGRES_DB=${POSTGRES_DB:-sure_production}
      - POSTGRES_USER=${POSTGRES_USER:-sure_user}
      - POSTGRES_PASSWORD=${POSTGRES_PASSWORD:-sure_password} # pipelock:ignore
      - SCHEDULE=@daily # Runs once a day at midnight
      - BACKUP_KEEP_DAYS=7 # Keeps the last 7 days of backups
      - BACKUP_KEEP_WEEKS=4 # Keeps 4 weekly backups
      - BACKUP_KEEP_MONTHS=6 # Keeps 6 monthly backups
    depends_on:
      - db
    networks:
      - sure_net

  redis:
    image: redis:latest
    restart: unless-stopped
    volumes:
      - ./redis-data:/data
    healthcheck:
      test: [ "CMD", "redis-cli", "ping" ]
      interval: 5s
      timeout: 5s
      retries: 5
    networks:
      - sure_net

networks:
  sure_net:
    driver: bridge
Then finally you can set your environment variables in the .env file, for the postgres and email details. Just make sure you create again a nice secret key with the command
openssl rand -hex 64and then paste it into the .env file for the SECRET_KEY_BASE
.env
POSTGRES_USER=usernamedifficult
POSTGRES_PASSWORD=0394jgoipjeroigjoisdjgkljyourcode
POSTGRES_DB=sure_production
SECRET_KEY_BASE=a7523c3d0ae56415046ad8abae168d71074a79534a7062258f8d1d51ac2f76d3c3bc86d86b6b0b307df30d9a6a90a2066a3fa9e67c5e6f374dbd7dd4e0778e13
PORT=3000
SMTP_ADDRESS=smtp.example.com
SMTP_PORT=587
SMTP_DOMAIN=example.com
SMTP_USERNAME=your-username
SMTP_PASSWORD=your-password
SMTP_AUTHENTICATION=plain
SMTP_ENABLE_STARTTLS_AUTO=true
Note! Make sure that sure has the right writing permissions of 750 for the "sure" folder you are hosting everything in. Otherwise it cannot create a directory for your account.
Most likely you will get an error for because of sure not being able to write to the sure folder. In that case as noted above go into your folder and change the permissions and restart the sure stack.
Then you will be able to reach your sure instance at DOCKERVMIP:Port and create a user account. Now, as with any application you should give it a domain name public or not. If you don't know how to do this check the Reverse Proxy section.
Perfect! Now on the next pages we will discuss some basic settings and things you can do with it. However, just check the documentation for everything of course.
1.5.23 Open Notebook
Open Notebook is the cognitive partner you always wanted and could never explain why. It combines the power of AI with unwavering privacy controls. It's designed for researchers, students, and professionals who want to enhance their learning and abilities while maintaining complete control over workflows, models, and how their data gets used and exposed.
1. Installation
We will again use our Dockervm to deploy this application via docker. The installation instructions can be found on their Github page but here is the compose file regardless ;)
compose.yml
services:
  surrealdb:
    image: surrealdb/surrealdb:v2
    # Credentials default to root:root for a zero-config local setup. Before
    # exposing this instance to a network, set SURREAL_USER / SURREAL_PASSWORD
    # in a .env file (see .env.example) — they are applied here and to the
    # open_notebook service below, so the two always stay in sync.
    command: start --log info --user ${SURREAL_USER:-root} --pass ${SURREAL_PASSWORD:-root} rocksdb:/mydata/mydatabase.db
    user: root  # Required for bind mounts on Linux
    ports:
      - "8000:8000"
    volumes:
      - ./surreal_data:/mydata
    environment:
      - SURREAL_EXPERIMENTAL_GRAPHQL=true
    restart: always
    pull_policy: always

  open_notebook:
    image: lfnovo/open_notebook:v1-latest
    ports:
      - "8502:8502"  # Web UI
      - "5055:5055"  # REST API
    environment:
      # REQUIRED: Change this to your own secret string
      # This encrypts your API keys in the database
      - OPEN_NOTEBOOK_ENCRYPTION_KEY=change-me-to-a-secret-string

      # Database connection. SURREAL_USER / SURREAL_PASSWORD default to root:root
      # for local use; override them in a .env file before exposing the instance
      # (the same values configure the surrealdb service above).
      - SURREAL_URL=ws://surrealdb:8000/rpc
      - SURREAL_USER=${SURREAL_USER:-root}
      - SURREAL_PASSWORD=${SURREAL_PASSWORD:-root}
      - SURREAL_NAMESPACE=open_notebook
      - SURREAL_DATABASE=open_notebook
      - API_URL=http://localhost:5055
      - OPEN_NOTEBOOK_PASSWORD=${OPEN_NOTEBOOK_PASSWORD:-secure-webgui-password}
    volumes:
      - ./notebook_data:/app/data
    depends_on:
      - surrealdb
    restart: always
    pull_policy: always
Just copy and paste this in your dockhand instance as a new stack. Just makes sure you change the SURREAL_USER, SURREAL_PASSWORD and the OPEN_NOTEBOOK_PASSWORD to something more complicated than root and root. You can do this in the environment variables section in the Dockhand Stack
Then just deploy the stack and visit it at http://IP-DOCKERVM:8052
Attach Domain Name
Now, if you want to attach a domain name to your open notebook instance then you need to make a tiny addition to your docker compose file environment variables. Namely the API URL needs to match your domain name. If for instance your URL is opennotebook.example.org then the add the following line to the environment variables of the opennotebook container.
- API_URL=https://opennotebook.example.org
2. Configuration
1.5.24 Dawarich
Dawarich is a self-hostable web app designed to replace Google Timeline (aka Google Location History). It enables you to:
- Track your location history.
- Visualize your data on an interactive map.
- Create trips and analyze your travel history.
- Share your location with family members.
- Integrate with photo management apps like Immich and Photoprism to visualize geotagged photos.
- Import your location history from Google Maps Timeline, OwnTracks, GPX, GeoJSON and some other sources
- Explore statistics like the number of countries and cities visited, total distance traveled, and more!
- Share your location with family members.
Owntracks/Traccar clients
Sadly enough they all require google play services to work
1. Installation
This app is again extremely simple to install.
What is important is that you set the IP of your DockerVM and the domain name you want to use to access the Dawarich instance in the APPLICATION_HOSTS= environment variable. Otherwise you won't be able to connect to it from any other machine then local host !
1.5.25 Ente Photos
1. Ente vs Immich
Ente vs. Immich – a comparison
Both Ente and Immich are tools to manage images and videos, and both come with a self-hosting option. And even though they do the same thing in general, there are some fundamental differences in their implementation.
In this article, I explicitly compare them for self-hosting purposes and thus ignoring the cloud version of Ente explicitly. If you don’t want to self-host, Ente would be your way to go anyways.
Principles
Immich stores the files in is unencrypted form, making them still usable if the software itself breaks. Ente, on the other hand, encrypts all files. While this is generally a good thing, it makes you dependent on their implementation. And if the software breaks, it’s not that easy to get to the files. While in my case I only self-host locally, there’s no special need for an encryption for me.
Aside of that, Immich just stores the files in a directory you want it to, while Ente requires an actual S3 storage, which requires more administrative work.
This is also not a fully review between all functions of both systems. I just write about things I noticed while using them. It’s more an impression on how they behave.
Installation
Installing Immich is pretty straight forward and doesn’t really left any questions open. This is not the case for Ente and you need to understand how the particular parts of the system work together to get the system working. This is especially true for my TrueNAS Community system in this case, since Immich can be installed via a pre-defined app, while Ente needs to be installed manually.
Import
Since I wanted to import all of my photos and videos, both systems had something to do, as there are over 16.000 files to import. Immich tells me when files are excluded, but doesn’t tell me why. I assume it was because of duplicates by importing them via both on iOS and macOS.
None of the apps did it very smoothly, though. While the upload to Ente was way more faster, it also draw so much power and used so much compute resources that the iPhone was nearly unusable during this time. On macOS, it also used around 60 % CPU usage while importing.
Also, the iOS app stopped multiple times and finally crashed, often after 50 – 150 files. But sometimes, it also successfully uploaded more than 1.000 files in one try.
While not requiring that much resources in the Immich app, the upload was way slower. And it too crashed more often than it should.
In the end, in Ente it took me around 4 hours to import all the data, while Immich took me more than 24 hours.
Mobile iOS app
In short: The Ente app is superior most of the time. Syncing files in the background is faster, viewing items stored on my NAS is way faster, especially noticeable in the same Wi-Fi, where Immich sometimes behaves like it had just a slow 3G connection.
One nice thing I noticed in the Ente app (and made me worried at first, because I didn’t expect it) is that it uses the images on the device itself to display, at least if it has no connection to the server. Thus, images in the Photos app are always displayed there, even without internet connection. Immich, on the other hand, does only store thumbnails locally and doesn’t access locally stored images if there is no connection.
I also like the UI more for Ente, but essentially they are similar. Scrolling is more snappy for the Ente app, while especially faster scrolling is stuttering in the Immich app.
However, this all comes with one major drawback: Nearly everything you do in the Ente app requires very much compute resources, which is noticeable especially when viewing videos. My iPhone 13 Pro gets very hot while watching, while there’s no such problem in Immich.
My best guess is that this is to the continuous encryption and decryption operations in Ente, since the server apps always run very cool and without many resources.
Server resources
Which brings us to the server resources. Ente can run even with very small amount of resources. According to the documentation, also some embedded devices are sufficient to run it. On the other hand, Immich requires 4 GiB of RAM (recommended 6 GiB) and 2 CPU cores (4 cores recommended).
In my system, the Ente apps need around 130 – 150 MiB RAM and nearly no CPU usage while viewing a video, the S3 storage 300 – 500 MiB RAM and 1 – 3 % CPU usage. Immich uses more than 900 MiB RAM with 5 – 12 % CPU usage while viewing a video.
Immich on the other hand needs around 950 MiB RAM and also 3 % CPU usage while viewing a video.
However, if you upload files, you can see the difference between on-device handling for Ente, which does produce nearly no notable usage on the server, while Immich ramps up to using around 25 % of my AMD Ryzen 5 PRO 2400GE CPU and peaks at 1,6 GiB RAM usage.
And even though all systems are in the same Wi-Fi, a 4K clip sometimes cannot be viewed without buffering on Immich. It just doesn’t load fast enough (this seems to be improved the last weeks through updates, though). However, the comparison is not really fair, since Ente doesn’t allow you to view the raw footage as originally stored. In my case, the original video was around 145 MiB in size, while the video viewed directly in Ente was only half its size. So, there’s definitely some kind of converting taking place in Ente.
Interestingly, Immich has a file storage usage of 127 GiB, while the S3 storage of Ente consumes only 107 GiB. And in its UI, Immich tells me it stores 236 GiB.
Machine learning
Both projects use machine learning, e.g. for face recognition or searching for natural language and it works fine for both. They also get both a plus for using the correct term machine learning instead of “AI”.
Also, in Ente, machine learning is an on-device process, while Immich does it on server-side. While both should be working fine, in general, I like it more to have it on server-side (since I also own the server) to keep resource usage low on the (often mobile) device.
1.5.26 Immich
1. Installation
han
You want to use the immich release version s.t it will always update to the newest version and keep immich up to date.
100MB File size Cloudflare Tunnel Limits
Source: Cloudflare Tunnels
If you use cloudflare tunnels for your public websites then it is limited to files of 100MB or less. This is a problem of course since lots of video files are larger than 100 MB. Hence, if you use cloudlfare tunnels the files either need to be uploaded in chuncks smaller than a 100MB or you need to remove the cloudflare tunnel and expose your public IP to the internet. The former is of course the best option which can be solved by using
30 Journiv
1. Installation
Source: https://www.journiv.com/docs/installation/docker
Then go into your terminal and make sure you provide the following permissions for the journiv data folder.
mkdir -p data/app data/postgres data/valkey
sudo chown -R 1000:1000 data
sudo chmod -R 755 data
Then fill in the docker compose file
Then copy paste the .env file
Then in the .env file you should create again some secrets with
docker compose up -d
Then make sure you have your reverse proxy ready !! Because it will only load for the Domain you have set in the .env file!!
31. Tinycld
1. Installtion
31. Journal/Diary Applications
This chapter looks at different open source journal/diary applications. As usual we look both at E2EE and non E2EE versions. These applications are meant to provide you with an oversight of your thoughts, the things you did during the day, how you felt, etcetera. Also there will be apps that are local only i.e just work on your phone for instance or once that work via your server that can be accessed on multiple devices and used by multiple users. In this case it is especially necessary that your data is E2EE, since you don't want someone else reading your most personal notes. However, if you host your own server at home then you can go with some beautiful journal applications that are not E2EE.
At this moment the only E2EE encrypted open source diary apps would be Notesnook and Joplin ;) However, I would say they are more focused on being a note taking app with folders, sub folders for studying and developing. So far the best project in my opinion is Journiv that would be most focused on your personal life/diary format, but unfortunately it is not E2EE at this moment. However, if you are self hosting this obviously does not matter ;)
1. Memos
The first application that we will discuss is the Memos application
2. Journiv
Community: Discord
At this moment I use Journiv as my main diary application for my personal life. The reason I use this one is the following
- It allows me to create multiple Journals for different things. For instance a journal for Sports, Work, Relationships, Health, etcetera.
- Second it allows me to create tags. With these tags I can easily navigate how often I did or had something. For instance how often you went to the gym, had an anxiety attack, how often you took vitamine pills etcetera.
- It is a new kid on the block with lots of features planned
- It integrates with Immich, but will integrate with many other features according to their roadmap
- The only down side to it is that you won't get all the features unless you get a paid subscription. The price is not that high, but it always makes you wonder to what extend the open source app will become a commercial product and just uses open source to sell. However, this could also change over the years of course. At this moment the free version gives you enough capabilities.
- It allows you to add people to your memories as well. Hence, you can also easily click on a person in your diary and see all the notes that included these people.
3. Daily You
32. Dashboards
This chapter discusses different open source webbrowser dashboards. You could see it as the landing page of your webbrowser from which you move to your apps or the web. These dashboards are more than just a clickable link, since there are also API integrations possible.
1. Homarr
5. Dashboards
6. Collaboration
This Chapter discusses some collaboration applications i.e alternatives to slack for instance.
1. Mattermost
Source: Mattermost Docker Installation
compose.yml
# https://docs.docker.com/compose/environment-variables/
services:
  postgres:
    image: postgres:${POSTGRES_IMAGE_TAG}
    restart: ${RESTART_POLICY}
    security_opt:
      - no-new-privileges:true
    # See https://docs.mattermost.com/administration-guide/scale/scaling-for-enterprise.html
    # for guidance on memory limits based on your deployment size.
    mem_limit: 16G
    read_only: true
    tmpfs:
      - /tmp
      - /var/run/postgresql
    volumes:
      - ${POSTGRES_DATA_PATH}:/var/lib/postgresql
    environment:
      # timezone inside container
      - TZ

      # necessary Postgres options/variables
      - POSTGRES_USER
      - POSTGRES_PASSWORD
      - POSTGRES_DB

  mattermost:
    depends_on:
      - postgres
    image: mattermost/${MATTERMOST_IMAGE}:${MATTERMOST_IMAGE_TAG}
    restart: ${RESTART_POLICY}
    security_opt:
      - no-new-privileges:true
    # See https://docs.mattermost.com/administration-guide/scale/scaling-for-enterprise.html
    # for guidance on memory limits based on your deployment size.
    mem_limit: 4G
    read_only: ${MATTERMOST_CONTAINER_READONLY}
    tmpfs:
      - /tmp
    volumes:
      - ${MATTERMOST_CONFIG_PATH}:/mattermost/config:rw
      - ${MATTERMOST_DATA_PATH}:/mattermost/data:rw
      - ${MATTERMOST_LOGS_PATH}:/mattermost/logs:rw
      - ${MATTERMOST_PLUGINS_PATH}:/mattermost/plugins:rw
      - ${MATTERMOST_CLIENT_PLUGINS_PATH}:/mattermost/client/plugins:rw
      - ${MATTERMOST_BLEVE_INDEXES_PATH}:/mattermost/bleve-indexes:rw
      # When you want to use SSO with GitLab, you have to add the cert pki chain of GitLab inside Alpine
      # to avoid Token request failed: certificate signed by unknown authority
      # (link: https://github.com/mattermost/mattermost-server/issues/13059 and https://github.com/mattermost/docker/issues/34)
      # - ${GITLAB_PKI_CHAIN_PATH}:/etc/ssl/certs/pki_chain.pem:ro
    environment:
      # timezone inside container
      - TZ

      # necessary Mattermost options/variables (see env.example)
      - MM_SQLSETTINGS_DRIVERNAME
      - MM_SQLSETTINGS_DATASOURCE

      # necessary for bleve
      - MM_BLEVESETTINGS_INDEXDIR

      # additional settings
      - MM_SERVICESETTINGS_SITEURL
Check the permissions of the folders! needs to be 2000:2000
.env
# Domain of service
DOMAIN=mattermost.rfeyn.org

# Container settings
## Timezone inside the containers. The value needs to be in the form 'Europe/Berlin'.
## A list of these tz database names can be looked up at Wikipedia
## https://en.wikipedia.org/wiki/List_of_tz_database_time_zones
TZ=Europe/Amsterdam
RESTART_POLICY=unless-stopped

# Postgres settings
## Documentation for this image and available settings can be found on hub.docker.com
## https://hub.docker.com/_/postgres
## Please keep in mind this will create a superuser and it's recommended to use a less privileged
## user to connect to the database.
## A guide on how to change the database user to a nonsuperuser can be found in docs/creation-of-nonsuperuser.md
POSTGRES_IMAGE_TAG=18-alpine
POSTGRES_DATA_PATH=./volumes/db/var/lib/postgresql/data

POSTGRES_USER=mmuser
POSTGRES_PASSWORD=aosdjfasjdfajsfjlaskdfasdf
POSTGRES_DB=mattermost

# Nginx
## The nginx container will use a configuration found at the NGINX_MATTERMOST_CONFIG. The config aims
## to be secure and uses a catch-all server vhost which will work out-of-the-box. For additional settings
## or changes ones can edit it or provide another config. Important note: inside the container, nginx sources
## every config file inside */etc/nginx/conf.d* ending with a *.conf* file extension.

## Inside the container the uid and gid is 101. The folder owner can be set with
## `sudo chown -R 101:101 ./nginx` if needed.
## Note that this repository requires nginx version 1.25.1 or later
NGINX_IMAGE_TAG=alpine

## The folder containing server blocks and any additional config to nginx.conf
NGINX_CONFIG_PATH=./nginx/conf.d
NGINX_DHPARAMS_FILE=./nginx/dhparams4096.pem

CERT_PATH=./volumes/web/cert/cert.pem
KEY_PATH=./volumes/web/cert/key-no-password.pem
#GITLAB_PKI_CHAIN_PATH=<path_to_your_gitlab_pki>/pki_chain.pem
#CERT_PATH=./certs/etc/letsencrypt/live/${DOMAIN}/fullchain.pem
#KEY_PATH=./certs/etc/letsencrypt/live/${DOMAIN}/privkey.pem

## Exposed ports to the host. Inside the container 80, 443 and 8443 will be used
HTTPS_PORT=443
HTTP_PORT=80
CALLS_PORT=8443

# Mattermost settings
## Inside the container the uid and gid is 2000. The folder owner can be set with
## `sudo chown -R 2000:2000 ./volumes/app/mattermost`.
MATTERMOST_CONFIG_PATH=./volumes/app/mattermost/config
MATTERMOST_DATA_PATH=./volumes/app/mattermost/data
MATTERMOST_LOGS_PATH=./volumes/app/mattermost/logs
MATTERMOST_PLUGINS_PATH=./volumes/app/mattermost/plugins
MATTERMOST_CLIENT_PLUGINS_PATH=./volumes/app/mattermost/client/plugins
MATTERMOST_BLEVE_INDEXES_PATH=./volumes/app/mattermost/bleve-indexes

## Bleve index (inside the container)
MM_BLEVESETTINGS_INDEXDIR=/mattermost/bleve-indexes

## This will be 'mattermost-enterprise-edition' or 'mattermost-team-edition' based on the version of Mattermost you're installing.
MATTERMOST_IMAGE=mattermost-enterprise-edition
## Update the image tag if you want to upgrade your Mattermost version. You may also upgrade to the latest one. The example is based on the latest Mattermost ESR versi>
MATTERMOST_IMAGE_TAG=11.7.0

## Make Mattermost container readonly. This interferes with the regeneration of root.html inside the container. Only use
## it if you know what you're doing.
## See https://github.com/mattermost/docker/issues/18
MATTERMOST_CONTAINER_READONLY=false

## The app port is only relevant for using Mattermost without the nginx container as reverse proxy. This is not meant
## to be used with the internal HTTP server exposed but rather in case one wants to host several services on one host
## or for using it behind another existing reverse proxy.
APP_PORT=1023

## Configuration settings for Mattermost. Documentation on the variables and the settings itself can be found at
## https://docs.mattermost.com/administration/config-settings.html
## Keep in mind that variables set here will take precedence over the same setting in config.json. This includes
## the system console as well and settings set with env variables will be greyed out.

## Below one can find necessary settings to spin up the Mattermost container
MM_SQLSETTINGS_DRIVERNAME=postgres
MM_SQLSETTINGS_DATASOURCE=postgres://${POSTGRES_USER}:${POSTGRES_PASSWORD}@postgres:5432/${POSTGRES_DB}?sslmode=disable&connect_timeout=10

## Example settings (any additional setting added here also needs to be introduced in the docker-compose.yml)
Notifications: https://docs.mattermost.com/end-user-guide/preferences/manage-your-mobile-notifications.html
2. Matrix
4. LLM Dashboards
This chapter contains different open source LLM access dashboards. Hopefully, it will include also open source LLM's whenever they come out. Yes OpenAI is not open source. Up untill then it mainly discusses open source dashboard where you can add your own models and store all the gathered data locally as well.
1. OpenWebui
Installation
There are different ways you can install OpenWebUI but as usual I like to install it with docker compose that also includes Ollama as well. You can find the docker compose file over here
compose.yml
services:
  ollama:
    volumes:
      - ./ollama:/root/.ollama
    container_name: ollama
    environment:
      - OLLAMA_NUM_GPU=1
      - GPU_DEVICE_ORDINAL=0
    devices:
      - /dev/dri/renderD128:/dev/dri/renderD128
    pull_policy: always
    tty: true
    restart: unless-stopped
    image: ollama/ollama:${OLLAMA_DOCKER_TAG-latest}

  open-webui:
    build:
      context: .
      dockerfile: Dockerfile
    image: ghcr.io/open-webui/open-webui:${WEBUI_DOCKER_TAG-main}
    container_name: open-webui
    volumes:
      - ./open-webui:/app/backend/data
    depends_on:
      - ollama
    ports:
      - ${OPEN_WEBUI_PORT-3000}:8080
    environment:
      - 'OLLAMA_BASE_URL=http://ollama:11434'
      - 'WEBUI_SECRET_KEY='
    extra_hosts:
      - host.docker.internal:host-gateway
    restart: unless-stopped
and the environment variables fil
.env
# Ollama URL for the backend to connect
# The path '/ollama' will be redirected to the specified backend URL
OLLAMA_BASE_URL='http://localhost:11434'

OPENAI_API_BASE_URL=''
OPENAI_API_KEY=''

# AUTOMATIC1111_BASE_URL="http://localhost:7860"

# For production, you should only need one host as
# fastapi serves the svelte-kit built frontend and backend from the same host and port.
# To test # Ollama URL for the backend to connect
# The path '/ollama' will be redirected to the specified backend URL
OLLAMA_BASE_URL='http://localhost:11434'

OPENAI_API_BASE_URL=''
OPENAI_API_KEY=''
OPEN_WEBUI_PORT=1024

# AUTOMATIC1111_BASE_URL="http://localhost:7860"

# For production, you should only need one host as
# fastapi serves the svelte-kit built frontend and backend from the same host and port.
# To test with CORS locally, you can set something like
# CORS_ALLOW_ORIGIN='http://localhost:5173;http://localhost:8080'
CORS_ALLOW_ORIGIN='*'

# Set to false to keep memory tools enabled without adding memory context to the system context.
ENABLE_MEMORY_SYSTEM_CONTEXT=true

# For production you should set this to match the proxy configuration (127.0.0.1)
FORWARDED_ALLOW_IPS='*'

# DO NOT TRACK
SCARF_NO_ANALYTICS=true
DO_NOT_TRACK=true
ANONYMIZED_TELEMETRY=false

# Valkey Vector Store (requires VECTOR_DB=valkey)
# VALKEY_URL='valkey://localhost:6379'
# VALKEY_COLLECTION_PREFIX='open_webui'
# VALKEY_INDEX_TYPE='HNSW'
# VALKEY_DISTANCE_METRIC='COSINE'
# VALKEY_HNSW_M='16'
# VALKEY_HNSW_EF_CONSTRUCTION='200'
# VALKEY_HNSW_EF_RUNTIME='10'with CORS locally, you can set something like
# CORS_ALLOW_ORIGIN='http://localhost:5173;http://localhost:8080'
CORS_ALLOW_ORIGIN='*'

# Set to false to keep memory tools enabled without adding memory context to the system context.
ENABLE_MEMORY_SYSTEM_CONTEXT=true
Then simply deploy the stack with docker compose up -d or with Dockhand by simply clicking on Deploy stack ;) !! Then if it is all green lights you will be able to access it either on the URL you sepcified in the .env file or on http://DOCKERVM-IP:PORT. You will then be presented with this interesting screen ;)

Then simply create your admin account and save it in your Vaultwarden account. You will then be brought to your OpenWebUI dashboard. Note! There is no model configured yet, so that's what we will do in the next step.
1. Cloud Storage
This book describes different cloud storage experience
20. Documentation
1. HedgeDocs
Source: https://docs.hedgedoc.dev/how-to/reverse-proxy/
8. ToDo Software
This chapter discusses different ToDo list open source software. This can either be integrated into another bigger application or completely stand alone.
1. Vikunja
Source: Vikunja
10. Nextcloud ToDo
Nextcloud ToDo comes integrated with Nextcloud as an application.
Messenger Applications
1. Session Messenger
Source: Session Messenger FAQ
Source: Arguments against Session Messenger
Loki: Is basiscally Tor for rich people
Session Messenger would not go down if seed nodes were destroyed, though it would create temporary disruptions for new users trying to connect.
Here's how it would work:
Initial impact on new users: Seed nodes are bootstrap points that help new users find and connect to the decentralized network. If all seed nodes were destroyed, new users would have difficulty joining the network initially since they wouldn't have a starting point to discover peers.
Existing users unaffected: Users already connected to the network would continue to function normally. Their clients maintain direct peer-to-peer connections with other users and nodes, so they wouldn't depend on seed nodes to keep messaging.
Recovery and resilience: The decentralized nature of Session Messenger means that:
- New seed nodes could be deployed relatively quickly by the community
- Users could potentially connect manually by knowing the address of at least one existing peer on the network
- The network's distributed architecture is specifically designed to be resistant to this kind of centralized attack
The key distinction: Session's design acknowledges that some bootstrap infrastructure is necessary, but the actual message routing and peer-to-peer communication happens across the distributed network. Destroying seed nodes would be more of an inconvenience than a fatal blow—it would slow adoption and create friction for newcomers, but wouldn't collapse the network for active participants.
This is actually one of the arguments proponents make for decentralized messenger systems: they're theoretically more resilient to government or corporate infrastructure takedowns compared to services relying on centralized data centers.