2.3 Maintenance
This book will discuss how you maintain your home lab. Now, there is not to much to it and you can make it as crazy as you want but basically the most important is that you update your containers when new updates are available, and get notified when your run out of resources and if backups you do locally or at your backupfriend have been executed properly. We will first discuss two notifications services NTFY and Email and then use these notifications services to get notified.
- 1. Notification Services
- 2. Proxmox Notifications
- 1. SMTP Email Notifications
- 2. NTFY Proxmox Notifications
- 3. Proxmox Repository Update Notifications
- 3. TrueNas Scale Notifications
- 4. OPNSense Notifications
- 4. Proxmox PBS Notifications
- 5. Home Assistant Notifications
1. Notification Services
This chapter discusses all kinds of notifications you can receive on your phone or laptop regarding your home lab. You want to be notified when a hard drive fails, when a disk is almost full, when backup failed, when a new update is available or any other alert. This will provide you with the ease of use of your home lab.Once it is running it is running and you only need to pay attention again to your homelab when you get a notification ;)
We will focus on two main notification strategies which will be NTFY and Email, but there are bunch of others out there as well. Maybe we will add these as well to this book later down the road. As always it is up to you which ones your prefer and if you can't choose you can also do both obviously.
1. NTFY
Docker VM Deployment via Dockhand
Ntfy is a great notification application that provides you with alarms on your phone or laptop if anything happens inside your infrastructure. When resource limits are reached or when a new update for a container is available. It is really handy to have instead of using your Email for all your notifications. In this way your personal email can stay nice and clean and is only used for sending email and not being bombarded with notifications that clogs up your inbox.
Some self hosted applications integrate NTFY natively and others you can add it via Webhooks. Now just as with the other docker vm applications we will deploy NTFY with a simple docker compose file. Now, installation is very straightforward by using their Configuration Generator.
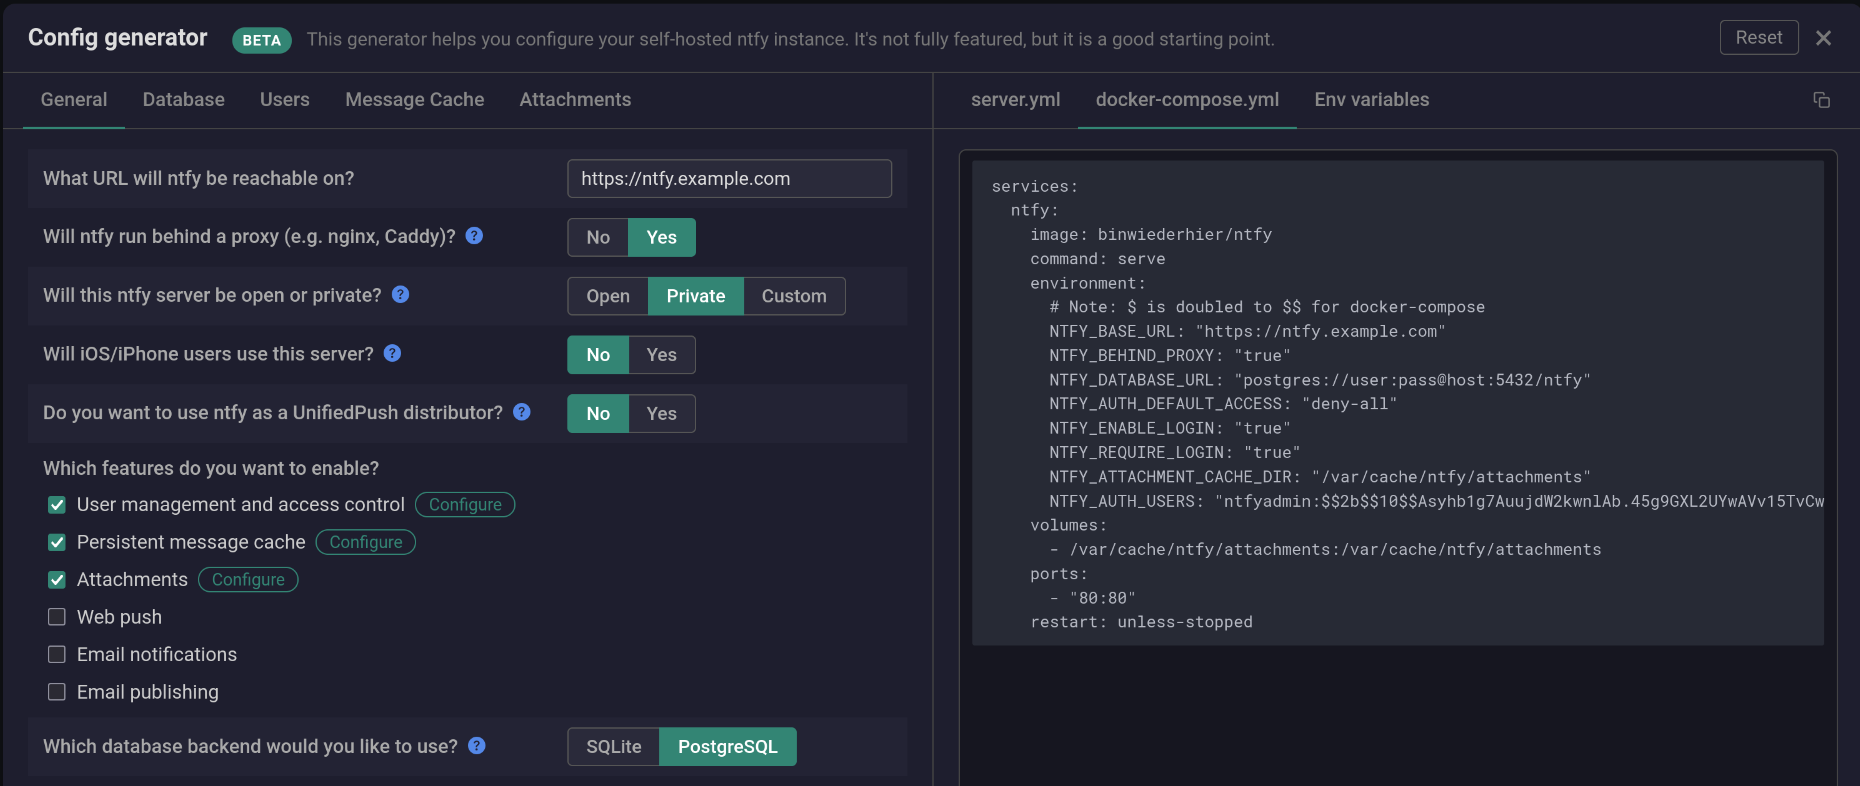
The above screenshot is how I have set it up, which is fairly basic. I don't need Web Push, Email notifications, nor Email pushing but that are possibilities if you want to. Also by default an NTFY server is public and anyone can write and read from topics. For most instances you would like to have some form of authentication to prevent random people from flooding your topics. Hence, you can make your instance private. Finally, I would recommend to choose a different port then port 80 since it is most often already used by another application in your Docker VM.
Users
Now, if your instance is private you also need to create users to login to your instance if they want to interact with it. Also this is easily done in the Configuration Editor
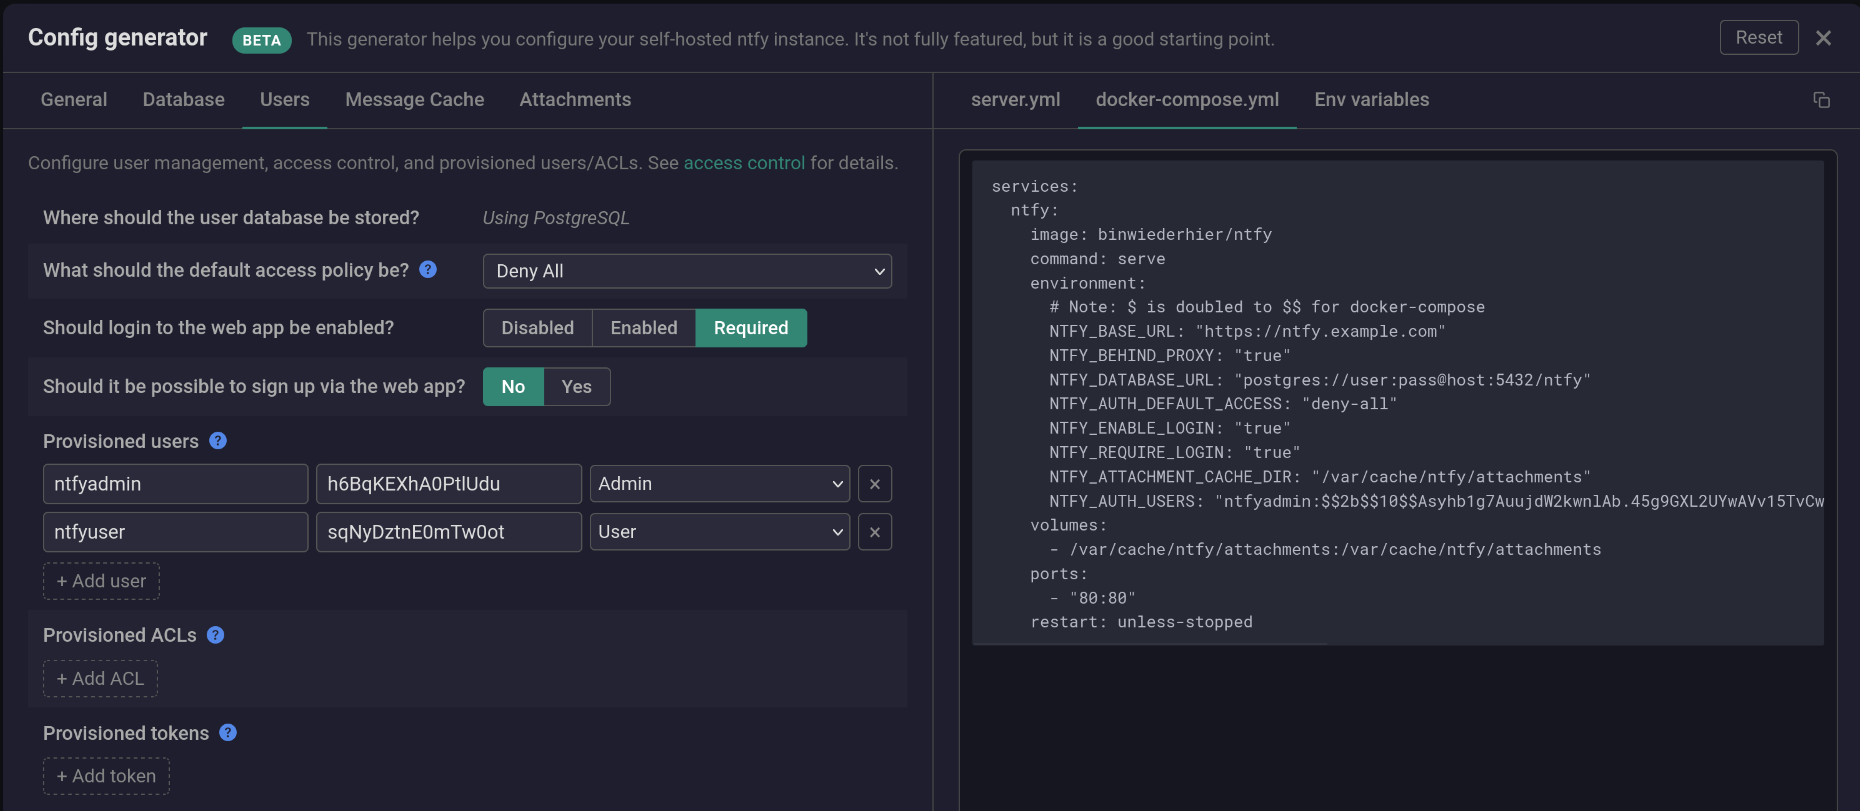
Here you can define as many users and admins that you want up front. Now, after you have created your instance and you want to add more users to it later on then this is also possible from inside the container. Simply go to Dockhand and enter the container. In there you can use the following commands
ntfy user list                     # Shows list of users (alias: 'ntfy access')
ntfy user add phil                 # Add regular user phil
ntfy user add --role=admin phil    # Add admin user phil
ntfy user del phil                 # Delete user phil
ntfy user change-pass phil         # Change password for user phil
ntfy user change-role phil admin   # Make user phil an admin
ntfy user change-tier phil pro     # Change phil's tier to "pro"
ntfy user hash                     # Generate password hash, use with auth-users config option
Alright so that was basically it for installing NTFY on your instance.
Configuration
Sweet, so you got NTFY installed, and you have a reverse proxy pointing to your IP-DOCKERVM:Port then you will be able to reach it on the domain name you have set in the configuration file. Then if all goes well you should be prompted with a login screen as such
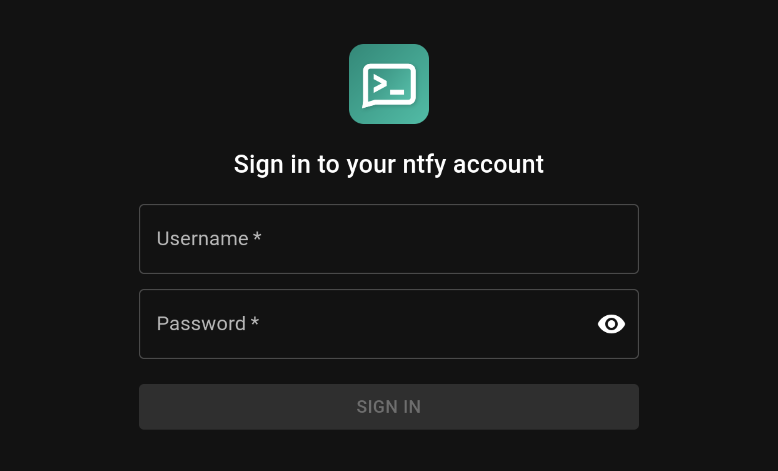
Then simply login with the Admin account which brings you to the home screen. Then to create a topic is also pretty simple by just clicking on Subscribe to topic. Now, you can choose a name related to your app but that would be less secure. Hence, I would click on the Generate Name button. This will generate a random string of numbers that is not easily to guess by anyone.
The great thing is that after you have created the topic you can create an alias in human readable form. However, make sure that you note down the real topic e.g https://ntfy.example.com/qCLtfI7rW6LPZ9yp since that will be the topic that your application will subscribe to.
Access Tokens
The final thing we need to setup are access tokens which applications will need to authenticate for your NTFY instance. For this go to Account > Access Tokens and simple click on Create Access Token. I would recommend one access token for each applications for security reasons.
Perfect! You have now setup your own NTFY instance and can start using it in the webbrowser, desktop app and of course especially on your phone. Make sure you save your login credentials in Vaultwarden or another password manager s.t you can always login from any device.
2. Classic Email SMTP Setup
Email is definitely one of the notification systems that you need to setup for notifications. Lots of applications use email for user verification, to setup accounts, but also to get notified for events, changes etcetera.
Now, every Email provider has an SMTP (For Outgoing Mail) and IMAP (For Incoming mail) server, for instance Porkbun follows the following Email Client configuration. However, one could also have setup his own email server obviously with Mailcow for instance.
| Service | Hostname | Port | Security |
| SMTP | smtp.porkbun.com | 587 | STARTTLS |
| SMTP | smtp.porkbun.com | 50587 | STARTTLS Alt. |
| SMTP | smtp.porkbun.com | 465 | Implicit TLS |
| IMAP | imap.porkbun.com | 993 | SSL (SSL/TLS) |
| POP | pop.porkbun.com | 995 | SSL (SSL/TLS) |
In this Porkbun example the SMTP server sits on port 587 with STARTTLS and the IMAP server on port 993 with SSL. Then the only thing left is to write down your username i.e email address and password. These configurations are the ones we will user for applications to notify us for any kind of change.
2. Proxmox Notifications
1. SMTP Email Notifications
The first notification system we will setup for Proxmox is by simply using SMTP Email. It is assumed that you already have an email setup somewhere with access to the SMTP credentials. The first thing we will do is setup an email Notification Target
1. Open up your PVE dashboard and go to Dashboard > Notifications > +Add > Select SMTP
2. Then give it a name i.e the name of your email provider
3. Check which Email SMTP settings your provider uses. As an example if you have an email with porkbun then you can find their Email configuration online. This should be the same for other providers.
4. With that information fill in the SMTP settings accordingly
5. Fill in your username i.e email address and password
6. Then select your recipient(s) which are all users with an account on your proxmox instance
7. Finally, you can also choose to have Additional Recipients that don't have an account on your instance.
8. If all good then it should look something like this
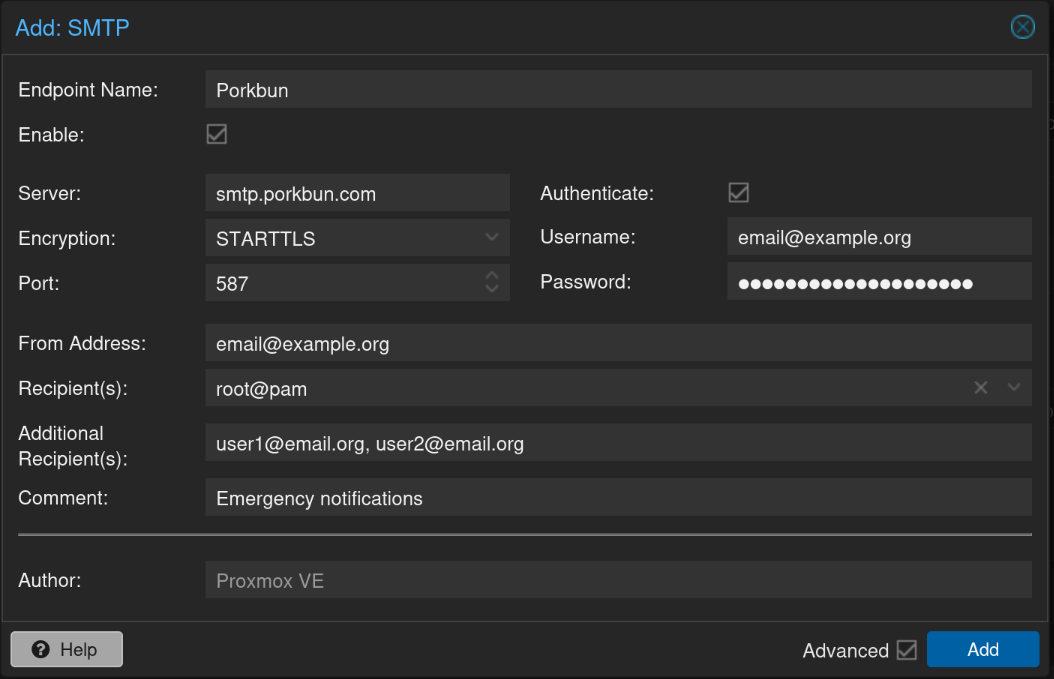
9. Sweet now what you will do is send yourself a Test notification to check if it actually works
10. You can do this by simply selecting your newly created SMTP entry and select "Test"
11. Now, what is next is that we need to make sure it is activated at
2. NTFY Proxmox Notifications
It is assumed that you have already configured NTFY on your server and if you have not you can find the installation instruction here.
3. Proxmox Repository Update Notifications
Just as with applications the proxmox virtualization software itself also needs to be updated every now and then. Hence, we would like to have a similar updating system as we have for containers using Dockhand. In that way we will receive a notification if any updates of the hypervisor are available.
Now, according to a blog post I found on the internet it seems to be pretty simple. You basically open up your shell and paste in the following command
pvesh set /cluster/options --notify package-updates=alwaysroot@pve1:~# pvesh get /cluster/options --noborder | grep notify
notify {"package-updates":"always"}
root@pve1:~#If these are the results then notifications will be send to your email or NTFY if you have a set that up. An example email looks something like this
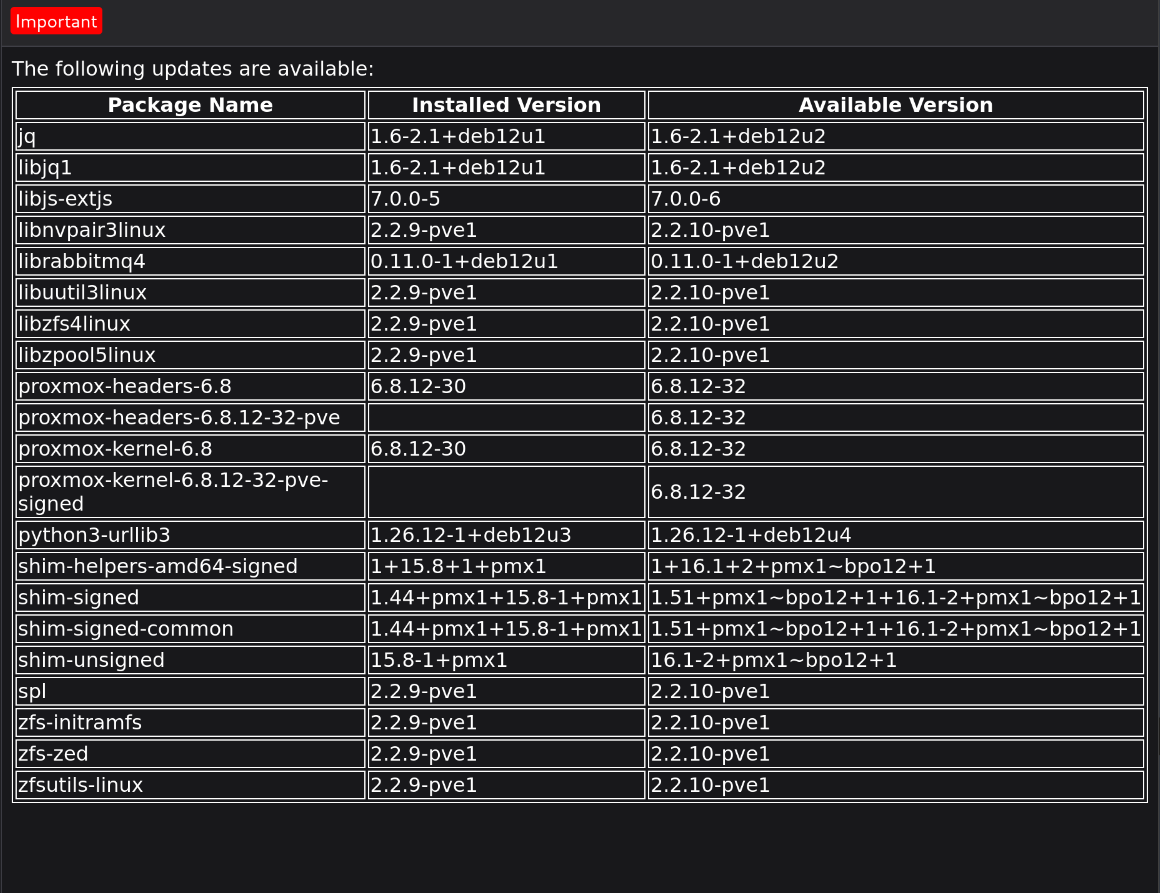
Then simply go to your Proxmox instance, go to your PVE > Shell and use the following command to update your packages
pveupgrade
3. TrueNas Scale Notifications
1. Setup SMTP Email
Unfortunately, TrueNas does not offer webhooks for notifications yet so a good alternative is Email. To setup email go to System > General Settings > Email
- Then simply fill in your SMTP credentials. If you don't know how to do this check SMTP Email Setup
2. Connect Notifications to Email
Once, your email is setup in TrueNas scale you can use that to receive notifications on all kinds of changes and updates within your TrueNas system. To do this
1. Go to System > Alert Settings > +Add Alert service
2. Then simply select Email
3. I would recommend to set the level at "Notice". The level you set here is the minimum level you will receive notifications from. The lowest being INFO and the highest being EMERGENCY
Alright sweet! that was setting up your email notification service. Just to check if it works you can send your self a Test Email.
Categories
Now, there are simply to many alerts you can get notified from, and you should just look for yourself which things you want to get notified from. By default you get an alarm for any critical change in your system so you don't need to edit to much. However, just have a look throughout the categories and if you want to get a notification from something just make sure it is at least above the minimum level threshold you set for your Email Alert service.
3. TrueNas System Updates Notifications
Just as with Proxmox we would also like to receive a notification when a new update for our TrueNas system comes available. Luckily TrueNas allows this.
- Go to System > Alert Settings > Category
- Select the category System
- Then scroll all the way down until you find Update Available. Then make sure it is set to Notice, s.t you will receive a notification when a TrueNas update is available.
4. OPNSense Notifications
1. Monit
1. Notification Possibilities
Source: https://www.youtube.com/watch?v=4AHlaW8ewmY
Wireguard Monitoring
Portal Monitoring
CPU
Memory
Bandwith