
2. Installation
Source: HomeNetworkGuy
Perfect! So you have the following things ready
- Ventoy USB stick with OPNSense ISO on it
- Keyboard with USB connection or a wireless mouse with keyboard included
- Monitor with HDMI connection
- HDMI Cable
- Mini PC and power cord
- Laptop with an Ethernet port
- Ethernet Cable
Port Configuration
1. Alright so let's install OPNsense then on your Mini PC. Now, to stay as general as possible we assume that we don't know yet the interface names on your mini pc. Hence, we first assume that you need to figure out how each port is labeled, because they are not always labeled internally in chronological order. For instance one of my mini pc's I used as my OPNsense box was labelled igc3, igc2, igc0,igc1.
2. Now, it is up to you which port you will use for your WAN and LAN port but it is common to have the WAN port completely right or left and the LAN port next to it. Then if you have any other ports you can use them for other networks. But for now we will focus on 2 ports and later extend to use the other ports as well.
3. Now, before starting the OPNSense router make sure you plug in an Ethernet cable in the second port from left or right and plug the other end in your laptop. This is how we will know which link is up and can identify the interface name with it.
4. The first thing we will do now is start the mini pc and hit the DEL, ESC, F10 or F12 key depending on which key combination brings you to the bios screen of your mini pc. Then in the bios screen we will change the boot order to load the Ventoy USB stick first. This will make sure we can choose the OPNSense installation iso.
4. Once, rebooted choose the OPNSense iso to load
5. Now, you can configure already things from the CLI but to make it simple we will just let the whole script run until we end up with this screen
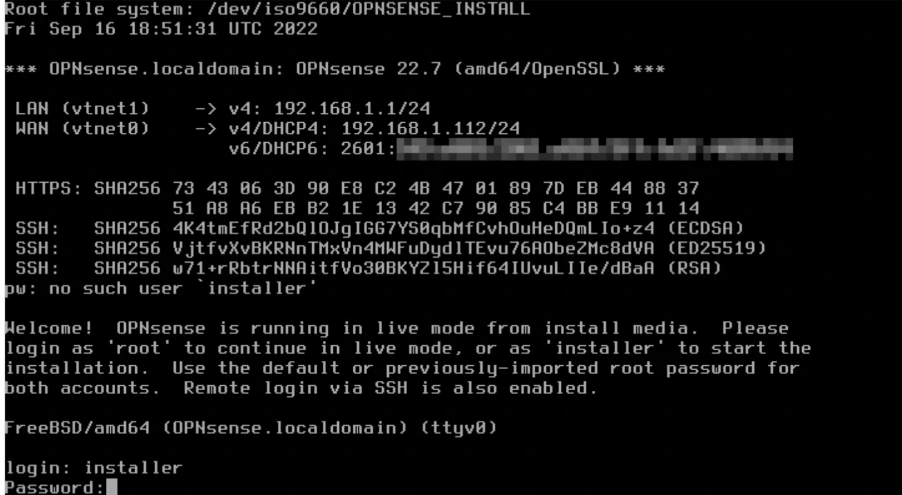
6. You can now login with root
7. Now
ifconfig for FreeBSD
No comments to display
No comments to display